How to Paint Wood – Complete Tutorial on Wood Painting
This post may contain affiliate links. We may earn a small commission from purchases made through them, at no additional cost to you.
Painting is an important process for perfectly finishing your DIY project. There are many different types of paint out there that provide a range of different finish options. They should also be chosen according to the surface that you are painting. So, if you want to paint wood, there are many different approaches to take. We will explore exactly how to paint wood perfectly in order to achieve the ideal results for your project.
Table of Contents
- 1 How to Paint Wood – Step by Step Guide
- 2 Types of Wood Paint
- 3 Wood to Paint on – Different Surfaces
- 4 How to Paint Wood – Different Methods
- 5 Sealing the Wood
- 6 Frequently Asked Questions
How to Paint Wood – Step by Step Guide
Before starting your painting process you are required to do a background preparation, thus making the surface ready for the paint application. The preparation process involves buying quality equipment, clearing the work area, and following the necessary instructions as this will ensure a smooth process. Following a standard operating procedure will allow you to master any paint job. This includes anything involving wood furniture, floors, and old materials.


Plan Your Wood Painting Project
Planning is the most crucial part of the process. This is when you gather information on the best paint to use, how to paint wood, and so on. These questions form a perfect combination of knowledge that will help you to achieve the expected end result.
Every material chosen has instructions and a process to be followed. For example, oil-based paints need an open space, paint thinner, or spirits for effective results. You can also get help from instructions given by the manufacturer. For example, you can learn how best work you can work with treated wood. When removing stains, water-based primers will do a better job and cause less harm. This is because certain materials work best when used with certain wood.
It is important to make your personal health and safety a priority. A number of paint materials are made up of toxic and harmful chemicals that are a high risk to humans and animals. There are preventive measures that you can take. Using protective gear such as goggles, gloves, boots, face masks, and even overalls should not be overlooked.
Preparing Wood for Painting
Before you start painting wood, you will need to make sure that the surface is fully prepared. This is necessary for the paint to stick to the wood, and create an even, smooth finish. If you want to know how to prepare wood for painting, you can follow the steps below.
Removing Old Paint
Can you paint wood with an existing wood finish? Not really. It is best to remove any old paint. Before you start painting, the wooden surface needs to be completely clear from any old paint. This can be removed with a paint scraper, chemical products, or by sanding. Before applying a fresh coat of paint, you will need to make sure that the wood surface is clean and clear. Once any old paint is removed, clean the area properly from any dirt or dust.
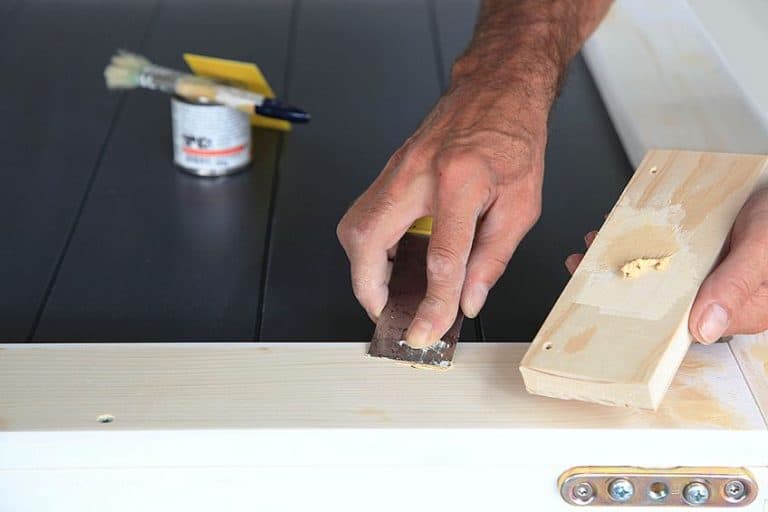
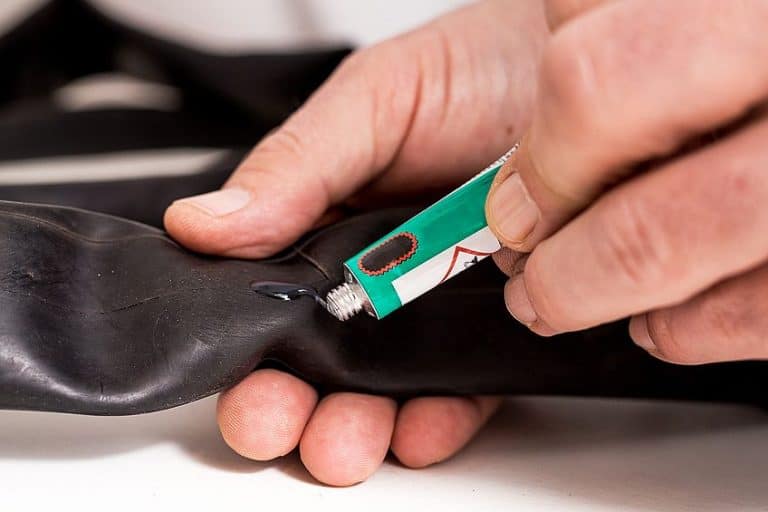
Repair Dents, Dings, and Chips on the Wood Surface
Knowing how to prepare wood for painting involves getting an even finish. You can successfully remove any chips or dents using a waterproof filler or sealant. There are various fillers available, so make sure that the one you choose works with wood. Apply the filler using a putty knife if the wood has any minor dents or marks. You can remove resistant marks, dents, dings, or chips by sanding them off.
You can completely trace and remove any stronger resistant scratches or bumps using latex primer. A bright light will make it easier to see any leftover spots when doing this. Once you identify the spots, mark them with a pencil and remove them with 180-grit sandpaper.


Sanding the Wood Surface
Use 280 to 380-grit sandpaper to prepare wood for new paint application. For wood that was painted or treated before, you can use 80 to 100-grit sandpaper to clear all the residues of loose paint. To sand any wood between paint coats, use 360 to 600-grit sandpaper.
Some useful tools for wood sanding include an orbital sander and sanding discs, which are especially useful on bigger projects. If you have smaller home projects you can use a sheet sander and regular sandpaper. Finally, for final touches and smaller tasks you can use a sanding block. When you have finished sanding, make sure to clean up any dust or residue left from the sanding process. The wood will need to be completely clean before you can start painting.
Painting Preparations
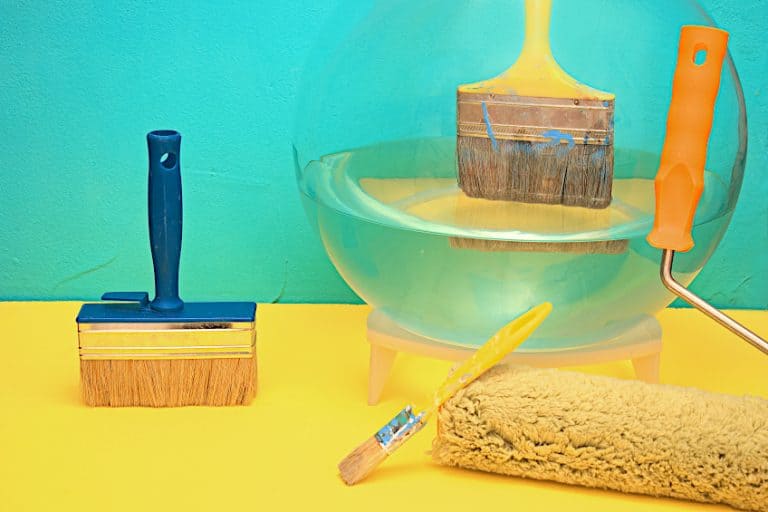
Being prepared is necessary for an effective painting job. Start by gathering all of your equipment, and getting your workspace neat and organized. We have listed the tools you will need for painting wood below.


Paintbrush
A paintbrush is essential for any painting job. Make sure to get a good, durable brush that suits your project. There are many different brush options available. These include different sizes, shapes, and synthetic or natural bristles. All of them have their own unique advantages and disadvantages. Here are a few simple pointers for choosing a paintbrush:
- A synthetic bristle paintbrush is good for oil-based paint.
- A straight brush works well on even and straight surfaces.
- Angled brushes are good for tight corners and angles
- Use wider flat brushes for larger surface areas. Use smaller round brushes for details.
Roller
If you will be painting a large, flat area, then a roller is usually the best tool to use. Rollers allow you to cover broad areas with minimal effort. They also offer a superior even and thin coating of paint. Rollers can be attached to extendable poles to allow you to reach tall and tricky places.
Tarp/Drop Cloth
Before you start painting, make sure to cover any surfaces that you don’t want paint on. Lay out a tarp, newspaper, or plastic sheeting to protect your space. Cover the floor or any furniture that you would like to avoid painting over.
Thinner/Water
You will always need to have a solution available for cleaning your brushes. This should depend on the type of paint that you will be using. If you are painting with a water-based product, then you can use a jar of water to clean your brush. If painting with oil-based paint, you will need a paint thinner/remover to keep your brush clean.


Priming
When painting over wood, you should generally prime the surface before applying the paint. This depends on the type of wood you are working with and the type of paint. Generally speaking though, priming is a good idea. Applying primer will help to increase the adhesion of the surface to make sure that the paint sticks properly. This also helps to improve the durability and lifespan of the paint.
Applying primer can also help to cover up stains, knots, and marks on the wood. This helps to achieve a smoother, more even surface for painting. When painting on wood, the primer also stops the bleeding of acidic tannins through the wood. Priming is helpful in stopping paint defects such as flaking, peeling, blistering, corrosion, and cracking. When choosing your primer, take note of the following basics:
- Gray primer is used in conjunction with dark paint
- White primer is used for lighter paint
- Oil-based primer is suitable for oil-based paint
- Water-based primer is suitable for water-based paint
An oil-based primer provides more durability than water-based primers. Water-based primers are more flexible than oil-based primers. They are also safer to use. It is advisable to always refer to the guidelines given by the manufacturer. Spray primer is another tool that saves a great deal of time. However, can only do one thin coat at a time. For any cracks, marks, knots, stains, and bleeding, you should use a stain-blocking primer.
Wood Painting Techniques
When learning how to paint wood, you will find that there are many different techniques available. The technique that you choose will influence the end finish and the overall effect of the paint. Different painting techniques also work best with different types of surfaces and paints. If you are painting furniture, for example, you may want to achieve a distressed look, a worn-in effect, or have a solid color coat. Each of these follows different techniques. First, understand what type of effect you are after before starting to paint. Below is a basic guide to wood to painting wood that can be used for various techniques:
- Start at the top of the item with your brush full of paint. Slowly bring the brush down towards the center. Add more paint to the brush when it starts to drag.
- Smooth out the paint by running over a brush that doesn’t have paint loaded onto it. This is called tipping. Hold the brush at a 45-degree angle when doing this.
- Before tipping, you should try to cover a whole area. However, you should not leave the paint to sit for longer than a minute before you start tipping.
- Try to load the brush with as much paint as possible with each stroke. This helps to make the job go faster.
Taping Off the Wood
Make sure that the only wood exposed is the wood that you wish to paint. If you want to paint furniture with handles or areas that you want to protect, then you will need to tape these off. You can use masking tape to protect small areas, or simply use newspaper to cover larger areas.


Types of Wood Paint
There are many different types of wood paint available. The type of paint that you choose will greatly influence the outcome of the work. The first thing to consider is if you will be using oil-based or water-based paint. Then you can also decide between the different sheen options. This refers to the eventual finish of the paint. Some sheen options include:
- High-gloss which is very shiny, and can be almost reflective
- Semi-gloss is smooth and shiny, but not as shiny as high-gloss
- Matte which is a more dull finish. This is not at all shiny
- Flat which has a non-reflective finish and very good at hiding imperfections
- Satin is highly reflective but it differs from manufacturer to manufacturer.
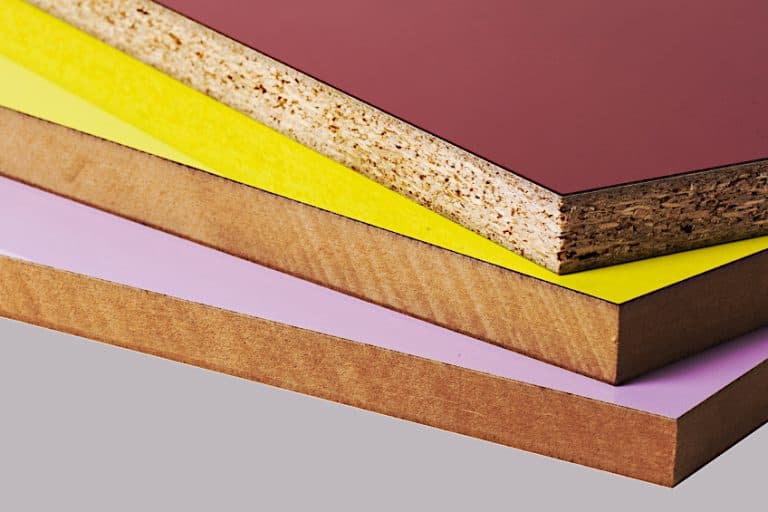
Wood to Paint on – Different Surfaces
There are a number of factors that must be considered before choosing the right wood paint. You should consider the purpose of the wood, whether the surface type is internal or external, environmental factors that affect the paint, and so on. Below are a few examples of common examples of wood to paint on.
Rarely-Used Furnishings
For rarely used furniture, you can use latex or water-based paint. These paints dry very fast for a quick painting process. Usually, these paints are applied on tables, stairs, and spindles. Latex paints are affordable, can cover brush lines, and provide a refreshing look to the appearance of furniture. Scratches or any defects on your furniture can be removed by this type of paint. This is because it is easier to achieve a smooth coat with latex paints.
Furnishings With a Distressed Look
You can use chalk paint for creating distressed look furniture. Common items include headboards, wooden, chests, cupboards, coat racks, cabinets, chairs, benches, and tables. This type of paint is popular for covering furniture, and it provides a really unique, pastel finish. For a vintage or distressed look, chalk paint is ideal.
Commonly Used Furnishings
Furniture that is regularly used tends to grow old and develop more wear and tear. For this reason, a durable paint is the best option for superior protection. Oil-based paint is more durable, and better suited for resisting high-traffic areas and furnishings. However, many prefer to use a strong water-based wood paint for furniture, thanks to its less harmful properties. Choose a paint that is long-lasting and resistant to scratches, abrasions, and heavy use.
Kitchen and Bathroom Cabinets
Alkyd is a multi-purpose paint that works well in protecting surfaces exposed to water. This type of paint does not get affected by moisture or steam easily thanks to its highly resistant properties. Alkyd paint is also water and mildew repellent, making it a smart choice when it comes to bathroom finishes. It is important to choose the right type of paint for surfaces exposed to water, heat, and steam to avoid the paint from quickly peeling away.
Trims
If you need to paint trimmings, there are a couple of paint options to choose from. This can include painting door frames, window edges, ceiling trims, and so on. An alkyd oil-based paint is best for standard trimmings. Water-based paint is best for decorative trimmings. A satin-sheen is a good choice for decorative trimmings, as the paint is easy to clean, relatively cheap, and works well on low traffic areas.
Wooden Floors
Standard oil-based or oil-based enamel paints are best for wooden floors. The paint you use on a floor needs to offer superior resistance against foot traffic, scratches, and heavy use. Try to look for the most durable finish that you can find.
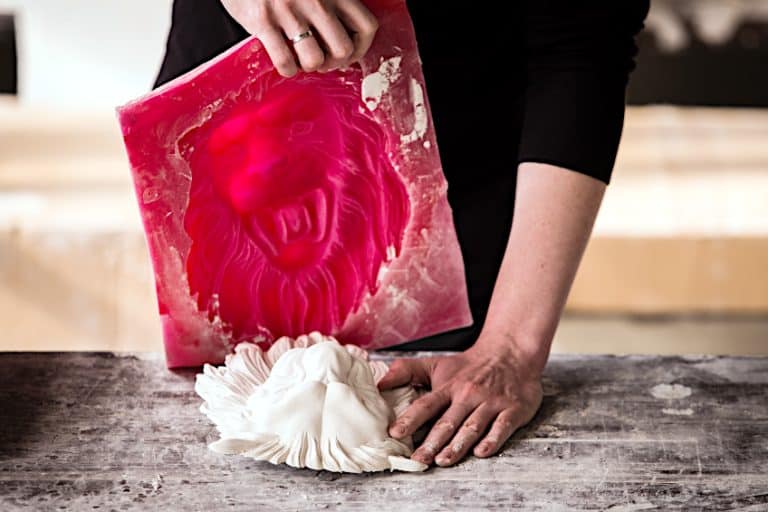
Small Wood Items
Small wooden items, such as jewelry boxes, sculptures, or decorative pieces can be painted with plant oil-based paint. This provides a soft surface when the paint dries, and it will still be resistant to things like temperature changes or cracking. These paints are more expensive, but they offer a beautiful, naturally pigmented finish.


How to Paint Wood – Different Methods
Once you have found the right type of paint and sheen for your project, you have to decide on the correct type of tool to use in order to produce the best results. Below, we have outlined some of the different approaches that you can take here.
Using a Brush
Always remember to spread thinner coats rather than one thick coat as this will save you time. Ensure you brush your paint in the direction of the grain. Continue brushing gently in a similar direction using light strokes and make sure the brush is not overloaded with paint.
We recommend wetting the brush starting to paint. If you choose to make use of oil-based paint you can wet the brush with a thinner. Run the brush under water first if you are using water-based paint. Wetting the brush will make the cleaning process much easier. Always make sure that your brush is in great shape and hang it with the bristles facing down to make it dry faster.
The problem with using a brush is that it can cause brush marks or even leave bristles stuck in the drying paint. Make sure that the brush you use is most suitable for the application to try to avoid these occurrences.
Using a Roller
A roller is also an effective tool for painting. Rollers provide a larger surface area for painting. Rollers require you to use less pressure when painting to avoid unwanted lines or spots on the surface. This method is best for applying smooth and even coats over a large surface area. If you maintain the roller properly it will last a long time. After cleaning, you can wrap it with plastic to keep the roller fresh.
Spraying the Paint
Airbrushing paint on wood is another option. Using an airbrush sprayer allows you to achieve the smoothest and most even finish. It also requires the least amount of effort. Spraying paint is the best choice for covering fine details and difficult to reach places. It also makes the job go much faster.
However, airbrush spraying will involve a more expensive investment. The equipment is tricky to clean, and can cause quite a mess. You need to make sure that you know what you are doing when working with an airbrush paint sprayer.

- High-quality airbrush system that is ready to go
- Powerful compressor for longer operation time without overheating
- Also included: Airbrush paint / Airbrush Stand and Quick Start Guide


Sealing the Wood
Once you have finished painting the wood, you can then seal the surface. Sealing wood provides durability, and helps to protect the underlying paint. It also offers a unique, shiny finish that can enhance the aesthetic of your wooden surface. Any wood that is exposed to harsh weather conditions or heavy use should be sealed. When sealing the wood, there are a few different options that you can choose from.
Wax
Wax comes in different colors to best suit your expectations. You have to apply wax on the wood surface using a clean rag. Put a thin application so that your surfaces can look smooth and attractive. It is advisable to apply the wax once every year. Wax provides a beautiful natural finish that is safer and more eco-friendly. However, wax is not as durable as other harder topcoats.

- Protects and polishes various wooden finishes
- Suitable for furniture, trim, paneling, and more
- Fast-drying and easy to work with
Polyurethane
Polyurethane is a popular option for sealing the wood. This substance is very strong and durable against a wide range of external influences. Polyurethane coatings are clear and provide a beautiful shine to the wooden surface. This is best used for outdoor and heavy-use surfaces, such as floors or countertops.

- Offers superior durability for hardwood floors
- Advanced anti-settling formula for a smooth and even coat
- Faster drying for quicker recoating
Epoxy Resin
Epoxy can be used as a durable sealer over wood. Epoxy is clear and dries to a very hard finish. It is great for use on things like counters and tabletops. Just be cautious of using epoxy outside, as it can easily yellow from UV exposure. You can get special UV-protected epoxy to avoid this.

- A durable woodworking/countertop epoxy resin
- Scratch-resistant and UV resistant
- Provides a clear and shiny finish
Polycrylic
Polycrylic is a clear and safe sealer. It is water-based and has a low VOC formula. This makes it perfect for sealing children’s furniture. When applying polycrylic, the initial white substance will soon dry to a clear finish.


Frequently Asked Questions
Can You Paint Wood With Any Primer?
You should choose a primer based on the type of paint you will be using, and the surface you will be painting over. There are special primers for wood, metal, masonry, etc. Also, match the base of your primer with the base of your paint.
How Long Should You Wait Between Paint Coats?
This varies between different paints. The waiting time could be anywhere from 1 hour to 24 hours. Water-based paints dry faster than oil-based paints. Be sure to consult the paint instructions when proceeding with this.
Is a Primer Necessary Before Painting?
It is highly recommended for you to prime before painting. This helps the paint to stick to the surface better, and it creates a more durable base for the paint to hold on to. Priming can also help to avoid peeling, cracking, and blistering.
Can I Sand Stained Wood Before Applying Primer?
Yes, you can sand the surface before adding primer. You will need to achieve a smooth and even finish before you start to prime and paint. Just make sure that the surface is completely clean before priming.
How Do You Get a Perfectly Smooth Paint Finish?
Airbrush spraying offers the smoothest, most even finish. Using a paint roller is second best for this. Using a brush can cause an uneven or marked finish. Applying more coats of paint also helps to get a thicker, smoother surface.
Knowing how to paint on wood is important, as there are so many different wooden surfaces out there. If you are interested in DIY or renovations, then you will find yourself painting over many different wood surfaces. Be sure to follow our guide above to help you get a perfect finish each time. Happy painting!