Best Wood Filler – Finding and Using the Best Wood Repair Product
This post may contain affiliate links. We may earn a small commission from purchases made through them, at no additional cost to you.
Your wood is generally exposed to holes, cracks, decay, divots, and rot – perhaps accidentally or just from standard wear and tear. If you want to ensure that your wood has a long lifespan, then at some time you will need to apply wood filler. A high-quality wood filler can restore and fix furniture, beams, flooring, windowsills, shelves, doors, and loads more. You might want to address an old screw hole and fill it up, or maybe the wood has cracked, and wood filler is a simple way to fix the problem. We have put together a guide to assist you in understanding which is the correct wood filler to use for your project and how to apply your chosen wood filler to ensure stunning results.
Table of Contents
When Should You Use a Wood Filler?
Good quality wood fillers can be used on an assortment of surfaces and different woods, and are an amazing option for the restoration and maintenance of all wood types. The wood filler you choose to use all depends on the project you are doing and the overall repairs that are required.
If 50% or more of the wood has rotted, you have no choice but to replace the wood. If you have had to use wood filler at least three times already on the wood surface, or if the wood is being used to support a heavy load, then unfortunately you will have to replace the wood as well. The wood will also require replacement if large portions of it have already been taken out. You can resort to wood filler, however, for any other decay, cracks, and holes.
Wood filler is a great option for saving money, as you will not have to replace specially crafted pieces or expensive wood. You can simply use a wood filler at home by yourself without any hassle.
If there are lost portions of wood, you can use wood filler, such as when there is a chip in the wood. Wood filler can also be used for internal issues, like when the wood has insect damage, or to cover scratches, holes, and cracks. High-quality wood filler will maintain identical properties to the wood once it has cured and can be painted, sawed, screwed, and drilled just like wood.


Different Types of Wood Filler
There are so many different types of wood filler, and your choice should always be linked to the kind of damage the wood has as well as what type of wood you are working with. Below, we have gone into more detail in terms of the different wood fillers, being water-based and solvent-based, which will help you to select the correct one for your project.
Solvent- and Water-Based Fillers
Your wood filler can either be solvent-based or water-based, either of which can be used for several different applications, although each has its own attributes. The biggest difference is that water-based fillers, while less toxic and safer to use, are less durable than their more toxic solvent-based counterparts.
Water-Based
Water-based wood fillers contain very few volatile organic compounds (VOC), making them safer to use while giving off much less of an odor. These wood fillers are made up of gypsum, wood fiber, or cellulose. Other benefits include that they are easier to clean up, you can use water to thin them out, and that they dry quicker, making them a versatile option. Unfortunately, as previously mentioned, they are not as durable as their solvent-based counterparts.
Solvent-Based
Solvent-based wood fillers are high in VOCs and emit a strong odor. They are also hard to thin down or clean up, as you will require chemicals to assist you in doing so. These wood fillers require additional care when handling them and take much longer to cure, while also being very expensive. That being said, solvent-based wood fillers are very durable and are a great option for exterior wooden surfaces, as they can resist humidity, fluctuating temperatures, moisture, rot, water, and much more.
Epoxy Wood Filler
Epoxy can be used in an assortment of DIY projects. An epoxy wood filler provides high levels of strength and great levels of durability. There are two parts to an epoxy wood filler, namely the hardener and the epoxy, which you will have to combine in order to form and activate the wood filler. Once cured, you will be left with an extremely durable material.
You can purchase epoxy wood filler in either a liquid or putty form. The liquid version must be poured over the wood, and its thin consistency makes it perfect for wood with a lot of rot or internal damage. The liquid wood filler then seeps into the holes, pores, and cracks on the wood, thus restoring the internal structure and strength of the wood once dried and cured.
The putty form of epoxy wood filler dries quite quickly once you have combined the two parts. You can use your hands to mold and shape the putty into pieces that will fit any chips, cracks, or holes in the wood. The putty is ideal for filling small gaps in the wood or for fixing damaged furniture. It is very resistant to heavy use and is also quite durable.


Interior or Exterior Wood Filler
Wood filler will be labeled either for exterior use, interior use, and in some cases, both. This is an important factor to take into consideration when selecting your wood filler. You want a strong and weather-resistant option for an exterior wood filler, which means that in all likelihood, it will be solvent-based. Such a wood filler can be used for several applications, from merely repairing some wood to restoring a deck outside.
Interior wood filler tends to be less harmful or toxic as it needs to be applied indoors. This does mean, however, that while safer and gentler to use, these products are likely going to be water-based and therefore not as durable.
Before you select your wood filler, you need to determine the exact type of wood you will be working with and whether the item will be stored and used outside or inside.
The Best Wood Filler
Now that we have a greater understanding of the different types of wood filler, we will assist you in selecting the correct product for your requirements. It can be daunting going into a home improvement store and being overwhelmed by the volume of options available. We have put a list together of some of the best options available, and have included their positive and negative attributes to assist you with your selection.


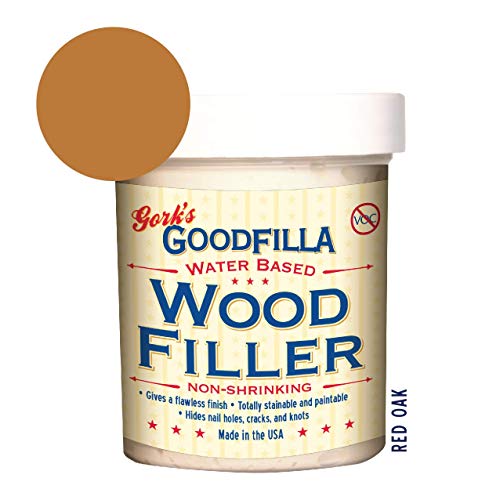
Best Overall Wood Filler: GOODFILLA Water-Based Wood Filler
This top-quality wood filler is perfect for an assortment of general projects. This water-based filler has no VOCs, is safe to use, easy to work with, and is formulated to give off lower levels of odor. It does all of that while also ensuring a durable finish – in fact, this product is considered to be the strongest water-based wood filler available.
This non-toxic wood filler is simple to apply to wooden finishes as well as other surfaces. The cured wood filler will not crack or shrink, and will accept any form of paint or stain. You can even combine the filler with a pigment or dye to change its color. It acts just like wood once dried, so it can be screwed into, sanded, and so on. Another great aspect is its unlimited shelf life, because if stored correctly, it will not dry out.
This is a really useful product to keep in your home, as you can store it and keep it for touch-ups when required.

- Does not shrink, sink, or crack, and has excellent adhesion
- Has an unlimited shelf life since it reconstitutes with water
- A green, non-toxic product with zero VOCs and zero waste
PROS
- Can be purchased in several different colors
- Water-based and eco-friendly
- Great value for money
- Can be used for an assortment of applications
- Shelf life is unlimited
- Easy clean-up and simple to use
- Paintable and stainable
- Durable finish once dried
CONS
- Gives the best results when used for interior items
- Not great for larger-scale projects
Best Exterior Wood Filler: DAP Platinum Patch Exterior Filler
This is the best option when it comes to an exterior wood filler, and it can also be used on fiber cement, metal, PVC, composite, and more. As a filler, it has great adhesive properties and is durable enough that it will work with all of these hardy materials. This filler is extremely weather-resistant and provides great UV protection and waterproofing.
The product is easy to apply and will be completely cured within just 24 hours. Once cured, you can expect the filler to act just like wood, meaning that it can be painted and sanded. It will also be rain-ready and resistant to mildew and mold. This is a great product to own for any DIY enthusiast as it can be used both outdoors and indoors, and can be applied to an assortment of surfaces.
If you are looking for a wood filler to use outside on your wooden finishes, decking, furniture, and more, then this is it!


- Use on metal, composite, PVC, fiber cement, wood, and more
- Easy to apply, and can be sanded and painted once cured
- Offers exceptional weatherproofing and UV protection
PROS
- Versatile
- Very durable and adhesive
- Can be painted and sanded
- Simple to use
- UV-protected and weather-resistant
CONS
- Drying time may be longer than advertised
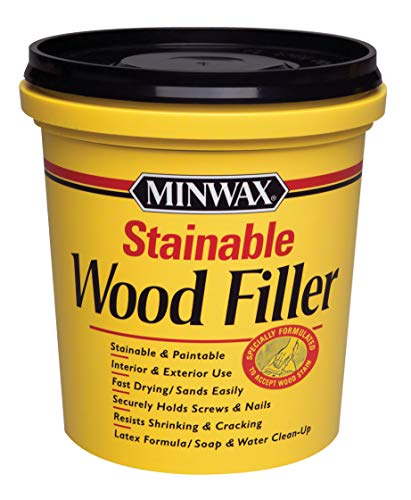
Best Stainable Wood Filler: MINWAX Stainable Wood Filler
Minwax is known for its great DIY products, including this stunning wood filler. Many wood fillers do not react well to painting and staining, but this wood filler can be stained with great effect. When you paint or stain this filler, it reacts exactly like wood, making it simple to work with. In fact, this filler is so much like wood, it can hold screws and nails, sands easily, and dries fast.
You can use either water- or oil-based stains on this filler, and it can be used for both exterior and interior jobs. When it has cured completely, the filler can resist heavy use, cracking, and shrinkage. Its latex base means that any excess can be cleaned up with some soap and water. Unfortunately, this filler has a limited shelf life, meaning that you can only use it once. You will also require several coats of paint of stain to get the filler to match the surrounding wooden surface.
This stainable wood filler offers a firm bond with an assortment of wood finishes and types of wood.

- Ideal for repairing cracks, small gouges, nail and knot holes, and more
- Designed for indoor/outdoor use with oil- and water-based stains
- Stainable and paintable, fast-drying, and easy to sand
PROS
- Will not shrink
- Can be stained with ease
- Dries quickly
- Ideal for a variety of wood finishes
- Simple to apply and work with
- Extremely durable once cured
CONS
- Staining requires multiple coats
- Very limited shelf life
Best Epoxy Wood Filler: J-B WELD KwikWood Wood Repair Putty Stick
Despite its small size, this is the perfect choice for touching up smaller wood finishes and furniture. It is great for small chips, holes, and cracks on a variety of wood types. Once the two parts have been combined, you will have a short window within which to mold and shape the thick epoxy putty into the necessary spots.
Once cured, this putty is extremely hard, offering a shear strenght of 900 psi. You will be able to paint the putty within just one hour, and you can sand, drill, or tap it once it has fully cured. The putty will not shrink or rot, and is a great choice for quick and easy wood repairs.
This is the best epoxy wood filler option, while also being the best available putty!

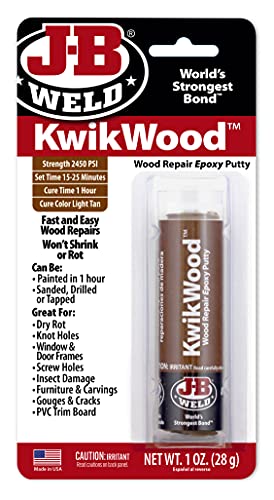
- A hand mixable two-part epoxy putty stick to repair and rebuild wood
- Will not shrink or rot and can be stained, molded, sanded, and more
- J-B Weld delivers superior performance, quality, and results
PROS
- Long-lasting and extremely strong bond
- Easy-to-use wood repair putty that dries quickly
- Works with an assortment of applications
- Will not rot, shrink, or crack
- Can be molded with ease
- Can be screwed into, sanded, and painted once cured
CONS
- Does not take stains well
- You only receive a small amount of putty
How to Select the Best Wood Filler for Your Project
As you can see there are many different types of wood filler available, so you may have a hard time selecting the correct product for your desired application. We suggest considering the following aspects before you make a decision as to which product you want to purchase and use.


The Application
Your first consideration should be what type of application you will be using the wood filler for. You may need to fill gouges or nail holes in your furniture, in which case you would be looking for the best wood putty. Alternatively, you may be working with a wooden outdoor deck, so you would need an exterior wood filler, or perhaps you have internal damage to the wood, where you will require a liquid wood filler. Some fillers have been designed for filling voids, while others have been made for filling pores in the wood.
Coloring
The color of your wood filler is important, as you do not want it to make the wood look patchy or create unsightly marks all over the wood. You are looking for a filler that blends naturally into the wood without detracting from the wood’s beauty. You can purchase wood fillers in several shades designed to resemble wood, or, alternatively, you can also get clear or white options.
You can either buy a wood filler that is an exact match to your wood, or choose a filler that can easily be painted or stained. If you use a filler that can be painted or stained, then you need to ensure that the filler matches the surrounding wood surface accordingly. If you have used a filler that is the incorrect color on exposed wood, it can look awful.
Wood Filler Consistency
You will find several wood filler consistencies, from liquid wood filler (which is thin) to thick putty wood filler. Each offers its benefits and is each applied in specific ways. If you are going for a wood putty, you will want one that can easily be molded into different holes, shapes, or missing pieces of wood, as well as fill up scratches, cracks, divots, and so on. You can apply wood putty to the wood at any angle.
When using liquid wood filler, it is absorbed by the wood and fills the pores of the wood to repair internal damage. Normally, these are epoxy wood fillers. However, if you have cracks or holes in the wood, a very thin wood filler is not a great option. You are only able to pour a liquid wood filler over the wood, so it cannot be molded to unique shapes in the wood, nor can it be applied vertically.


Format
Different types of wood filler will have different packaging, and this can greatly impact how the product is used. Epoxy wood filler, for example, comes in a mixable, two-component form by means of a tube, putty stick, tub, and so on.
It is easy to use products in tubs as they do not require mixing. You can also squeeze tube fillers directly onto the wood, making them ideal for small surface cracks and issues. Epoxy wood filler putties, on the other hand, do need to be mixed and kneaded together before you can apply it to the wood. Depending on your project, the amount of wood filler required will vary, so you want to ensure that you have sufficient product on hand for your project before you begin.
Strength
The level of strength the wood filler provides is very important. You will require a hardwood filler if you are working with strong wood in order to match it. Certain fillers can become quite powdery once dry and will not hold up as well as other fillers. These particular fillers can be used for smaller interior jobs to fill cracks and holes that are not under great pressure. If you need the filler for exterior use or for use on items that experience heavy usage (such as furniture and decking), you will require a stronger, more durable wood filler.
A Tutorial on How to Apply Wood Filler
The type of filler you plan on using will dictate how it is to be applied, and will also indicate any other unique aspects of the job, such as the type of surface it is being applied to. There are standard steps you need to follow when applying a good wood filler to your project, which we have advised below. We have laid out the steps with the assumption that you are working with a wood filler of a thicker consistency, used for cracks, gaps, holes, gouges, and scratches in wood.


Preparing the Wooden Surface
The first step is to properly prepare your wooden surface for the application of the wood filler by removing any loose pieces of decaying or rotting wood. You will not be able to fix wood with filler if the wood is soft or crumbling, so begin by ensuring that you remove these pieces of wood until you have a solid wooden surface to fill. Also, make sure that you also remove any other obstacles such as flaking paint.
Next, you need to sand down the wooden surface until it is completely smooth. If there are any rough edges, these need to be sanded down so that they are easier to fill. Finally, you must ensure that the wooden surface is completely clean and dry before proceeding to the application phase. The wood should be entirely clear of any residues or sanding dust, so wipe it down and then leave the surface to dry fully.
A smooth, clean, and dry surface will ensure that the wood filler achieves the best possible adhesion.
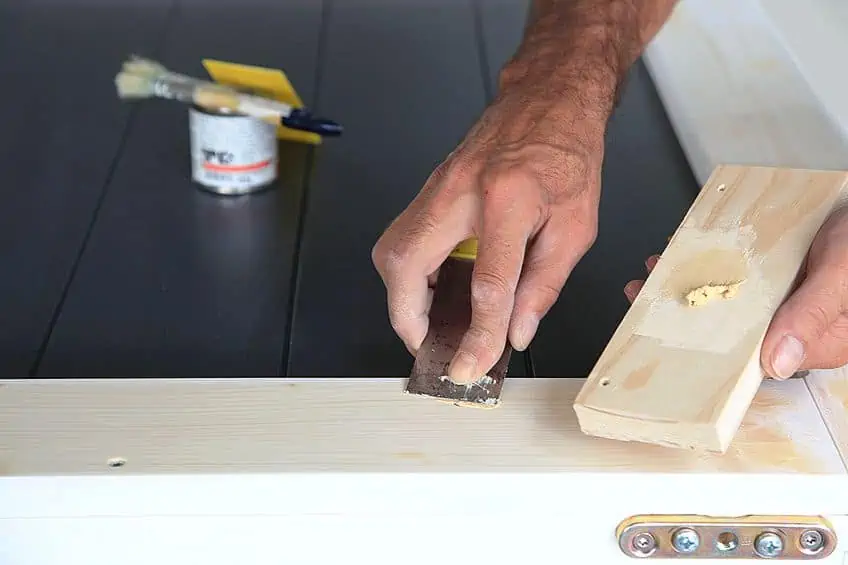
Applying the Wood Filler
It is now time to apply the filler to your prepared area – we suggest using a putty knife. Start at the edges of the damaged area and press the putty down firmly into the crack or hole. Continue applying the filler and pressing it down until you have filled the area. To ensure that there are no open areas or gaps left unfilled, you must always ensure that you press the filler down firmly when applying it.
You can then smooth the surface out using a knife. We recommend overfilling the holes slightly, as wood filler tends to shrink a bit when it dries. If any wood filler has been messed on another portion of the wood by accident, try to ensure that it is cleaned up before the filler dries. Depending on which filler you are using, this is pretty easy to do. For water-based products, you can simply wipe it off with some water, and if it is an oil-based product, you can use a little paint thinner or acetone.
Leaving the Wood Filler to Dry
Before moving on to the next step, you need to ensure that the filler is completely dry. Do not sand, touch, or paint the filler until it is completely dry. Depending on which product you have chosen to use, the drying time will vary considerably. In addition, external influences can also impact the drying time, such as the surrounding humidity and temperature. We recommend consulting the manufacturer’s guidelines, as they will clearly state the drying time of your selected product.
Sanding Down the Dried Wood Filler
When your filler has dried completely, you can sand it down in order to achieve a smooth finish. You want to do this so that the wood filler is consistent with the rest of the wooden surface. When you wipe the surface down, you want to be certain that there is no difference between the filler and the wood. If you do sand your filler down, ensure that you clean any particles off the surface when you have finished sanding.


Finishing the Wood
When your filled surface matches the wood and you have finished sanding it down so that is it smooth, you can finish off the filled-in areas to ensure that they blend in. This is imperative if you want to ensure that the filler is not obvious and instead blends in completely with the surrounding wooden surface.
You can choose either to stain or paint the wood filler, so you need to ensure that the filler you used is suitable for painting or staining. You should select a wood filler with the correct color to match the wood, especially if you are working with exposed wood. If you have wooden surfaces that are already sealed in a white coat or are painted white, you can then use a white wood filler.
It can be a difficult process to stain a wood filler, even when you have used a wood filler that is designed for working with stains – there can still be a difference between the filler and the wood. We suggest applying several layers of stain over the filler, more so than you would apply over the wood, and to continue doing so until the two surfaces match.
Tips and Tricks for Using Wood Filler
It is quite simple to apply wood filler, but in certain scenarios, you may require some additional tips and tricks to ensure that you achieve a stunning, long-lasting finish.
- Mix the wood filler before you begin applying it. This is not required if the wood filler is in a tube, however. Most other fillers will require mixing, and this will ensure that they can be applied smoothly with an even consistency.
- Wood filler cannot be used instead of screws, glue, or nails. A wood filler’s purpose is to cover up holes, gaps, or cracks, but it cannot be used to bond pieces of wood together. Once wood filler has dried, it becomes like wood and can be used with mechanical fasteners or wood glue.
- Use a tack cloth to wipe down the sanded surface. A tack cloth is the perfect tool for ensuring that all the fine dust particles are removed, which is necessary to ensure a smooth, perfect finish.
- To achieve the best color shade, you should pre-color the wood filler before you apply it. Before applying the filler, you can mix a wet stain, which will offer you a fuller color. Remember that when filler dries, it will lighten slightly, so rather use a little bit of a darker stain.


- When using a water-based filler, you should use a water-based stain. Likewise, if you are using a solvent-based filler, you should use a solvent-based stain.
- When applying wood filler, use a little bit more than required. Wood filler often shrinks a bit once it has dried, so it is better to add more. You can always sand any excess filler away once the wood filler has cured.
- Epoxy wood filler cures quickly, so you will have limited working time. Because of this, ensure that you are completely prepared and are ready to start before you mix the components of the epoxy.
- Always do a detailed inspection of the wood before using wood filler. You should only be repairing small damages with wood filler.
Thank you for reading through our detailed guide on the best wood filler. Remember, you must have the correct product for your project as this will make an extreme difference to your finish. Try using our product recommendations, follow the instructions provided, and you will have amazing results!
Frequently Asked Questions
Once the Wood Filler Has Been Applied, How Long Should I Wait Before Sanding?
Normally, your wood filler will be dry in about 30 minutes, but this varies from product to product. You must always ensure that your wood filler is completely dry before you attempt to sand it.
How Much Time Should be Allowed for Wood Filler to Cure?
The curing time depends on which wood filler you have used and how deep the actual crack is. Rather consult the manufacturer’s instructions, as the drying time can vary anywhere from just 20 minutes to 24 hours.
Can You Keep Unused Wood Filler?
The majority of wood filler products can be stored and will be suitable for a decent amount of time. Ensure that the wood filler is stored correctly and is airtight – you can ensure this by wrapping the container of wood filler in plastic wrap.
If You Are Painting Wood Filler, Does It Require Primer?
Priming is always recommended, although you can paint directly onto wood filler. Priming will help to assist in hiding any differences between the actual wood and the filler, as it improves the adhesion of the paint and provides better coverage.