Silicone Mold Making – How to Make Silicone Molds
This post may contain affiliate links. We may earn a small commission from purchases made through them, at no additional cost to you.
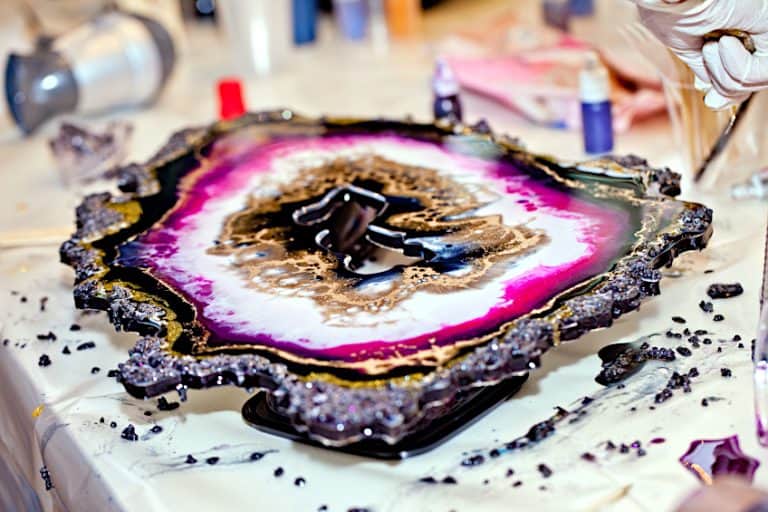
Epoxy resin is a material that allows you to create all kinds of artworks, from large river tables to small jewelry pieces. Epoxy resin consists of two liquid components that, once combined, will become an extremely hard and durable solid once dried. Its initial liquid form means that you can create almost anything out of epoxy resin, provided you have the right kind of negative mold. While you can purchase pre-made silicone molds for epoxy resin, you will be able to create all kinds of shapes and molds by making your silicone mold yourself. We will take you through the ins and outs of silicone mold-making so that you can create any number of molds for your epoxy resin.
Table of Contents
- 1 What You Should Know About Epoxy Resin
- 2 What Kind of Silicone Mold Should I Use?
- 3 The Hardness of Your Silicone Rubber
- 4 Preparation
- 5 The Best Duplicating Silicone for Mold-Making
- 6 Required Materials for DIY Silicone Molds
- 7 How to Make a Mold for Resin
- 8 What to Do with Undercuts
- 9 Helpful Hints for Creating Silicone Molds
- 10 Ideas for Future Projects
- 11 Frequently Asked Questions
What You Should Know About Epoxy Resin
Epoxy resin is famous for its immense durability, which occurs as a result of a chemical reaction that takes place when combining a liquid resin and hardener. However, you have to be extremely precise when measuring and mixing your liquids, as the incorrect ratio of resin to hardener can result in your epoxy resin not curing properly.
You can use epoxy resin as a protective coating for tables, countertops, and floors, or you can choose to use it in a number of art projects. The consistency of the resin liquid varies depending on what you want to use it for: a runny, honey-like resin is best for coating counters, whereas a low-viscosity resin is great for casting molds due to its runny consistency. You can then add color pigments, dyes, and embedded objects to create your unique resin creation.
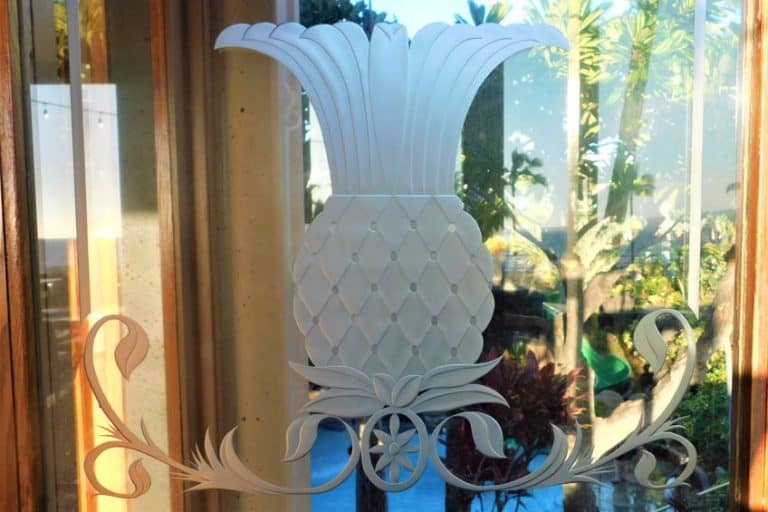
The best type of mold to use for epoxy resin is that of silicone, as these are flexible and will not adhere to the resin, making it easy to take out of the mold. You can either purchase a pre-made silicone mold, of which there are many different available shapes, or you can learn how to make resin molds yourself.
Once the resin has cured, which can take as long as 24 hours, you can remove it from the silicone mold. Some pre-made molds are polished, which results in a glossy resin surface. Alternatively, you may need to sand and polish the surface of your resin piece once demolded.


Best Epoxy Resin for Molds: PUDUO Epoxy Resin Casting/Coating Kit
This resin has been formulated specifically for the use of art projects, such as in jewelry, resin art, and much more. It has great color stability, meaning that any color added to this epoxy will remain vibrant for a long time. In addition to the liquid resin and hardener, this kit also includes measuring cups, mixing sticks, and a pair of rubber gloves.


- Specially formulated epoxy resin for artistic pouring
- Crystal clear and long-lasting
- Easy to use and very fast curing
This is one of the fastest curing resins on the market, as it will dry to the touch within just 8 hours, and can be removed from the mold after 24 hours. It has a simple 1:1 mixing ratio with a reasonable 45-minute working time.
Pros
- Fast curing time
- Easy to use
- Allows for lasting color
- Crystal-clear finish
Cons
- Not for outdoor use
What Kind of Silicone Mold Should I Use?
Silicone is the ideal material with which to make a mold, as it acts as a natural release agent. Its flexibility makes it even easier to remove your resin castings with ease. This material is non-toxic, environmentally friendly, and non-allergenic, making it a great option for everyone.
When purchasing a pre-made silicone mold, beginners may find it easier to select a silicone baking mold. These molds can be used for resin, although they are likely to wear out much more quickly due to the softness of this type of silicone. If you do not want any limits on your creativity, however, then we suggest trying your hand at silicone mold-making.
Those that are still testing the waters when it comes to silicone molds may prefer to begin with a pre-made set. We have selected the best beginner silicone mold kit that includes both basic and complex shapes, providing you with a great starting point.
Ready-to-Use Mold Set: LAMPTOP Resin Casting Molds and Tools Set
If you are not quite ready to learn how to make silicone molds for yourself, you can easily purchase some ready-made ones online. The Lamptop set of resin casting molds and tools is ideal for beginners. The set includes a wide range of different molds, as well as stirrers and spoons, droppers, a hand-twist drill, and screw-eye pins for making jewelry.

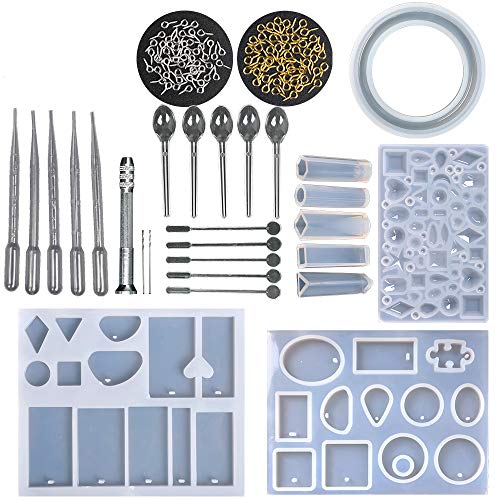
- A 127 piece set of resin casting tools
- Molds are made out of flexible silicone for easy use
- A wide array of different shapes and designs for many uses
The silicone molds are flexible, smooth, and will not tear. The various tools are made from premium plastics and stainless steel, and will aid you in the process of casting your resin and customizing your molds
Pros
- 127-piece set
- Easy to use
- Durable silicone molds
- Great value for money
Cons
- Mold release spray required for demolding
- No instructions included
The Hardness of Your Silicone Rubber
When making silicone molds, you will require a silicone rubber. This is a simple material that is soft and quick to cure. Once cured, the silicone will remain flexible and elastic-like, although this will depend on the hardness of the rubber you choose to use. Silicone may also tear or crack if it is stretched too much.
The hardness of silicone rubber is indicated by the value attributed to the term “Shore”. A high Shore value refers to a rubber that has a low elasticity (and is harder), whereas a low Shore value is a flexible rubber with high elasticity.
- A Shore value of 0 to 20 indicates a highly soft and flexible rubber. This material tends to be quite unstable.
- Shore values of 20 to 40 refer to rubbers of medium flexibility. This material remains relatively flexible whilst maintaining good stability in terms of quality.
- A Shore value of between 40 and 80 refers to rubbers that are harder than they are flexible. These molds can withstand more weight, but also tend to be quite brittle.
The hardness of your silicone rubber will depend on your particular project. It is always a good idea to test various products and degrees of hardness in order to experiment and get a good idea of what you will require.
When casting epoxy resin, you will need a mold that is relatively flexible and soft, as this will make it easier to demold your resin item. However, the more flexible the rubber, the more unstable the mold is. Stronger molds, on the other hand, are barely flexible and are likely to break due to their brittleness. However, molds of a higher Shore value are also easier to work with due to their increased stability. This simply means that they are less likely to become deformed or stretched.
Making silicone molds yourself means that it is not only the hardness of the rubber that needs to be taken into consideration, but also the viscosity of the rubber in its liquid form. The hardness and fluidity of your silicone rubber will depend entirely on your project and the purpose of the silicone.

Other Factors to Consider
You may want your silicone molds to be used for baking or making chocolate instead, in which case you need to ensure that the silicone is food-safe and resistant to heat. Silicone molds for this purpose should be able to withstand temperatures of a minimum of 392 degrees Fahrenheit (200 degrees Celsius).
It is also a good idea to have a look at the technical data sheet of your silicone rubber, as not all types of silicone are able to resist chemicals such as epoxy resin, concrete, and other such materials.
Preparation
You will need to take a lot into consideration when making a DIY silicone mold, such as the best way in which you can go about making your mold, the best blank to use, as well as determining the suitable amount of silicone rubber. The blank itself is instrumental in determining how you should make your silicone mold:
- Is the surface of the item you wish to copy smooth or indented? Does your blank possess several edges or fine grooves? When creating a detailed mold, you will require a soft silicone to pick up on all the intricacies and to make it easier to demold your cured resin. However, if the surface is simple and smooth, you can choose a harder silicone for your mold.
- How big and how heavy is the item you want to make a mold from? What is the weight and size of your blank? Soft silicone is not the best for large quantities of resin, as it is not stable enough to withstand heavier loads. Thus, you should always ensure that you are using silicone that is hard enough to handle the quantity of resin you wish to use.
We suggest beginning with a cheap bathroom silicone when first experimenting with silicone mold-making, as top-quality silicone rubber is quite expensive. This is a good way for you to practice and to make mistakes without worrying about wasting material.


The Best Duplicating Silicone for Mold-Making
When learning how to make silicone molds, you may become overwhelmed by the wide variety of products available on the market. You should not only take the quality of the product into consideration but also the flexibility and relative stability of the material as well.
Best Overall: SMOOTH-ON Silicone Mold-Making Kit
This silicone rubber set is ideal for beginners and has a simple mixing ratio of 1:1 so that you can create your own custom silicone molds with ease. Once dry, the molds will be of a soft to medium hardness, with a flexibility that is similar to that of a pencil eraser or rubber band.
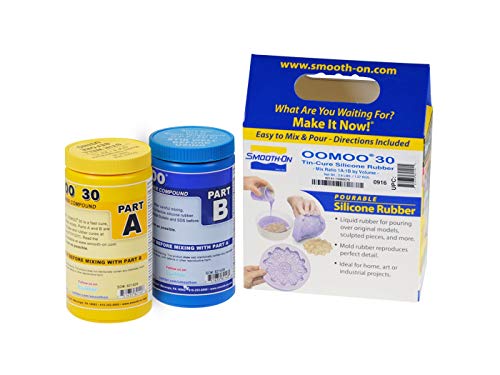

- Soft to medium range rubber for easy demolding
- Cures at room temperature with minimal shrinkage
- Ideal for simple block molds, no vacuum degassing required
You will have 30 minutes with which to work with the silicone rubber before it begins to harden, after which time it will cure fully within 6 hours (when stored at room temperature). The low viscosity and fluidity of the mixture makes it easy to mix and pour, and will not require any degassing.
Pros
- Easy and simple to use
- Rubber mixture will pick up on every detail
- Little to no shrinkage
- Great for making simple molds
Cons
- Prone to tearing
Premium Pick: UNICONE ART Marvelous Mold-Making Kit
This premium DIY silicone mold set contains two parts that, when combined, will cure into a soft, flexible, and durable silicone mold. The mixture is non-toxic and easy to mix due to its basic 1:1 ratio.

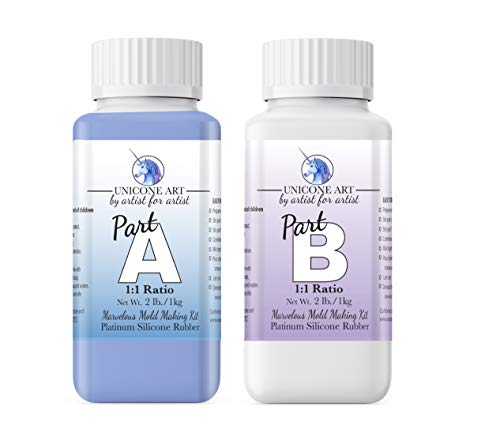
- A quality silicone rubber mold making kit
- Non-toxic and easy to mix
- Fast curing low-viscosity pourable silicone
You will have 40 minutes to work with the liquid rubber, after which the molds will require 3 to 5 hours of curing time. The silicone itself is pourable due to its low viscosity, and it will not require any degassing. The low viscosity also allows for intricate details to be copied over to the mold.
Pros
- Quick to cure
- Non-toxic
- Easy to mix
- Sturdy and flexible once cured
Cons
- Sold in small quantities
- Expensive
Budget-Friendly: LET’S RESIN Silicone Rubber Mold-Making Set
This silicone mold-making kit will produce translucent silicone molds, although you can easily add in mica powders so as to personalize your molds by adding color. Once cured, the mold will be flexible, soft, and clear. This product is great for beginners due to its ease of use and wide application.
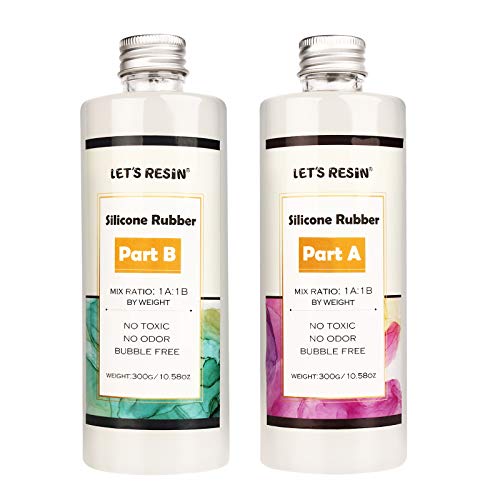

- Premium translucent liquid mold-making silicone
- Easy 1:1 mixing and pouring with 5 minutes working time
- Bubble-free, non-toxic, and odorless
The silicone rubber is non-toxic and produces no odor, making it safe to use. The mixture is also formulated so as to produce no bubbles. The two parts of liquid silicone require a 1:1 mixing ratio by weight, whereby they should be stirred together for 5 minutes. Once combined, you will only have 5 minutes with which to work with the rubber before it starts hardening. The total cure time of the silicone rubber is 12 hours at room temperature.
Pros
- Non-toxic
- Odorless
- Easy to mix
- Bubble-free
Cons
- Short working time
- Not food-safe
Required Materials for DIY Silicone Molds
You will require a variety of other materials in order to create your custom silicone molds. In addition to the rubber silicone and the item that is to be reproduced as a mold, you will require the following:
- Digital scale
- Measuring cups and wooden sticks
- Medium-density fiberboard (MDF board)
- Hot glue-gun
- Modeling clay, cotton swabs, and toothpicks
- Silicone spray
- Small knife
- Talcum powder


How to Make a Mold for Resin
A negative mold is created based on an original item or mold. In addition to the silicone rubber, you will require a suitable frame as well as the blank, onto which you will pour the rubber to create the mold. When learning how to make resin molds, you can choose to create a negative mold with or without the original item.
Making Negative Molds With an Item
If you want your mold to be an exact duplicate of another item, you can use the silicone rubber to make a negative mold of the original. When making silicone molds this way, you will require a frame that is the correct size for your mold. The frame will act as a barrier so as to stop the silicone from flowing off the edges, leaking, and spreading to unwanted areas.
You can choose to create the frame yourself, or you can use existing materials for your frame. For example, you can use plastic packaging of various foodstuffs such as an ice cream container or yogurt tub, which can then be adapted accordingly.
If you choose to build your own frame, you should aim to build it as close to the dimensions of the item you are molding, as this will prevent wastage. Once you have sealed the edges of your frame, ensuring that there are not remaining cracks or holes, you can place your chosen blank into the frame. Ensure that you have a suitable surface for the underlay of your frame.
Once your silicone has been prepared sufficiently, you can pour it into the frame, ensuring that the silicone is distributed evenly. Allow the silicone to cure and harden completely before removing it from the frame.
Making Negative Molds Without an Item
This method allows you to make a silicone mold without an original item. To do this, you will put the silicone rubber into a bowl or container that has been filled with a solution of water and detergent. This will allow for the silicone to become moldable by hand. You can then shape the silicone around the blank with your hands, ensuring that you use a generous amount. Using too little silicone can result in your mold being brittle and unstable.
Make sure that your mold needs to have an opening at one end to allow you to remove the object. Alternatively, you can choose a spot to cut open once the mold as cured, allowing you to remove the item.


Step-by-Step Instructions on Making Custom Silicone Molds
It can seem daunting when first trying to make your own silicone molds, but you do not have to worry! We have provided you with easy-to-follow directions on how to make silicone molds.
Step 1: Building Your Frame
- To begin, you need to construct a frame for your silicone mold. This frame needs to have the right dimensions so that it is just large enough to enclose the item that you will be molding. If the frame is too large, you will end up wasting silicone.
- Use a smooth plate as a base for your frame in order to stop the silicone from leaking. This base plate should not be made of glass, as silicone is difficult to remove from such a material. Instead, use a base plate made out of smooth wood. The base plate should be the right size for your frame.
- You will be building your frame around the base plate. Enclose the plate with four smooth walls on each side, which can be made out of MDF boards or smooth solid wood. The walls should be at least 10 cm higher than the item you are molding.
- Glue the walls together using a hot glue gun. Then, seal the joints of the wooden frame with modeling clay so as to prevent leakage. You can use a cotton bud or toothpick to smooth the modeling clay over the joints.
- Now, you can place the item to be molded into the frame, ensuring that the side you want to copy is facing upwards. You can use some double-sided tape or hot glue to keep the object in place when pouring in the silicone rubber.
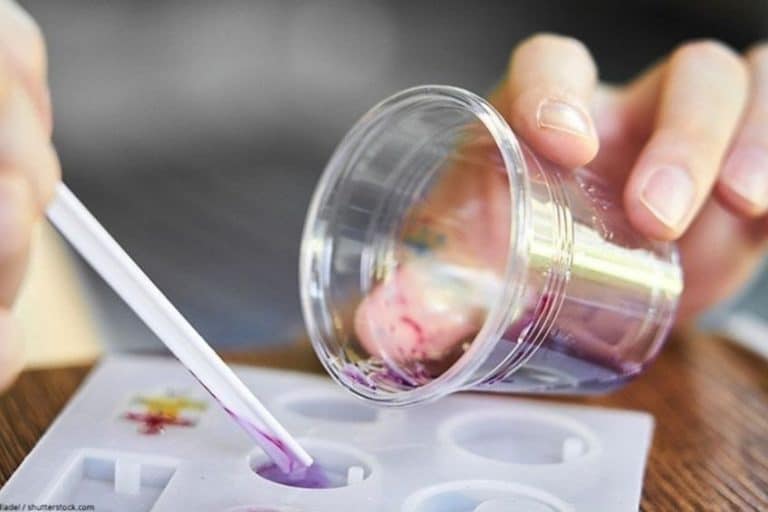
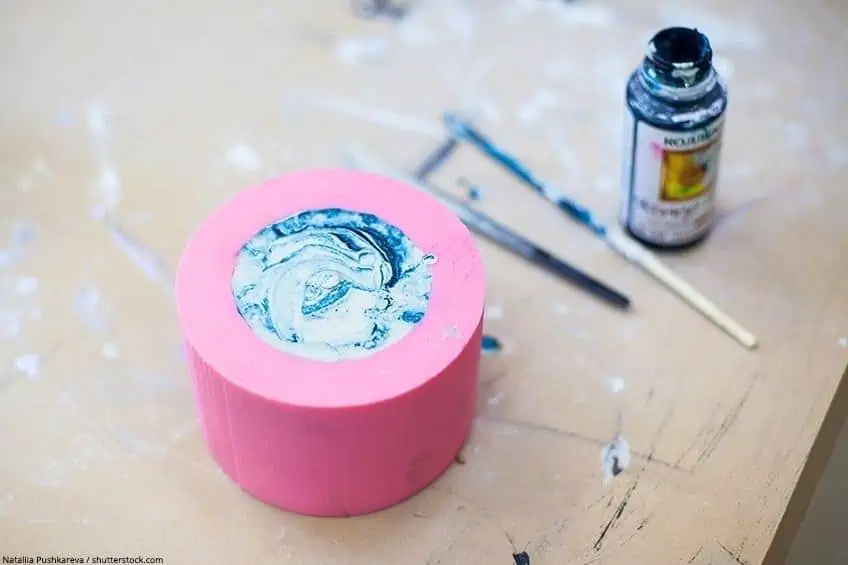
Step 2: Mixing the Silicone
- Once your frame is prepared, you can begin to weigh the necessary quantities of each of the silicone rubber parts, mixing them together in a 1:1 ratio. Use a scale to weigh the exact volumes beforehand.
- Stir the mixture together with a wooden stick in a plastic cup. Use smaller amounts at a time, as this will make it easier to mix without any clumps forming. Smaller mixing quantities will also lessen the effort required for mixing, as silicone rubber is quite a tough material.
- Once a small amount has been mixed, gently tap the bottom of the cup against a table or hard surface so as to release any air bubbles. Wait a few minutes before pouring the mixture into the frame in order to allow any remaining bubbles to rise to the surface.
Step 3: Pouring the Silicone into the Frame
- If you have used wood for your frame, we suggest applying some oil or release spray before pouring in the silicone. Ensure that you take note of the manufacturer’s instructions, however, as some oils are not compatible with silicone and can destroy the surface.
- You can now pour your silicone mixture over the item in your frame. If your blank is fairly large and smooth, you simply have to pour the silicone over the object from quite high up. Ensure that the entire blank is covered by the silicone.
- If your object is more detailed, however, containing corners, cracks, and lines, you need to cover these areas first. Only add the rest of the silicone once all the detailed pieces have been covered, as this will ensure that your mold is as detailed as possible.
- Pour the silicone into the frame until it is at least 5 mm above the item to be molded. Once you have poured the silicone, gently tape against the frame with your fingers to cause any air bubbles to rise and burst. Do this a few times on each side. Once you have done this, you can wait for your silicone mold to harden and cure.
Step 4: Removing Your Hardened Mold
- The length of time that your mold will take to cure is dependent on its overall size as well as the type of silicone that was used. Where some silicone molds can be removed after just one hour, others will need as long as 24 hours to cure completely.
- To check if your silicone has cured, gently press your finger into the silicone after the stipulated curing time. If it comes away from the frame easily, which will have been greased with oil or a release spray, you can be sure that the mold has hardened sufficiently.
- To remove your mold, you can use scissors, a scalpel, or a small knife. Once removed, rub the silicone mold with talcum powder. Talcum powder should be rubbed onto the mold after each use with epoxy resin, as this will help it to last a long time and maintain its durability.
Making a Two-Part Silicone Mold
When making silicone molds, you may be interested in creating a two-part mold so as to make a three-dimensional object. This will allow you to create resin art pieces and even small models for various scenes and dioramas. While plaster or concrete is used most frequently for this purpose, you can certainly use epoxy resin as well.
- To begin, you will need to press some malleable clay into your frame so that the frame is filled halfway. The corners should be lined well and the surface should be smooth.
- Then, you can take your plank and press it into the clay until half of it has been submerged. You can then fill the frame with your silicone rubber mixture.
- Once this has cured, you can remove the silicone mold as well as the underlying modeling clay. You will then place the finished half of the mold back into the frame.
- Place the blank directly into the recess left behind. Rub the mold with Vaseline so that you will be able to separate the two halves easily later on. You can then pour the silicone rubber into the frame and allow the second half of the mold to cure completely.

What to Do with Undercuts
When learning how to make a mold for resin, you are likely to come across blanks with undercuts. This occurs when a blank has an exposed and protruding edge or corner that can get stuck to the silicone during the demolding process.
Usually, smaller undercuts are not a problem if the resin has a Shore value of between 0 and 20, making it relatively elastic and flexible. Undercuts become a problem when they are larger, which is common in two- or multi-part molds. You should always try to use as soft a silicone rubber as possible, and be very patient and careful when you remove the blank from the now-cured silicone mold in order to prevent the silicone from stretching.
Sometimes, you will not be able to remove the blank at all as a result of the undercut. If this is the case, you may need to cut the mold open with a sharp knife at the undercut in order to remove the blank. You can then fix the crack in the mold by holding it closed with some tight rubber bands. The rubber band method will also make it easier to remove castings from your mold later on.
Helpful Hints for Creating Silicone Molds
- If you do not have the time or energy to make a frame for your silicone mold, you can use any old Lego bricks that you may have lying around. Lego bricks are ideal for building a fitted frame around your mold, underneath which you can place your wooden base plate.
- Your silicone needs to be kept at a suitable temperature while it is curing. Room temperatures below 64 degrees Fahrenheit (18 degrees Celsius) will take a long time to cure, whereas higher temperatures can cause the silicone to become clumpy or to dry too quickly. The ideal room temperature is one that falls between 64- and 68-degrees Fahrenheit (18 to 20 degrees Celsius).
- If you want to determine how much silicone you need, fill your fully-prepared frame with uncooked rice. The rice should cover the item to be molded by about 1 cm. You can then carefully pour this rice out into a bowl and weigh it. The weight of the rice should be close to the amount of silicone you will need.
- If you are a beginner at mold-making, you should try not to do too many projects at once. It is better to begin with simpler items first and allowing yourself the time to experiment before moving to more complicated pieces.
Ideas for Future Projects
There is an infinite number of ideas and designs when it comes to making custom silicone molds. Once you have gained some experience, you can try your hand at the following mold-making projects:
- You can make a chess set out of epoxy resin. The making of these molds will require a lot of work but will be extremely rewarding.
- You can create molds for jewelry made out of epoxy resin. These pieces are both timeless and modern and can be replicated with ease to make gifts for your loved ones.
- Preserving flowers in a beautiful epoxy resin mold is a great idea for all sorts of items, from paperweights and coasters to jewelry pieces and decorative pendants.
Frequently Asked Questions
What is the Best Material for Making a Mold?
Your best bet for making a mold is to use natural or synthetic rubber, as this material is highly flexible and will pick up on intricate details. Silicone is one of the most popular choices of rubber for making molds.
Can You Reuse a Silicone Mold?
Most silicone molds can be reused a minimum of 35 times, although you can always re-melt the silicone rubber and create new molds. If you re-melt the rubber at a low temperature of fewer than 180 degrees Fahrenheit for a short amount of time, you could even get more than 100 uses out of your silicone mold.
How Can I Stop My Silicone Molds from Sticking?
You can apply a specialized mold-release spray to the interior of the mold, or you can use an acrylic spray, petroleum jelly, or a wax. Be careful not leaving behind any brush strokes when applying the jelly or wax, as these will be picked up on in the mold.
What Can I Cast in My Silicone Mold?
You can use a silicone mold to cast any number of materials, including epoxy, polyester, and polyurethane resins, wax, concrete, soap, and more.
If you plan on doing an epoxy resin pour, then you will need a mold. Making your own silicone molds is not too difficult, and it can allow you to create whatever your vision desires. We hope that this article has answered all of your questions around mold making to help you get started.