
How to Draw a Strawberry – Create a Stunning Strawberry Drawing
This post may contain affiliate links. We may earn a small commission from purchases made through them, at no additional cost to you.
Strawberries are some of the most pleasant and delicious fruits available. Many people are interested in learning how to draw strawberries because of their vibrant color. If you are one of those who want to learn how to draw a strawberry, this guide is for you. In this step-by-step tutorial, we will teach you how to draw a strawberry.
Table of Contents
- 1 How to Create a Realistic Strawberry Drawing
- 1.1 Step 1: Construct the Base Shape of the Strawberry
- 1.2 Step 2: Attach the Stem to the Shape
- 1.3 Step 3: Outline the Crown Leaves
- 1.4 Step 4: Draw the Flower
- 1.5 Step 5: Add Extra Foliage to the Drawing
- 1.6 Step 6: Define the Strawberry’s Body
- 1.7 Step 7: Trace the Crown and Stem Lines
- 1.8 Step 8: Redefine the Flower
- 1.9 Step 9: Outline the Other Leaves
- 1.10 Step 10: Incorporate Details and Texture into the Drawing
- 1.11 Step 11: Apply the Base Color
- 1.12 Step 12: Add the Second Coat of Color
- 1.13 Step 13: Shade the Drawing
- 1.14 Step 14: Add More Details to the Blending and Highlights
- 1.15 Step 15: Complete Your Drawing
- 2 Frequently Asked Questions
How to Create a Realistic Strawberry Drawing
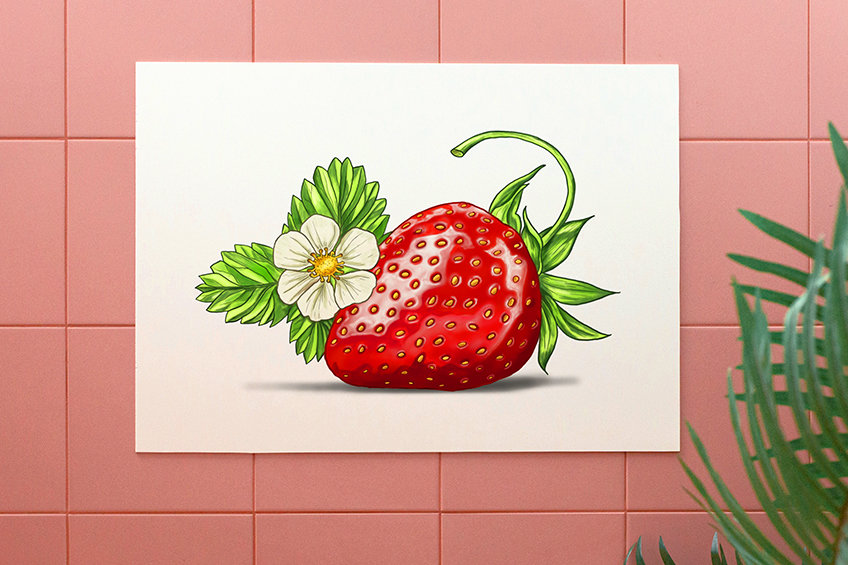
Our primary aim with this tutorial is to teach you the simplest way of drawing a strawberry. We also want to make learning how to draw a strawberry a pleasurable experience for you. We have also included the whole coloring process. Our easy strawberry drawing tutorial is suitable for both novices and more professional artists, so gather your drawing supplies and join us as we begin drawing!
We hope that at the end of our tutorial, you will produce an attractive strawberry illustration. Below is a picture that outlines the steps in this guide, including the construction and coloring steps.
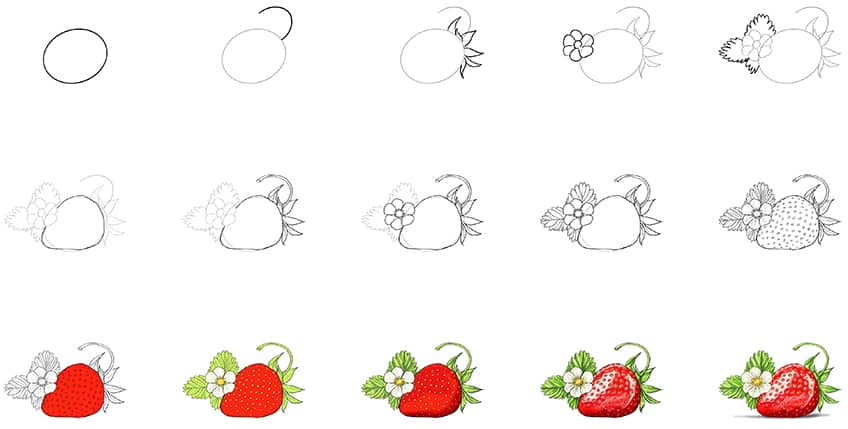

Step 1: Construct the Base Shape of the Strawberry
Firstly, you must pinpoint the center of your drawing area before you can begin working on your actual strawberry drawing itself. The body of your strawberry will be put here, and it will serve as a guide for where the rest of the drawing features will be positioned.
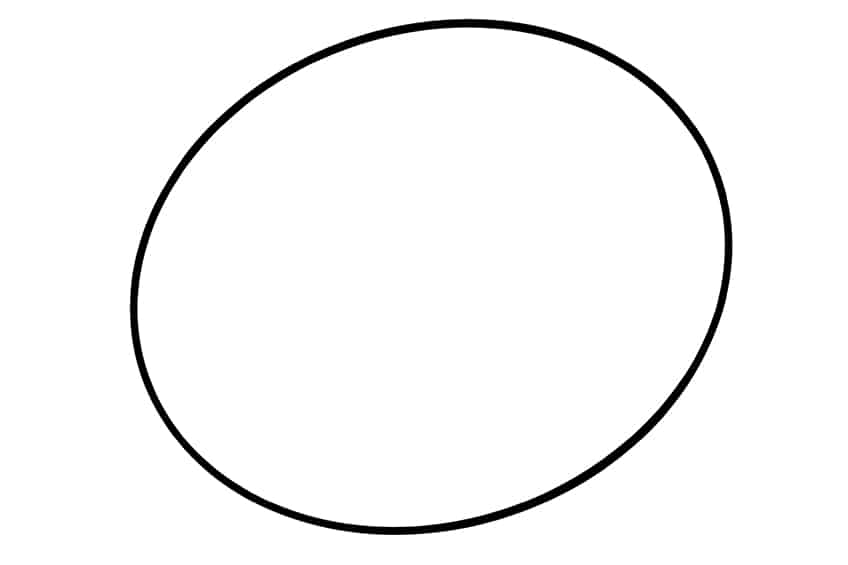

A slanted oval shape should be sketched in the center of the paper.
Step 2: Attach the Stem to the Shape
This is the step that involves attaching the strawberry stem to the fruit. At the very top of the shape, you should draw a curved and arched line. This will serve as a depiction of the stem’s shape and size. Make sure the stem is not too long.


Step 3: Outline the Crown Leaves
Once you have drawn the base, you can begin adding some leaves to the stem. The crown leaves should be added around the curvature of the oval shape. When adding the leaves, make sure that they spread outwards.
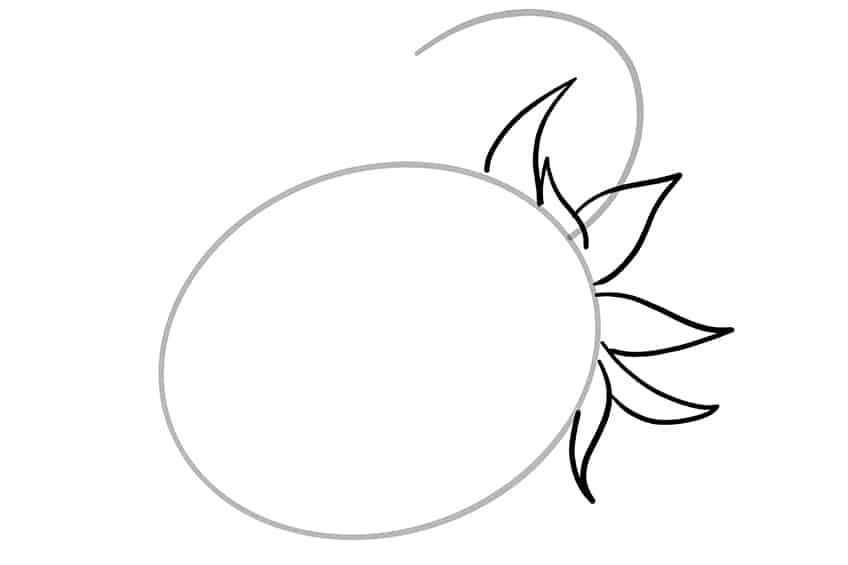

Do not include too many leaves in order to keep the picture looking as realistic as possible.
Step 4: Draw the Flower
Now, you can start drawing the flower for the strawberry illustration. The flower must be placed on the left-hand side of the oval curve. The flower should also be drawn towards the tip of the strawberry body. Simple is best when it comes to drawing the flower.

Adding the flower is entirely optional and can be done for aesthetic reasons.
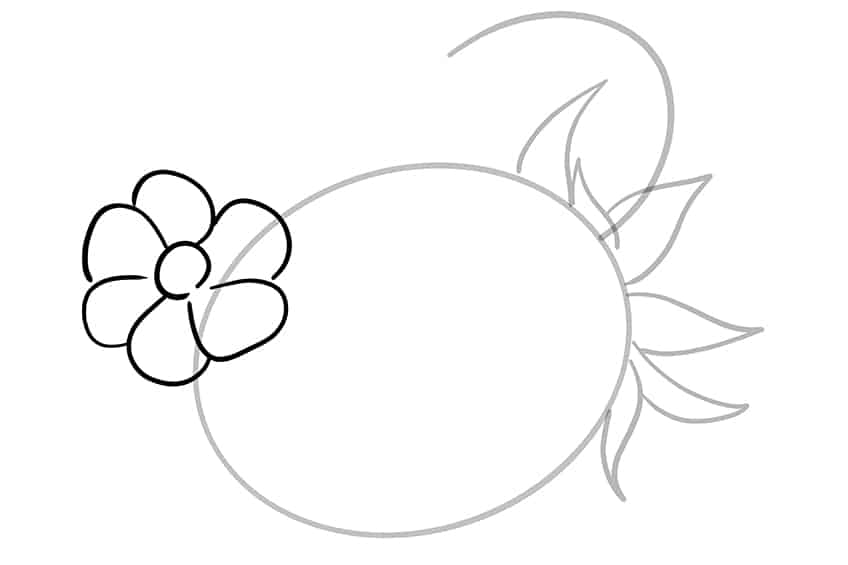
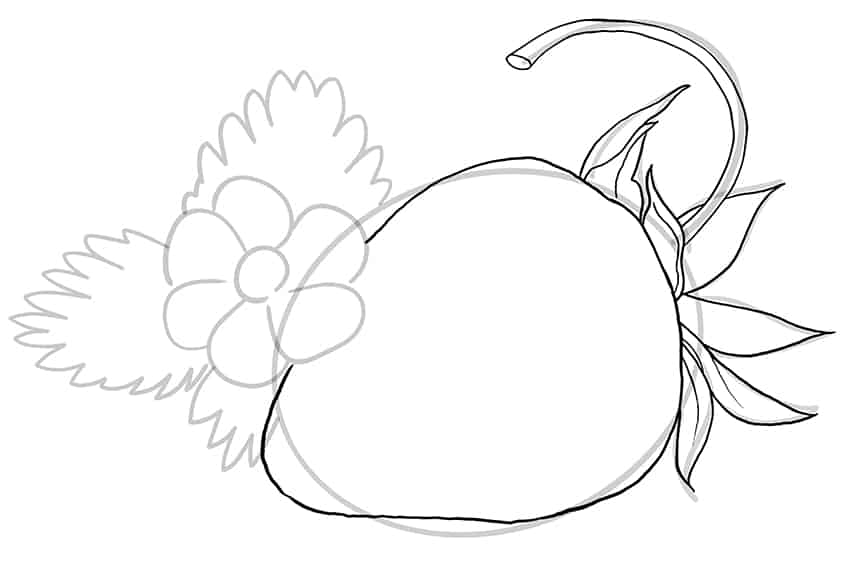
Step 5: Add Extra Foliage to the Drawing
In this step, you will proceed to surround the flower with more foliage. Make sure that the flower is encircled by a few leaves. They should be drawn differently than the crown leaves that were added before.

Extra foliage must be positioned behind the flower and strawberry.
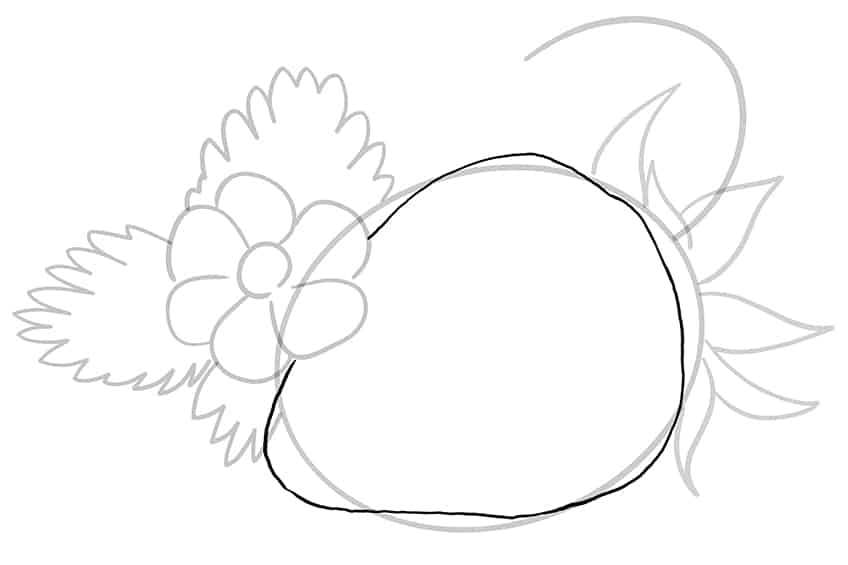
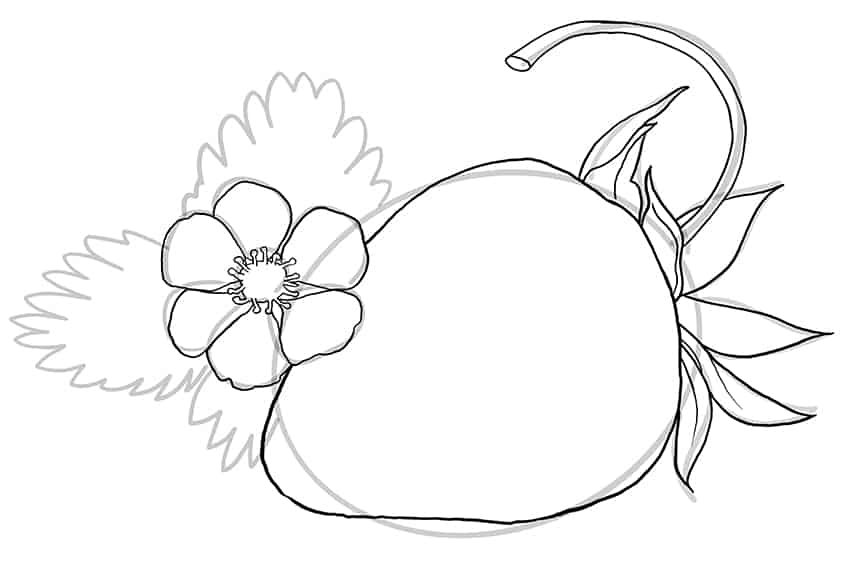
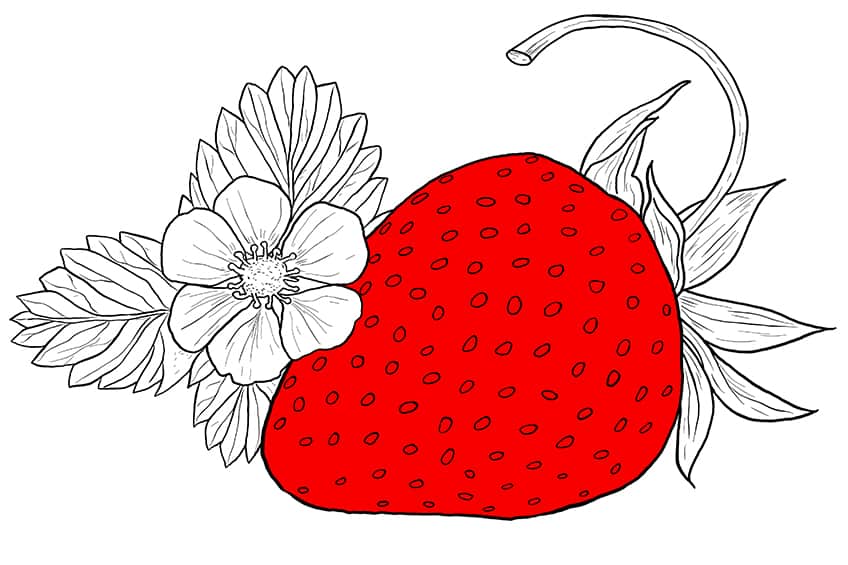
Step 6: Define the Strawberry’s Body
Taking the completed strawberry sketch as a starting point, the procedure for outlining the body may now begin. While using the outlines from the oval produced in step one, the strawberry must be sketched realistically. When drawing the oval shape, keep in mind that the body of a strawberry is heart-shaped.

Step 7: Trace the Crown and Stem Lines
Following the outline of the oval to make it even more of a realistic design, you may begin defining the stem and crown lines. To create appropriate outlines for these components, make use of the strawberry sketch lines that were drawn in stages two and three.

You should try to incorporate dimensionality in your strawberry sketch.
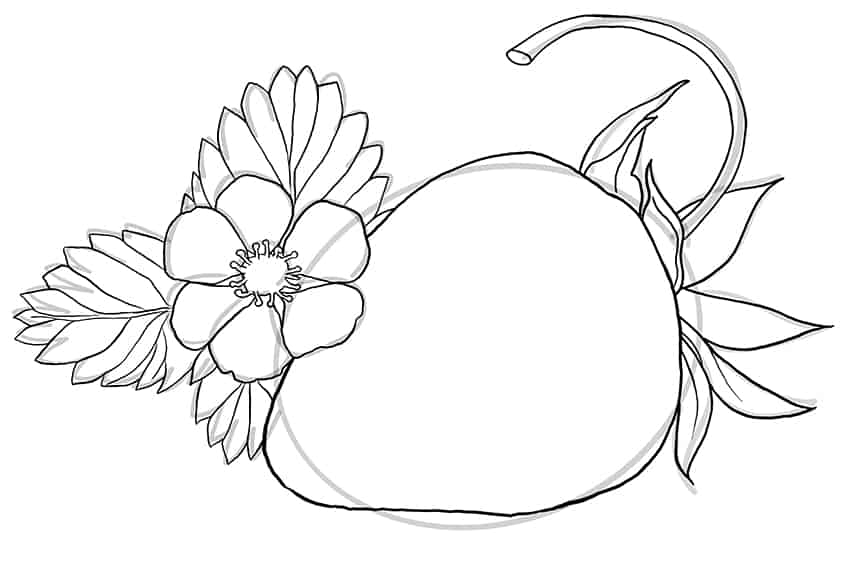
Step 8: Redefine the Flower
After you have traced over the crown and stem lines, you must outline the basic flower that you drew. Take advantage of the outlines, while also remembering to incorporate the stem lines in your arrangement. A much more realistic touch will be provided to it as a result of this.

When tracing over the flower, gently curve the flower petals that are flat on the strawberry to give it a wrapped appearance.
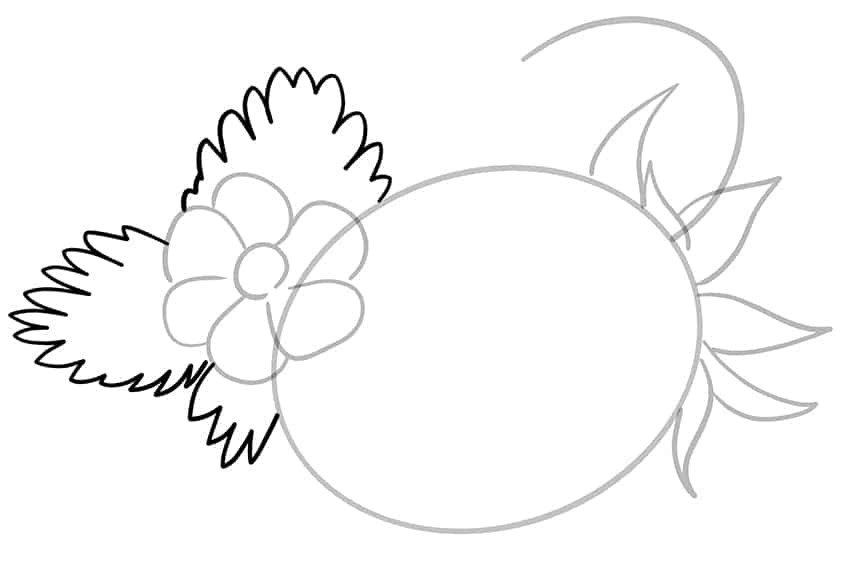
Step 9: Outline the Other Leaves
It is now time to highlight the extra leaves that were drawn in step five. Pay close attention to the fact that you are adding some small lines as well as curved edges to them as you go. When outlining extra foliage, be sure to follow the curvature of the shape. Any visible outlines can also be removed in this step.

Step 10: Incorporate Details and Texture into the Drawing
When the strawberry drawing reaches this level, you may begin adding features and texture to the painting. Start with sketching delicate lines on the petals and curving lines on the stem as well as leaves. Paint little seeds throughout the strawberry’s body to finish this phase. Put each seed at a point of equal spacing from the other seeds.
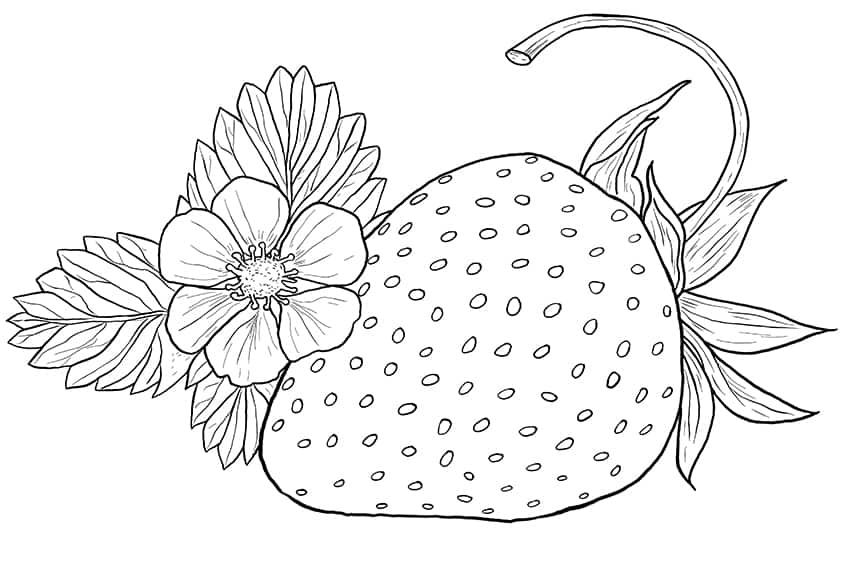

The texture and detail lines should be guided by the curve of your outlines.
Step 11: Apply the Base Color
Once all the details and texture have been added to your drawing of a strawberry, you can start coloring the drawing. Use a standard paintbrush and red paint to color the strawberry. Be sure to paint the drawing uniformly. The seeds drawn in the previous step should also be painted.

For a drawing that is realistic, you should consider using the colors used in our drawings.
Step 12: Add the Second Coat of Color
For the second layer, you are going to use a fine paintbrush as well as bright green or lime green for painting the seeds inside the strawberry drawing. If none of these colors are available, yellow will suffice. Use a vibrant green shade and a light paintbrush to paint the crown leaves, stem, and the leaves that are positioned behind the flower.
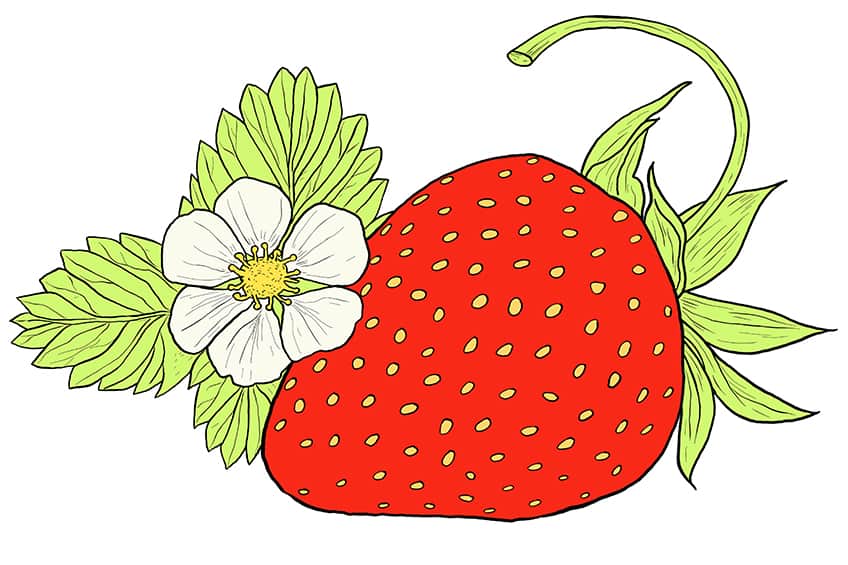

Complete the step by coloring the center of the flower using yellow paint. The petals should be colored using white paint.
Step 13: Shade the Drawing
You are now ready to begin shading the strawberry. Paint a shadow layer onto each seed of the painting with a small brush and some black paint. The shading should be placed on the strawberry, leaves, as well as stem with the same black paint that was used on the seeds. To shade the interior of the flower, a light mix of golden yellow or brown paint should be applied to produce a subtle shading effect.
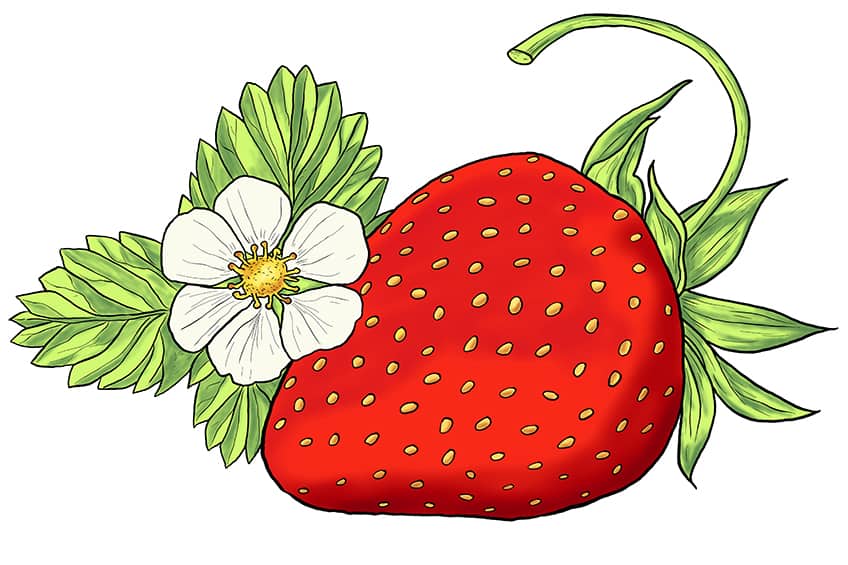

Make sure that you do not over shade the drawing of a strawberry. In addition, the first and second color coats must still be visible.
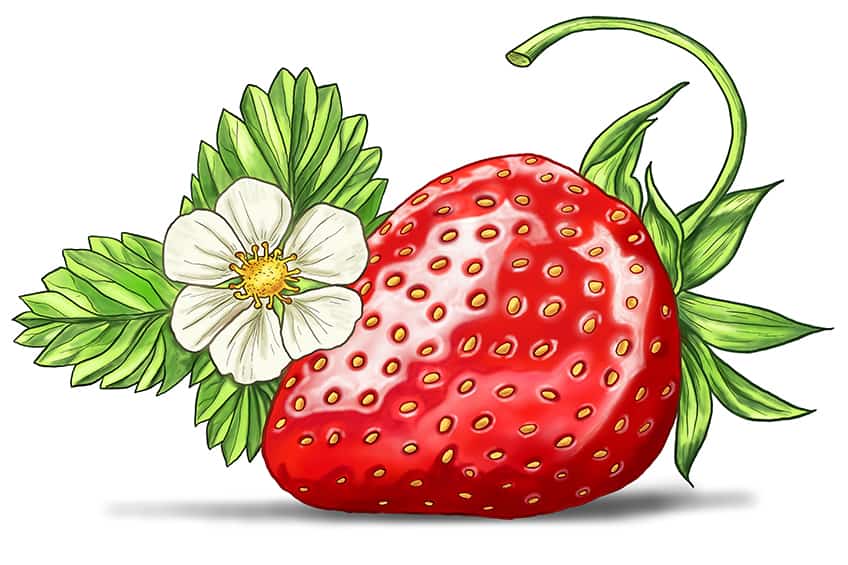
Step 14: Add More Details to the Blending and Highlights
This step involves enhancing the appearance of your realistic strawberry drawing. If you want your strawberry to seem genuine, you’ll need to apply enhancements to all of its surroundings as well. The shaded areas must also be blended and highlighted. Begin by applying a second layer of paint to your design using a fine brush as well as a dark red shade. For the lighter spots, a soft brush and white paint should be used. It is possible to get a faded color appearance by painting a soft, medium layer of white paint over the surface.


To enhance the shading on the leaves and stems, a soft brush and some green or gray paint can be used. Finish this stage by lightly painting the texture lines on the flower petals with a light olive paint to give them a more natural appearance.
By devoting more effort to improving the highlights and blending of your drawing, you may achieve a more realistic drawing.
Step 15: Complete Your Drawing
Finish drawing your strawberry by tracing the whole drawing with a fine brush. Each section of the drawing must be traced with the color that corresponds to it. This will assist you in creating a smooth appearance with no discernible outlines. Furthermore, this process can be performed on the texture lines as well as the inner outlines. Add some finishing touches to your realistic strawberry drawing. Light brushstrokes underneath the strawberry will create the impression that it is casting a shadow.

You have completed your easy strawberry drawing. We hope you have now mastered the art of drawing a strawberry and are able to enhance it with your own unique touches. Regardless of whether the drawing is for fun, feel free to explore with various creative mediums and colors. We also have a great number of step-by-step drawing tutorials that you may explore!
Frequently Asked Questions
Is Learning How to Draw a Strawberry Hard?
Mastering how to draw a strawberry is very easy. As explained in the steps above, you can create your own realistic drawing of a strawberry in 15 simple steps. Both novices, as well as more experienced artists, may benefit from the information in our tutorial.
Can I Create a Realistic Drawing of a Strawberry?
Yes, strawberry drawings that are realistic can be created by following a series of steps. The steps outlined in this lesson will teach you how to precisely draw a strawberry as well as how to add highlights to your drawing. Make sure to follow the steps accurately to have a beautiful drawing.