
How to Draw a Star – Drawing a Five-Pointed Star With Triangles
This post may contain affiliate links. We may earn a small commission from purchases made through them, at no additional cost to you.
If one of your favorite things to do is look up at the night sky to admire the stars, then it is understandable why you have found yourself reading this star drawing tutorial. When it comes to learning how to draw a star properly: a hand-drawn star with correct proportions, highlights, and shading, following a guide such as this is often a fantastic way to get started. So, grab your paper and art materials and let us show you how to easily draw a five-point star sketch in just 12 easy steps. Both beginners and more advanced artists can benefit from our basic and easy-to-follow star-drawing guide.
Table of Contents
- 1 A Step-by-Step Guide on How to Draw a Star
- 1.1 Step 1: Draw an Upside-Down Triangle
- 1.2 Step 2: Adding a Second Triangle
- 1.3 Step 3: Shaping the Star Drawing With a Final Triangle
- 1.4 Step 4: Adding Center Lines to the Five-Point Star
- 1.5 Step 5: Adding an Internal Pentagon Shape
- 1.6 Step 6: Outlining the Hand-Drawn Star
- 1.7 Step 7: The First Layer of Color on Your Star Drawing
- 1.8 Step 8: Adding More Color to Your Stars Sketch
- 1.9 Step 9: Adding Shading to Your Star Drawing
- 1.10 Step 10: Creating Highlights on the Five-Point Star
- 1.11 Step 11: Completing Your Stars Sketch
- 1.12 Step 12: Final Additions to Your Star Drawing
- 2 Frequently Asked Questions
A Step-by-Step Guide on How to Draw a Star
Perhaps you have been struggling to create the perfect hand-drawn star and your proportions just are not cutting it. This guide is the ideal place to learn how to draw a star as we break down each and every step in a simple and easy-to-follow method. This star is almost complete constructed from triangles, which makes it super easy to ensure that your star is as symmetrical as possible. Have a quick look at the breakdown of steps in the picture below, which details each step that this tutorial will entail.

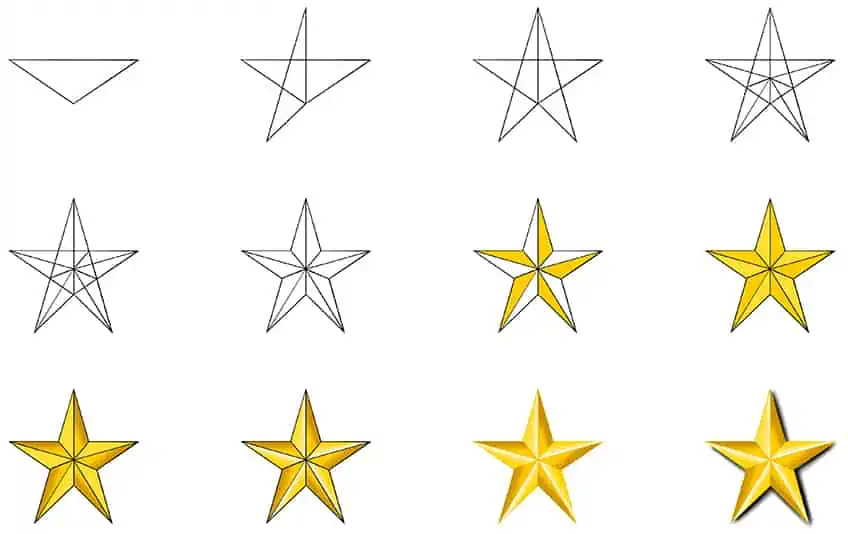
As you can see, the final six steps involve coloring in your star drawing. For this part, you can use the medium of your choice, pencils, paint, or even a digital graphic drawing pad are all completely acceptable. Now, let us get all our materials together and get started on our five-point stars sketch.
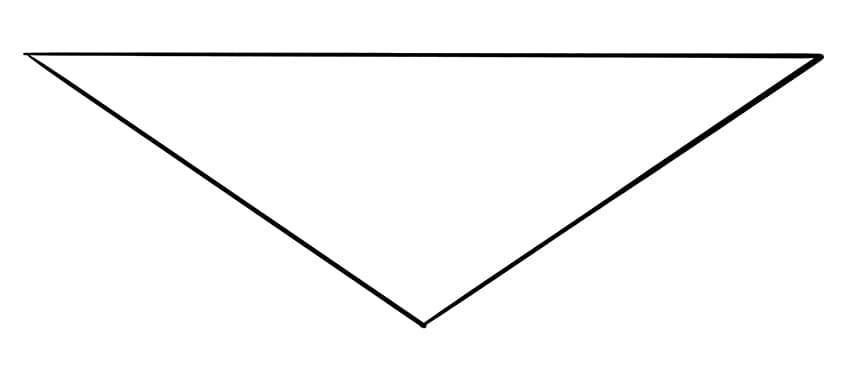
Step 1: Draw an Upside-Down Triangle
The first step is very simple. If you are drawing by hand, we recommend using a ruler and a protractor to get your angles just right when drawing this isosceles triangle. Once you have found the center point of your page, you can begin to construct an upside-down triangle. You want to make sure that there is enough space all around for the rest of the star. Take a look at this picture and you will notice that the triangle we have drawn is both flat and wide.

Step 2: Adding a Second Triangle
You will now need to draw another triangle; this triangle will have a slightly longer top line compared to the first triangle. You will draw the triangle at an angle and overlap the first triangle you drew in step one. As you can see by the image below, the bottom point of triangle one will be your starting point for triangle two.


Step 3: Shaping the Star Drawing With a Final Triangle
Your star drawing will finally start to make more sense by the end of this step. You will now draw a third triangle on the other side. Essentially a mirror image of triangle two. Once this triangle is done, your basic five-point stars sketch should be complete. You will know that your shape is correct if you can follow the outer line with your finger in a continuous circuit from one point to all the others.
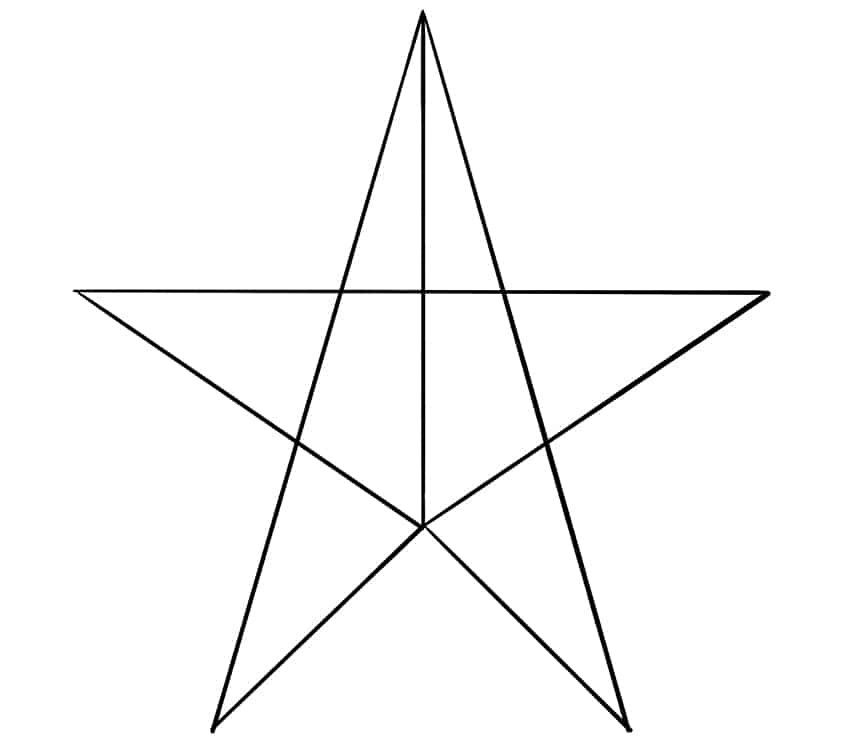

Step 4: Adding Center Lines to the Five-Point Star
This step is very simple, as all you will do is add a centerline through all five points of your star drawing. These lines will all converge at the central point of the star. You will notice a pentagon shape has been formed in the center of your hand-drawn star.
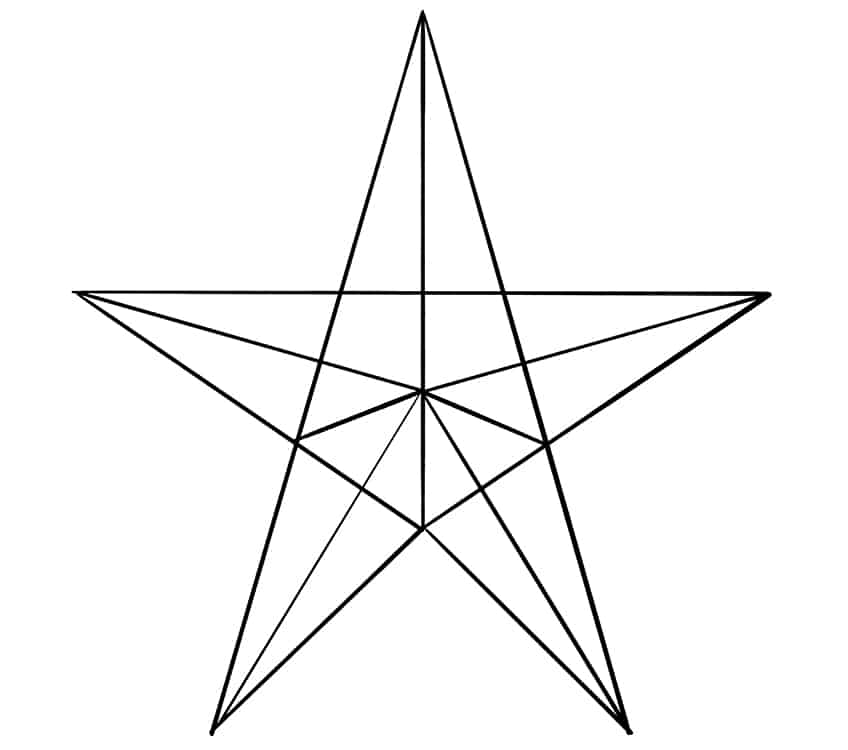

Step 5: Adding an Internal Pentagon Shape
You now need to draw another small line inside the pentagon shape mentioned in step three. It should extend from the right top-hand corner of the pentagon to the star’s centerline. You will see why this step is important as our “how to draw a star” tutorial progresses to the shading.


Step 6: Outlining the Hand-Drawn Star
You can now start outlining your star drawing as per the image that follows. Once you have completely outlined the star, you can erase the lines that are irrelevant. You will want to leave the secondary pentagon lines as well as the central point lines in place. Well done! You should now have a perfect hand-drawn star with three-dimensional qualities. Now we are going to add some color to our star drawing.


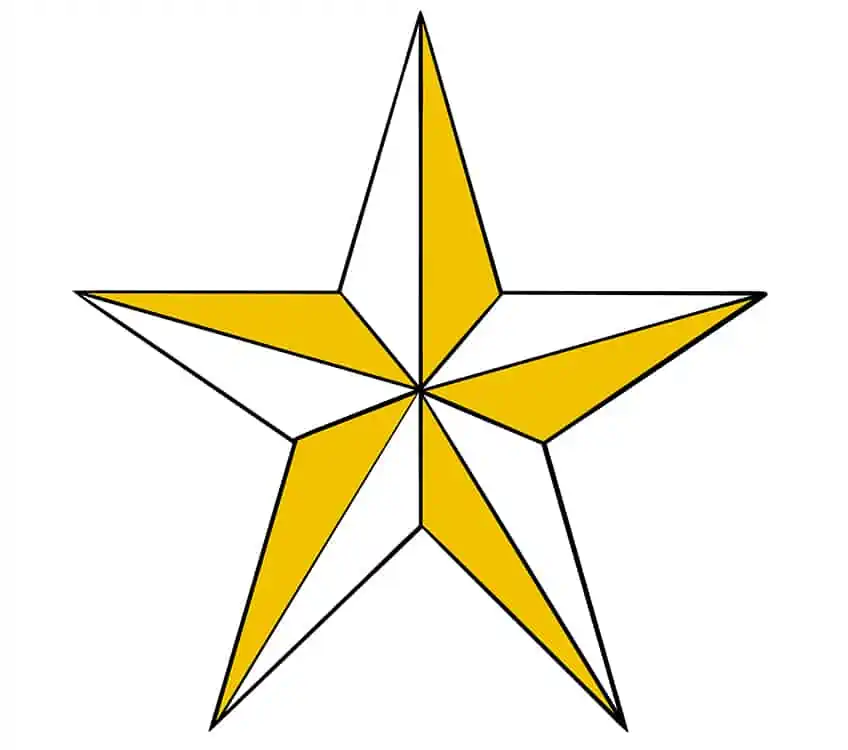
Step 7: The First Layer of Color on Your Star Drawing
Choose a sharp-point paintbrush and a golden color for the first layer of color. You will only want to color on the right side of each point. You will be using a different shade of yellow-colored paint for the left-hand side points of your star sketch.

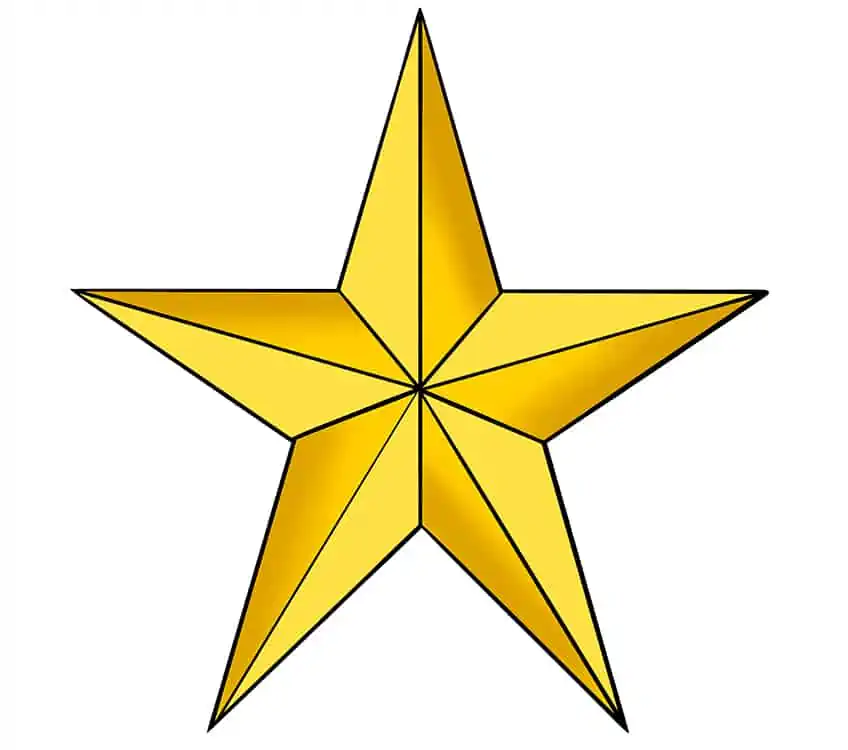
Step 8: Adding More Color to Your Stars Sketch
Focusing on the left-hand side of the points of your star, you can now use a lighter shade of gold and using a fine paintbrush. The color is now complete for your star drawing.


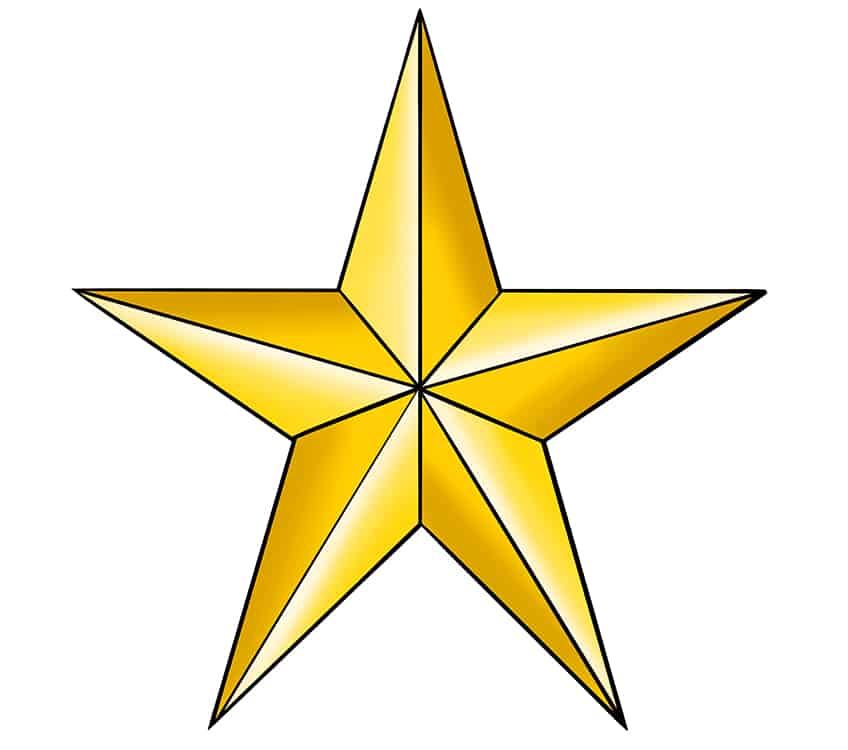
Step 9: Adding Shading to Your Star Drawing
Using a soft-tip paintbrush and a tiny bit of black paint, you can begin to add shading to your star sketch. You can add this shading on the right-hand side of each point. You will want to ensure that there is some gradient, meaning the darker parts of shading are on the edge of the five-point star and lightening as it fades inwards. Once complete with this step, take a clean blending paintbrush and blend the black shading into the yellow to help create a smoother finish.

Step 10: Creating Highlights on the Five-Point Star
You will now add some highlights to your five-point star. If you want a three-dimensional and realistic-looking star drawing, this step cannot be ignored. Using a small blending paintbrush and a little bit of white paint, you can now trace each point’s center lines as well as to the left half of each point.

Step 11: Completing Your Stars Sketch
The final step to completing your five-point star is to get rid of all the black outlining. This will help the edges of your star drawing to appear seamless. Simply select a finer tipped paintbrush and corresponding colors to trace over the outline.


Step 12: Final Additions to Your Star Drawing
Should you wish to give your star drawing even more third-dimensional appeal, all that you need to do is use a small blending paintbrush and once again trace along the star’s point edges, this time using black paint.


If you did not know how to draw a star before, we trust that by the end of this tutorial you will be equipped with all the understanding of how to draw a five-point star! We hope that you are pleased with your end result and continue drawing this fun shape in the future!
Frequently Asked Questions
How Do You Draw a Perfect Five-Point Star?
Learning how to draw a star is easy with a fun and easy-to-follow guide like this one. The star shape can be a tricky one to draw as it requires perfect symmetry, Our 12 simple step guide will show you exactly how to draw the perfect star.
Can You Hand-Draw a Three-Dimensional Star?
It most certainly is possible to draw a three-dimensional star by hand! Our easy star drawing tutorial will teach you how by using strategically-placed shadows and highlights which help give the illusion of a realistic-looking star.