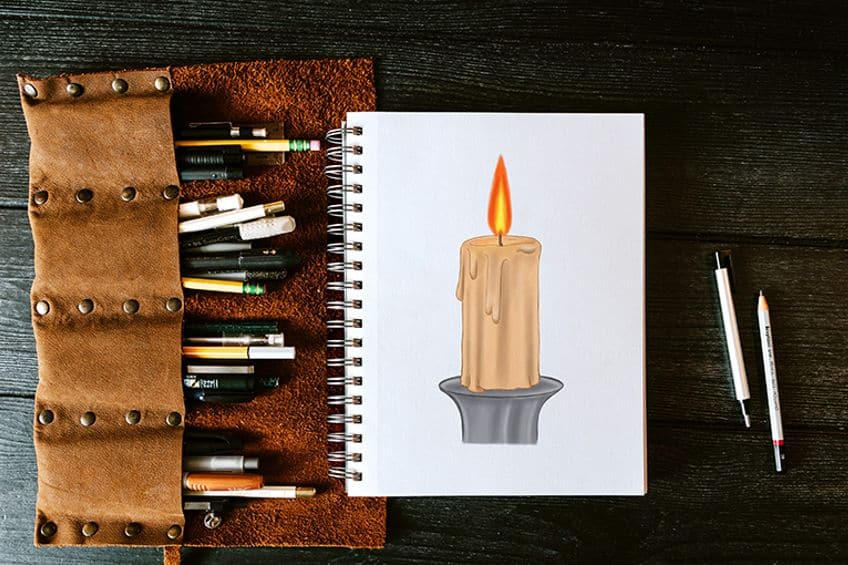

How to Draw a Candle – Sketch a Flaming Candle in 14 Steps
This post may contain affiliate links. We may earn a small commission from purchases made through them, at no additional cost to you.
Candles have a special role in so many of our activities, serving as symbols of calm, devotion, and comfort. Burning a candle allows us to take deep breaths and appreciate the elegance of the modest dancing flame. In today’s sketching guide, we’ll learn how to draw a candle step by step. Not only will we explain to you how to render the pouring wax of your candle sketch, but we will also include every other necessary step to produce a life-like candle flame drawing.
Table of Contents
- 1 Drawing Candles Step by Step
- 1.1 Step 1: Creating a Basic Cylinder Shape
- 1.2 Step 2: Rendering the Candle Sketch’s Plate
- 1.3 Step 3: Giving Form to Your Easy Candle Drawing’s Base
- 1.4 Step 4: Candle Flame Drawing
- 1.5 Step 5: Rendering the Outline
- 1.6 Step 6: Addition of the Colors
- 1.7 Step 7: Start Adding Color to the Candle Sketch
- 1.8 Step 8: Creating the Candle Holder’s Shadows
- 1.9 Step 9: Completing the Color Stage of This Guide to Drawing Candles
- 1.10 Step 10: The Final Outline of Your Easy Candle Drawing
- 1.11 Step 11: Coloring Your Candle Flame Drawing
- 1.12 Step 12: Making the Flame Color Stronger
- 1.13 Step 13: Making the Flame Color Deeper
- 1.14 Step 14: Completing the Guide on How to Draw a Candle
- 2 Frequently Asked Questions
Drawing Candles Step by Step
Initiating a drawing piece can be intimidating for many novices and even seasoned artists. We’ll utilize a number of building techniques and shapes to help you master your very first candle drawing right from the start. These first stages will assist us in establishing the ultimate form of the candle drawing, allowing us to subsequently add color and detail without having to remove any of our work. Construction forms will also assist us in ensuring that our easy candle drawing sits correctly on the canvas. In the candle drawing beneath, you can observe a broad outline of the stages.


We’ll start adding color in the final eight phases of our candle sketching lesson. We’re using a painting technique for these coloring processes, but you’re free to use anything you like. If you’re a digital artist, you can conveniently use a creating tablet, with the development, outline, and coloring aspects all on separate layers. If you’re using more tactile media, such as colored pencils or paint, we recommend using an erasable pencil for the building phases.
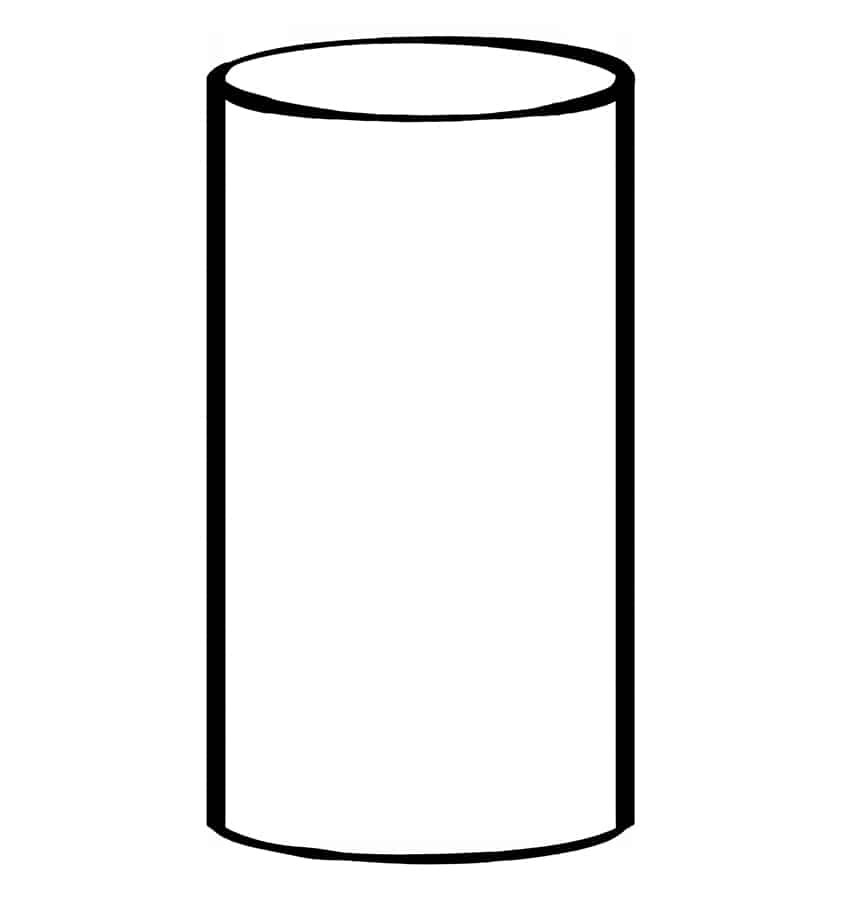
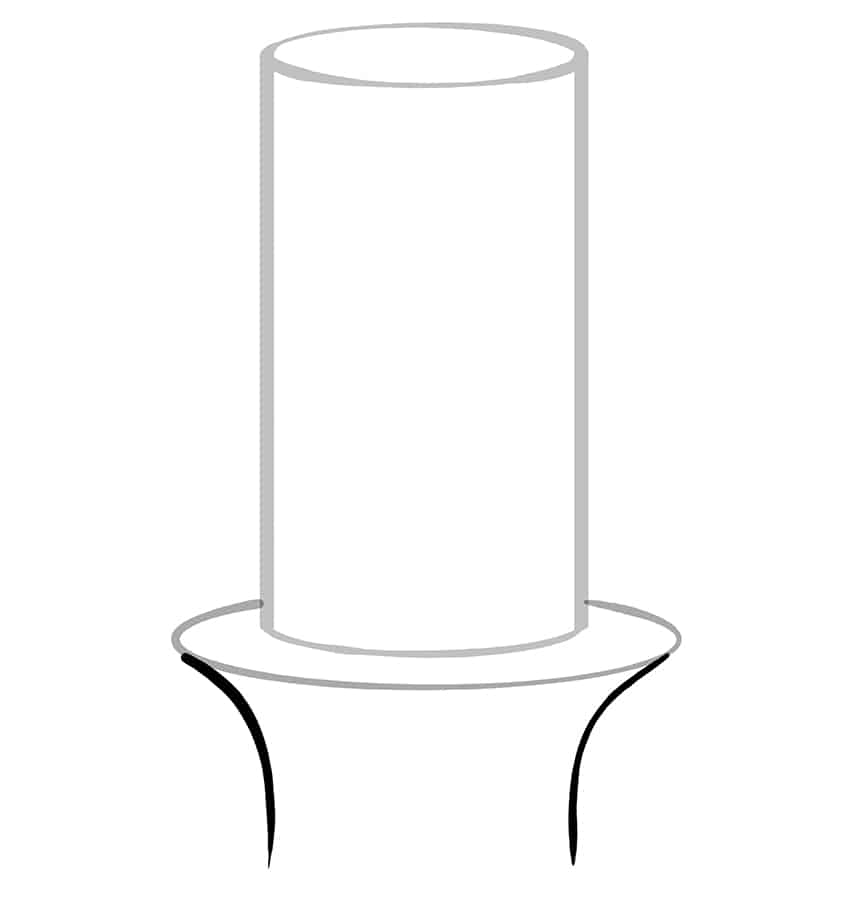
Step 1: Creating a Basic Cylinder Shape
To start your candle drawing, locate the middle of your canvas. Draw a lengthy cylinder once you’ve found this location. This structure will serve as the foundation for your candle painting, and we will add the flames and candle foundation to it in the subsequent subsections. As a result, allow plenty of room around the cylinder.

Step 2: Rendering the Candle Sketch’s Plate
Draw a thin oval shape at the bottom of your cylinder. This oval structure should be broader than the candle’s bottom and should not reach too far below it. In the next phases, we’ll use this foundation form to make the candle holder.


Step 3: Giving Form to Your Easy Candle Drawing’s Base
In this phase, we will continue to shape the contour of the bottom of your candle drawing. You may draw an arching line on either side of the bottom plate you sketched in the previous stage. These lines should flow in and out, eventually becoming parallel. This foundation must be the same width as the actual candle.

Step 4: Candle Flame Drawing
We’re now going to sketch a candle flame. Find the center of your cylinder’s top and draw a small line to depict the waxy stem of your candle drawing. You may now create the flame of your candle sketch from the top of this stem line. The flame should be broader at the bottom and narrower at the top, with a curved tip at the top.
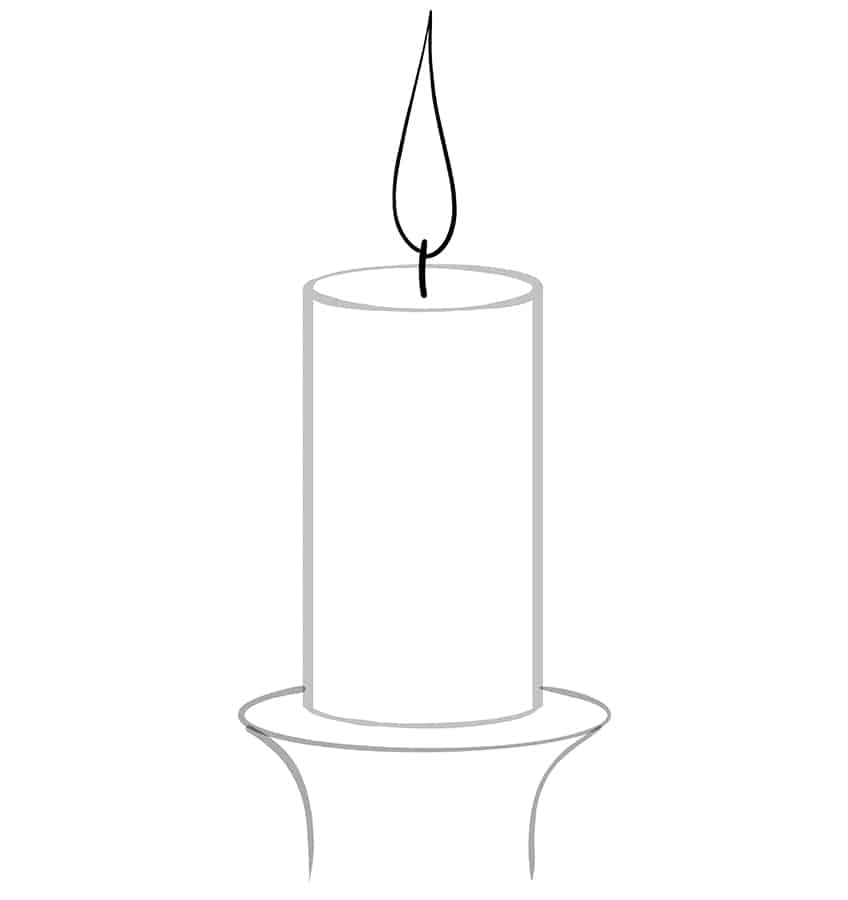

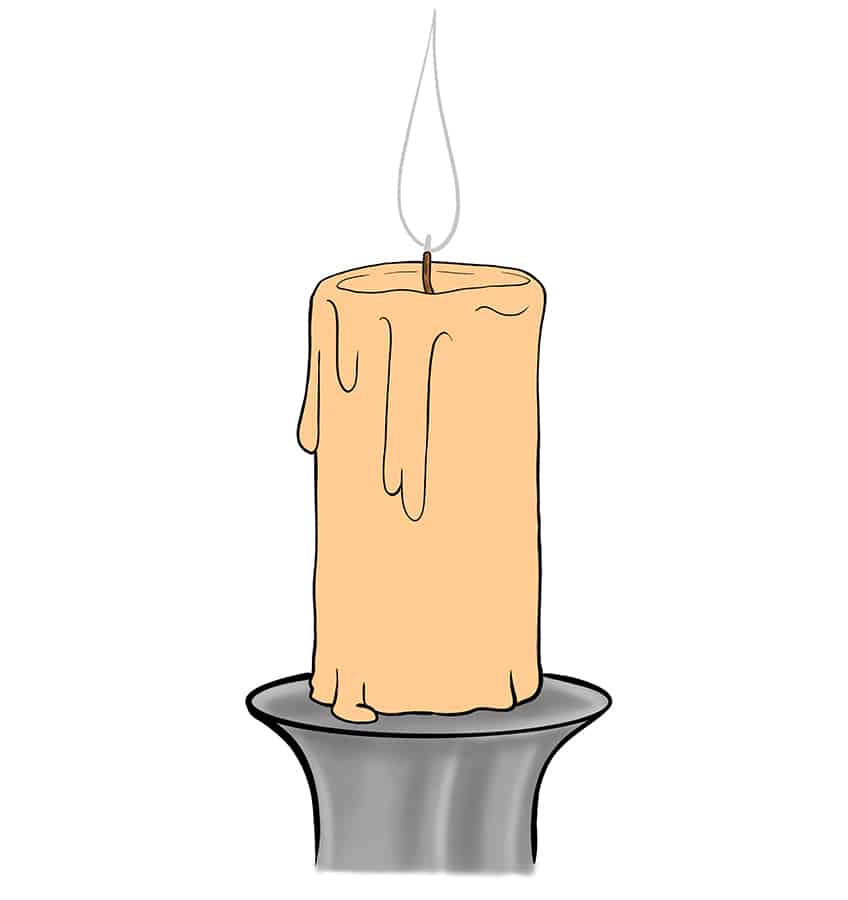
Step 5: Rendering the Outline
In this phase of the “how to draw a candle” guide, we’ll add melted wax texture to the building form and outline the contour of our candle drawing more realistically. Round out the edges and add some lengthy droplets of wax to the bottom and top of the candle using the building shape as a guide. Outline the wick with a thicker line. Excluding the flame, you can eliminate the construction lines once you’ve completed this detailing. In the following phases, we’ll employ the flame building form to aid with coloring.


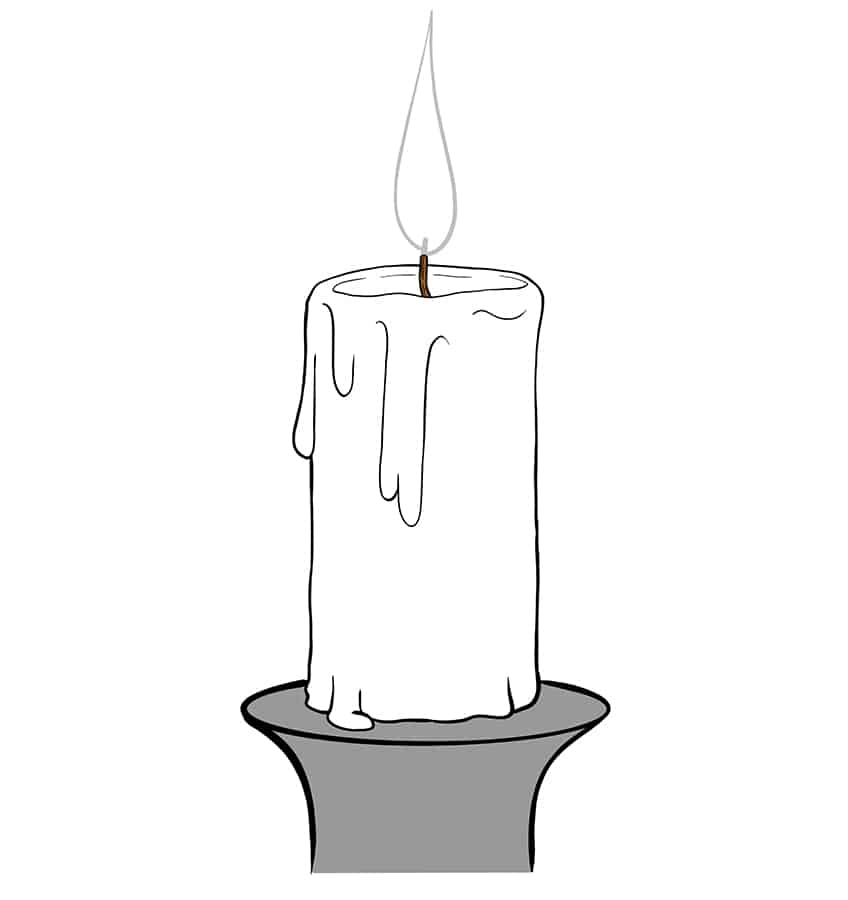
Step 6: Addition of the Colors
To start our coloring procedure, we will apply color to the bottom and wick of our candle drawing. Filling in the base of the candle holder with a standard brush and some dark gray paint. Make certain that the color coat is even and free of blemishes. Fill in the form of the wick with dark brown paint using a very delicate paintbrush.

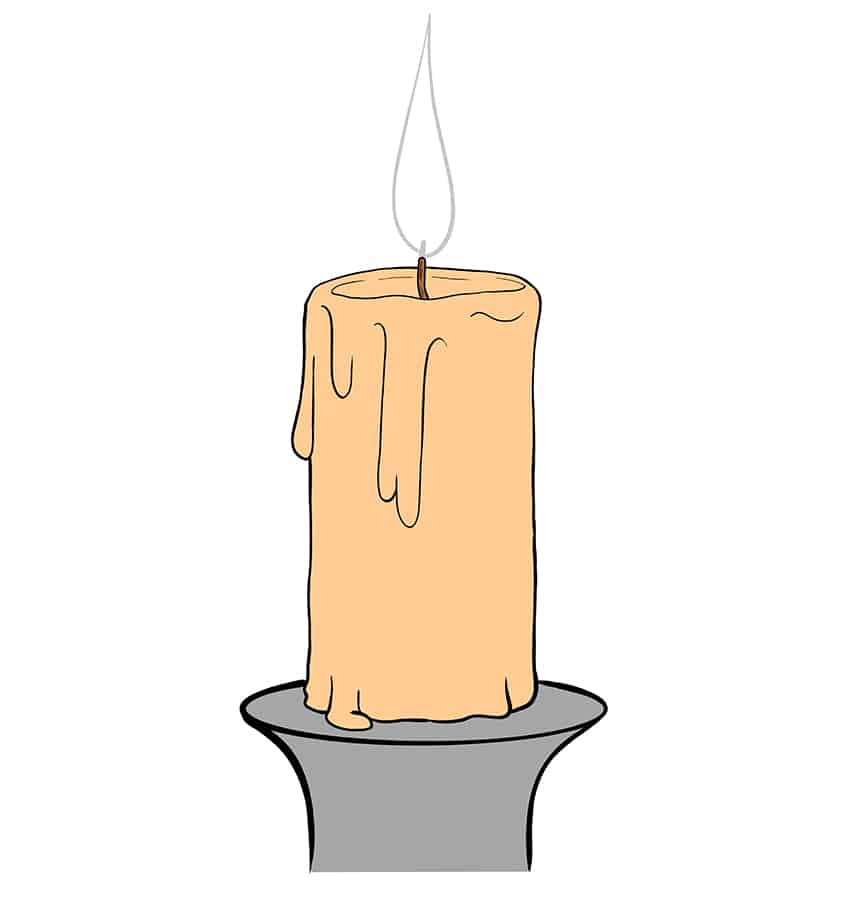
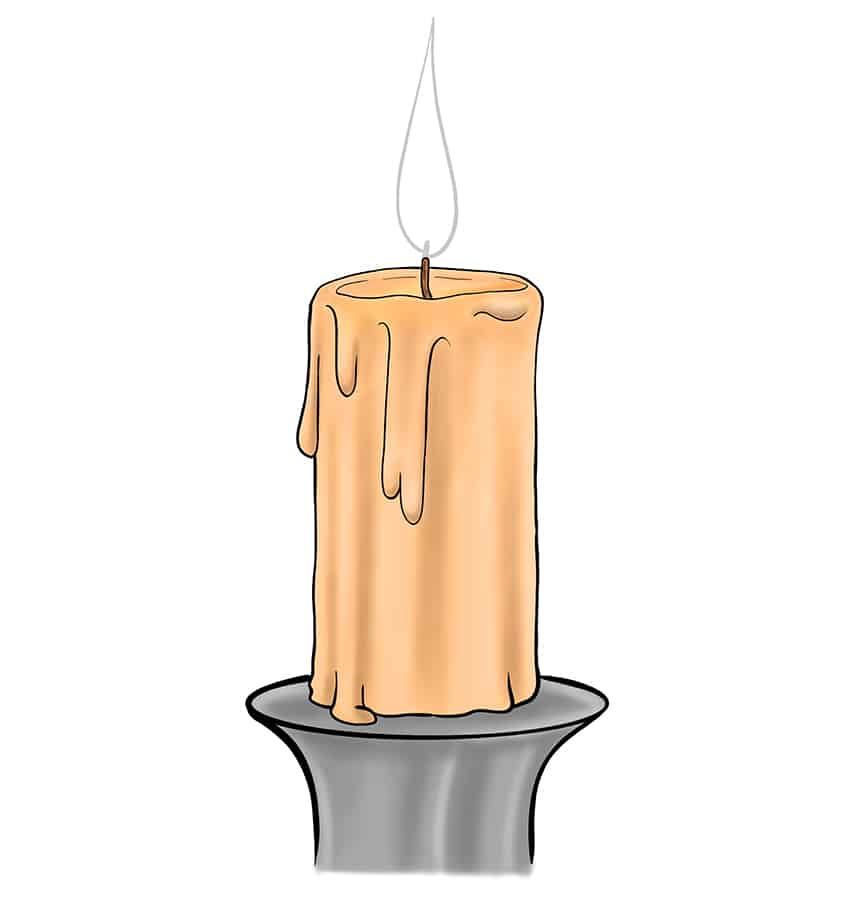
Step 7: Start Adding Color to the Candle Sketch
You will now add a first color layer to your candle sketch’s column. Fill the whole form of the wax candle with tan or light orange paint using a standard brush. Check to ensure that the color coat is even and that there are no darker patches. In the following sections, we will add depth and complexity to our candle designs by experimenting with various shade variations.

Step 8: Creating the Candle Holder’s Shadows
You may now use a mixing brush and dark gray paint to add dimension to the foundation of your candle stand. Gently mix in some shadows around the base of the dish and along the borders of the base to provide character and depth. To complete the foundation shape, use a tiny mixing brush and some white paint to make numerous strokes along the base.

Step 9: Completing the Color Stage of This Guide to Drawing Candles
Apply shading to the melting wax lines with a delicate brush and darker gray paint. This will aid in the creation of shape inside the form of the candle. Then, using a tiny blending brush and some yellow paint, put a little glimmer around the bottom of the wick. Then, with a mild orange tint, continue the cycle. Use a fresh soft brush to mix the hues together to level out the blending. Finish by adding some highlights between the initial color coat and the darkened lines using a tiny mixing brush and a dab of white paint.

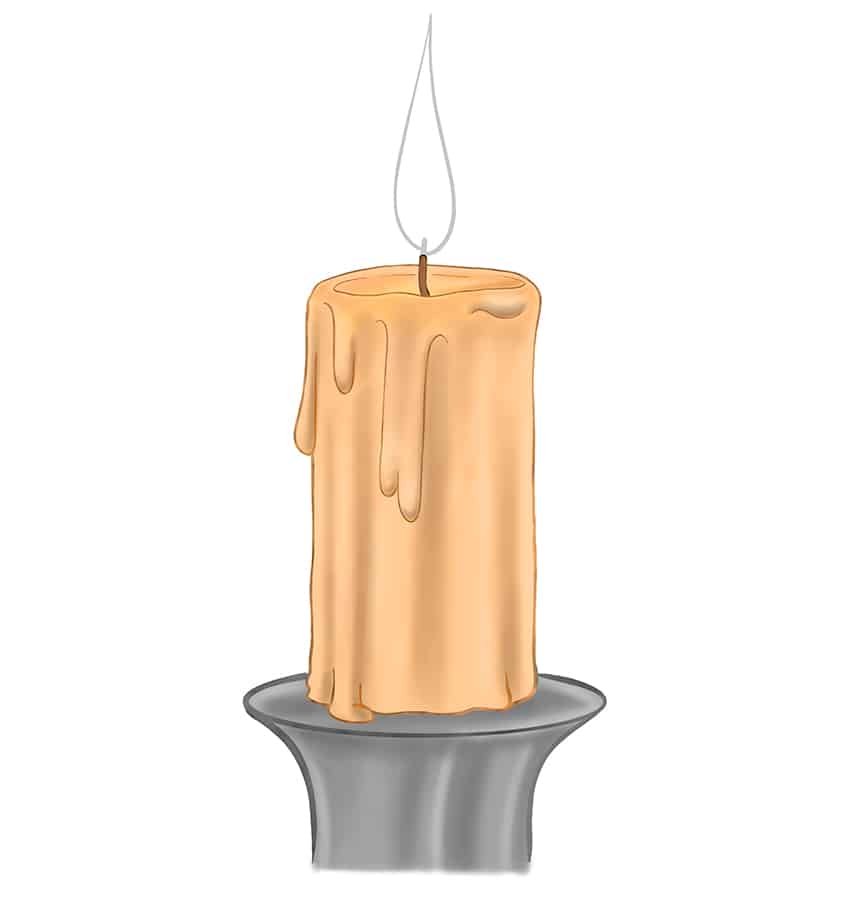
Step 10: The Final Outline of Your Easy Candle Drawing
Before we begin coloring the candle flame design, we’ll eliminate the sharp edges around the candle and the base. Outline the shape of the bottom dish and base using a fine brush and gray paint. Use the same shade of apricot or tan that you used for the tinting to draw the outlines of the candles, wicks, and wax lines for the candle pillar. You should now have a smooth candle design with no obvious black outlines.

Step 11: Coloring Your Candle Flame Drawing
Now that we’ve completed the bulk of this easy candle drawing, we can go on to coloring the flame. Color over the flame’s building lines with a gentle mixing brush and some lighter orange paint. We’ll be filling in a portion of the inner flame with a distinct color, so leave some of it unfilled.

Step 12: Making the Flame Color Stronger
This is a quick and easy process. All you have to do now is repeat the previous process, darkening the outside of the flame. For this phase, use a little brighter orange. The usage of several orange tones will aid in the creation of a smooth and natural mix inside the candle flame painting.

Step 13: Making the Flame Color Deeper
To the middle of the candle flame drawing, we’ll now add a last orange color variant. For this phase, use a tiny mixing brush and also a very light shade of tangerine. Add this lighter shade of orange to the inner section of the flame within the outside blend of orange. You should still leave a very little blank space in the middle of your flame.
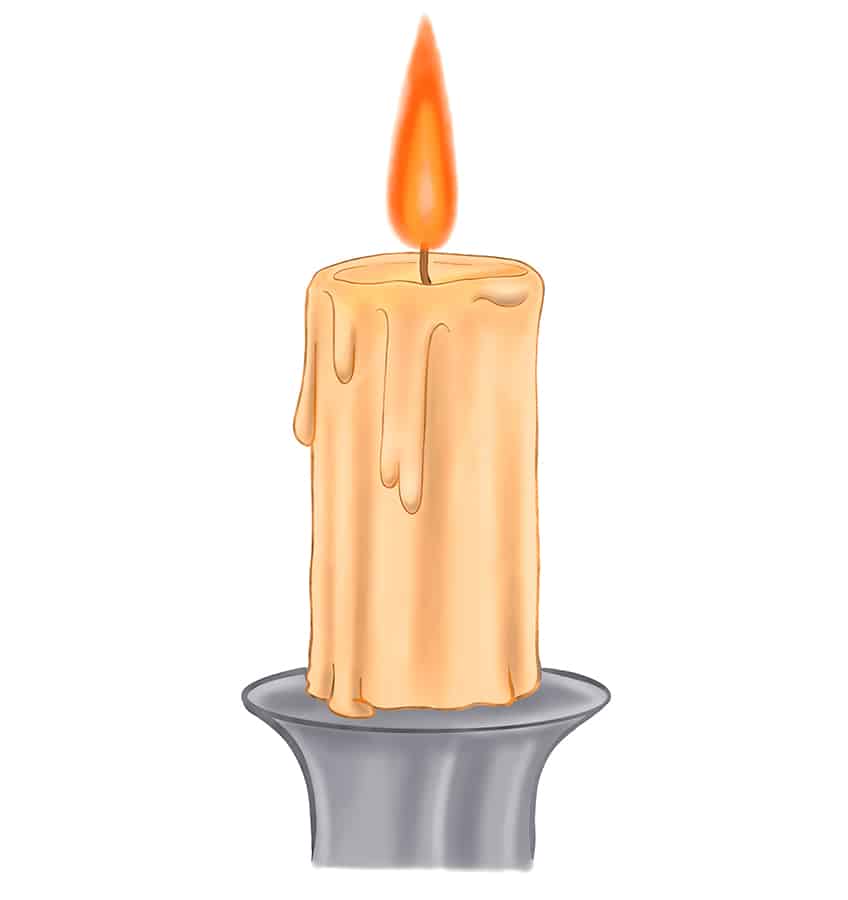

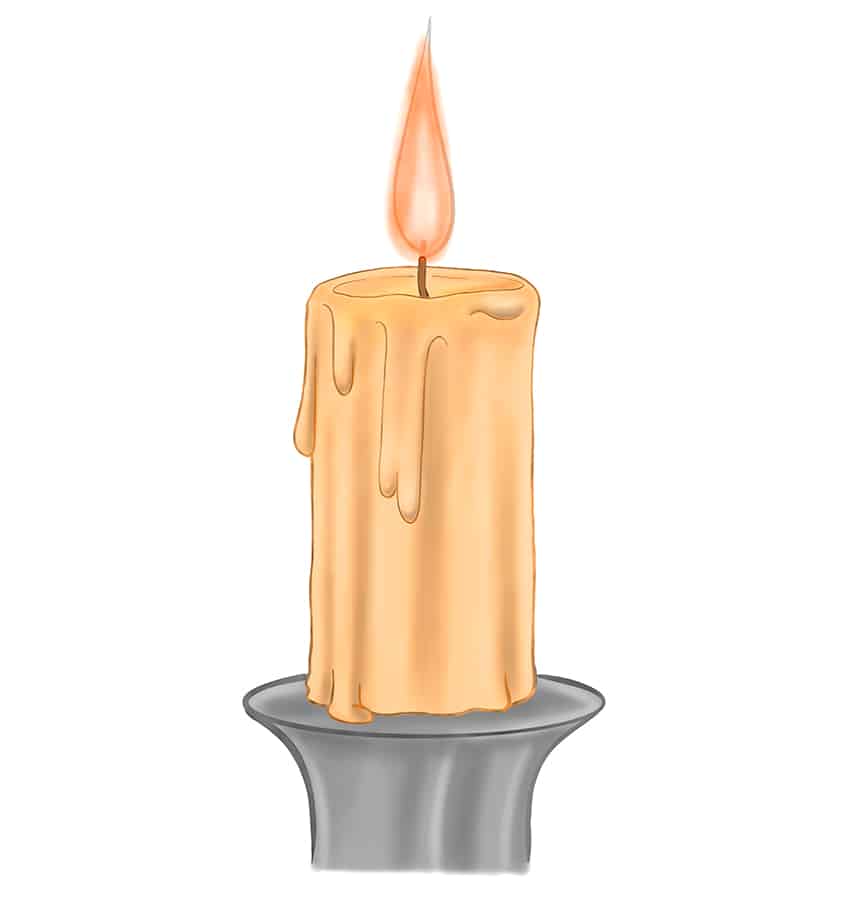
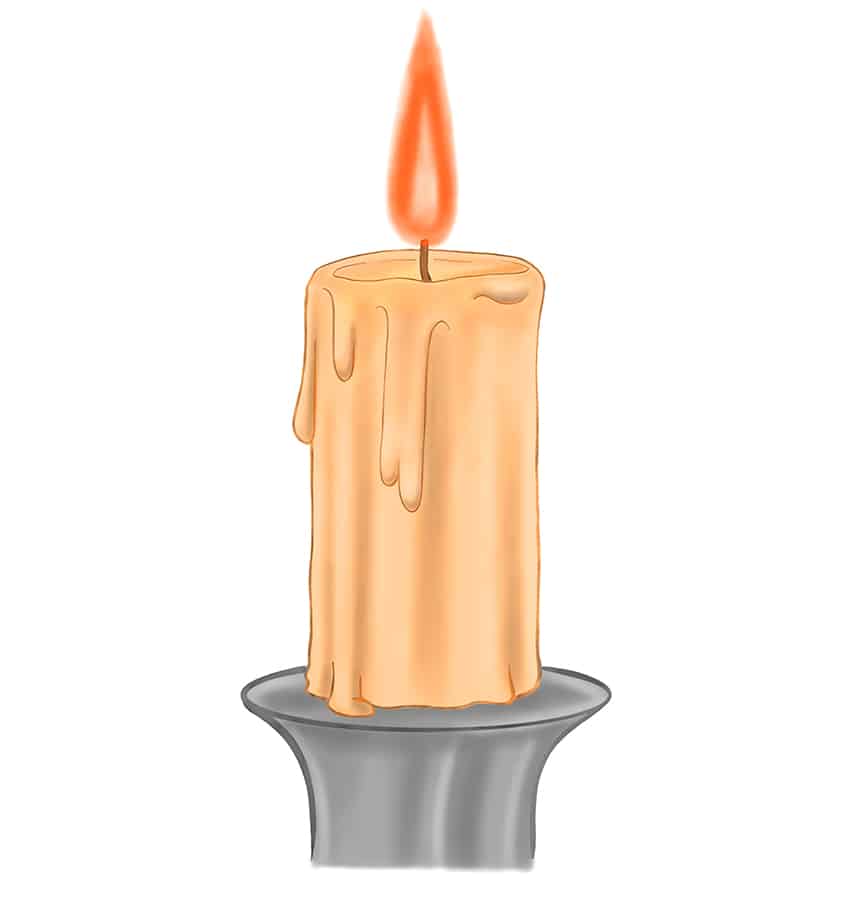
Step 14: Completing the Guide on How to Draw a Candle
To complete your simple candle painting, use a brighter yellow hue and a delicate brush to add a bigger spot to the middle of your flame. To complete your candle drawing, spread and mix the flaming colors together with a fresh mixing brush. This will result in more natural and consistent light.


How simple was it to produce a lovely and flawless candle sketch? In only 14 easy-to-follow steps, you can generate a realistic and simple candle drawing using building markings and a few flawlessly blended colors! We hope you’ve liked the technique of drawing candles, and that now that you’ve mastered the fundamentals, you’ll be able to draw a broad variety of various candles!
Frequently Asked Questions
What Specific Colors Should One Use for Candle Drawings?
The colors you may choose for a simple candle drawing are almost limitless. We selected tan colors to make a neutral candle, although candles can come in a broad variety of varied and intriguing colors! A combination of different tones of orange and yellow can provide a realistic flickering look for the flame. However, since this is your unique creation, we encourage you to use whichever colors best suit your mood, or perhaps your room color scheme where you plan to exhibit your lovely work!
How Do I Create a Life-Like Candle Flame Drawing?
The key to creating a realistic flame drawing is in the colors you select and how they are blended together. Use three distinct orange and yellow tones, with the darkest shades along the perimeter and the brightest yellow in the middle. This would be our best recommendation to achieve the effect you desire.