
How to Draw a Calla Lily – Your Guide to Drawing Lifelike Arum Lilies
This post may contain affiliate links. We may earn a small commission from purchases made through them, at no additional cost to you.
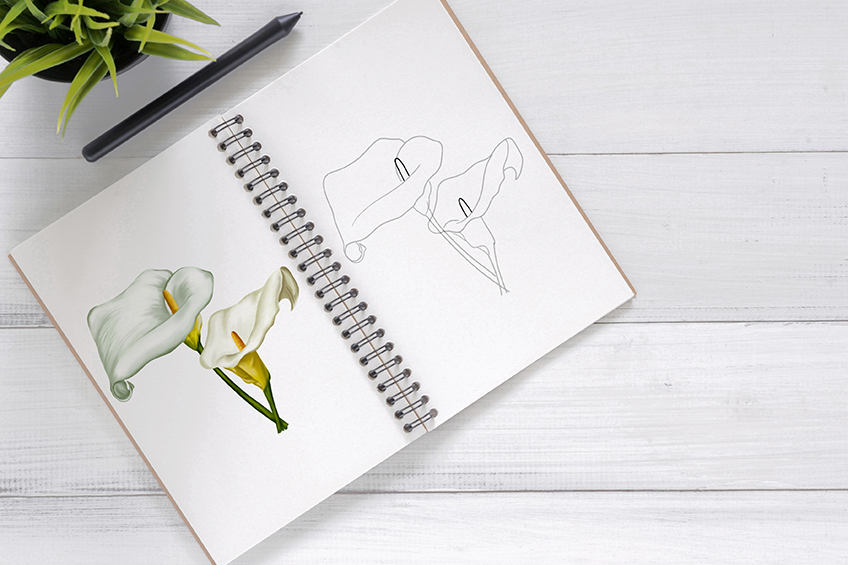
The luxurious calla lily or arum lily is one of the most beautiful lily flower species (although it is not technically a lily). This elegant plant is indigenous to Southern Africa and grows wild all around Lesotho down to the Western Cape. Often a popular choice for weddings or funerals, this flower encompasses style and grace. To learn how to create a calla lily is very simple! Just follow our tutorial, and you will be able to make a realistic calla lily drawing in no time! Now, choose your art tools and we shall begin!
Table of Contents
- 1 How to Draw a Calla Lily in 21 Easy Steps
- 1.1 Step 1: Create the Stem of Your Calla Lily Sketch
- 1.2 Step 2: Draw the Shape of Your Calla Lily Outline
- 1.3 Step 3: Constructing the Shape of Your Realistic Calla Lilly Drawing’s Cups
- 1.4 Step 4: Add the Spadix to Your Lily Flower Drawing
- 1.5 Step 5: Apply Color to the Petals of Your Calla Lily Outline
- 1.6 Step 6: Apply Color to Your Calla Lily Drawing’s Flower Cups
- 1.7 Step 7: Apply Color to the Stem of Your Calla Lily Drawing
- 1.8 Step 8: Color the Spadix of Your Calla Lily Outline
- 1.9 Step 9: Add Highlights to Your Lily Flower Drawing
- 1.10 Step 10: Create Texture in Your Calla Lily Drawing
- 1.11 Step 11: Shade the Flowers of Your Realistic Calla Lily Drawing
- 1.12 Step 12: Create Texture on Your Lily Flower Drawing
- 1.13 Step 13: Add Contouring to Your Calla Lily Sketch’s Flower Cups
- 1.14 Step 14: Shade the Flower Cups of Your Calla Lily Drawing
- 1.15 Step 15: Apply Highlights to the Flower Cups of Your Calla Lily Sketch
- 1.16 Step 16: Shade the Stem of Your Realistic Calla Lilly Drawing
- 1.17 Step 17: Add Highlights to Your Lily Flower Drawing’s Stem
- 1.18 Step 18: Shade the Spadices of Your Calla Lily Drawing
- 1.19 Step 19: Create Texture on Your Calla Lily Outline’s Spadix
- 1.20 Step 20: Enrich the Texture of the Spadix of Your Calla Lily Drawing
- 1.21 Step 21: Complete Your Sketch of a Calla Lily Flower
- 2 Frequently Asked Questions
How to Draw a Calla Lily in 21 Easy Steps
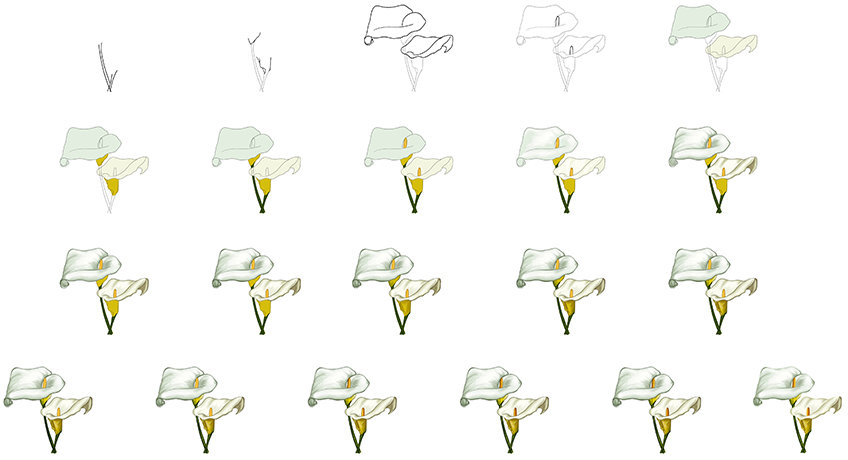
The calla lily is a popular flower, and it would be a shame to miss out on learning how to draw a calla lily! Below, you can study the 21 steps that you will be competing in this fun and simple guide. By the end, you will have learned the basics of creating a calla lily outline and how to add color and texture for a realistic calla lily drawing.

This 21-step guide is easy to pursue and understand. Take your time and work thoroughly through every stage. This how-to-draw-a-call-lily tutorial was made for a painting medium, but you are welcome to adapt it to any physical or digital medium you choose. If you use a design tablet, you will need to create separate layers for each step.
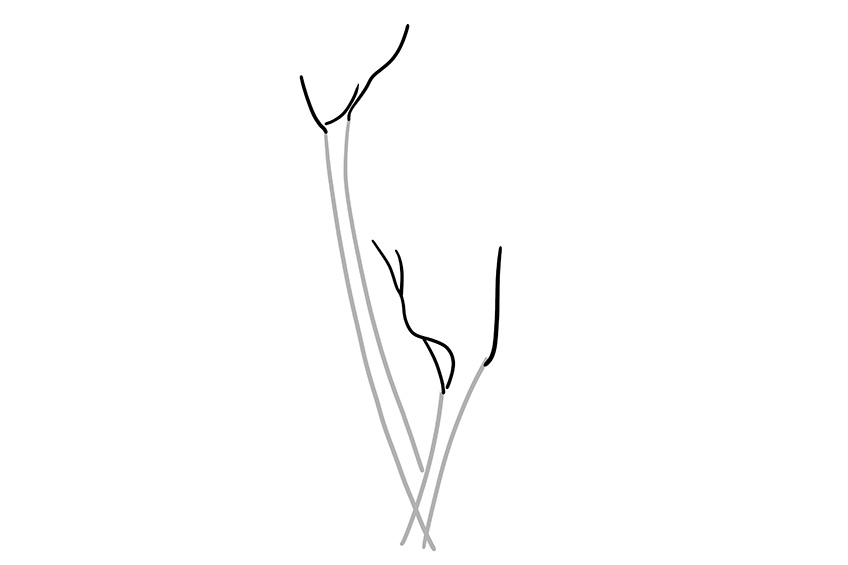
Step 1: Create the Stem of Your Calla Lily Sketch
To begin this how-to-draw-a-call-lily tutorial, you must draw the flower stems. We will draw two flowers today. To sketch the correct perception, you must draw the first stem long, and the second much shorter. Your calla lily drawing should look like the first picture of the diagram.


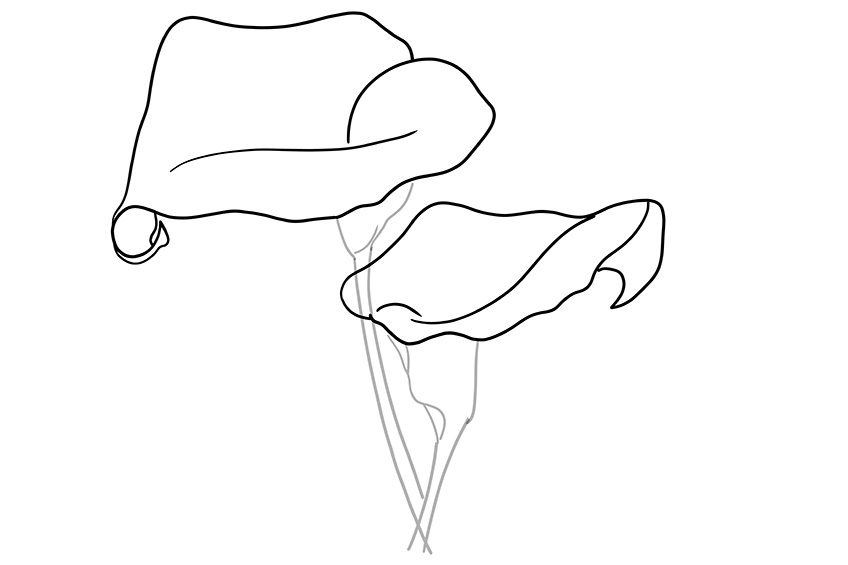
Step 2: Draw the Shape of Your Calla Lily Outline
Next, at the very top of your two stems, you must add the flower cup outlines. Take note, that both flower cups will be the main focus of your calla lily drawing.

Step 3: Constructing the Shape of Your Realistic Calla Lilly Drawing’s Cups
This part will be a little tricky. You must construct the shape of your realistic calla lily drawing by adding the calla lily shape to the flower cups you drew in the previous step. Using a light pencil, create gentle outlines. Create a curved arch on the opposite ends of the individual calla lily flower finishing off with an inward curl.
Use the image below for reference. This part of the calla lily is called the spathe.

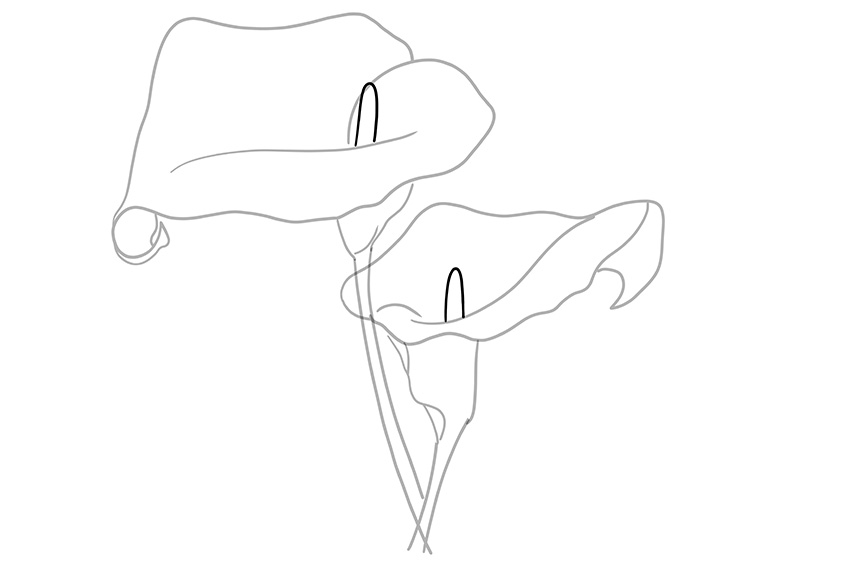
Step 4: Add the Spadix to Your Lily Flower Drawing
The most distinct feature of a calla lily is the yellow pollen-covered spike protruding from the center of the lily flower. This is called a spadix. Draw the spadix relative to the size and proportion of each calla lily, and you can align it to the flower stem.

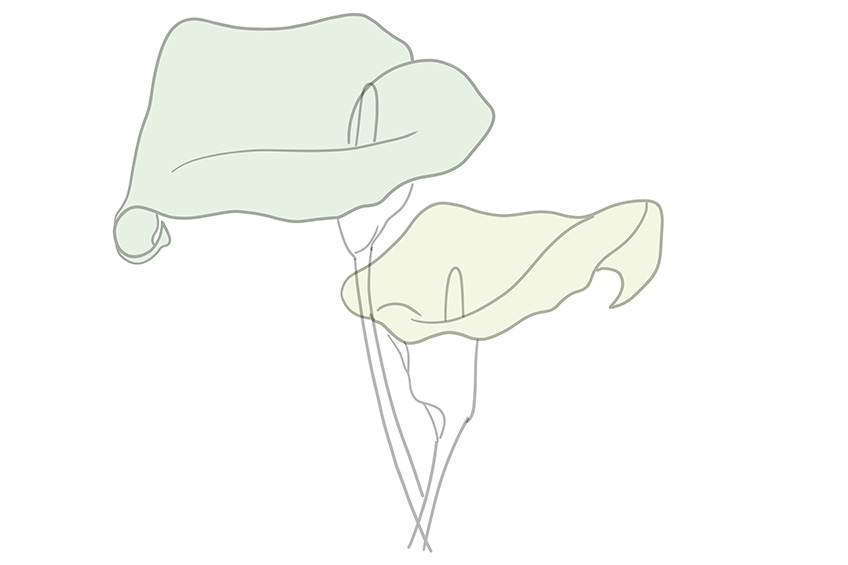
Step 5: Apply Color to the Petals of Your Calla Lily Outline
You have completed creating the outline of your lily flower drawing. The next phase will be to add the first coat of color. Use a pistachio green shade of paint and a regular paintbrush and cover the larger top part of your calla lily outline.
Repeat the coating process on the rest of your calla lily sketch. Use a light beige color.

Step 6: Apply Color to Your Calla Lily Drawing’s Flower Cups
In this step, you can continue applying the first coats of color. You should use mustard yellow and a small paintbrush to coat the flower cups.
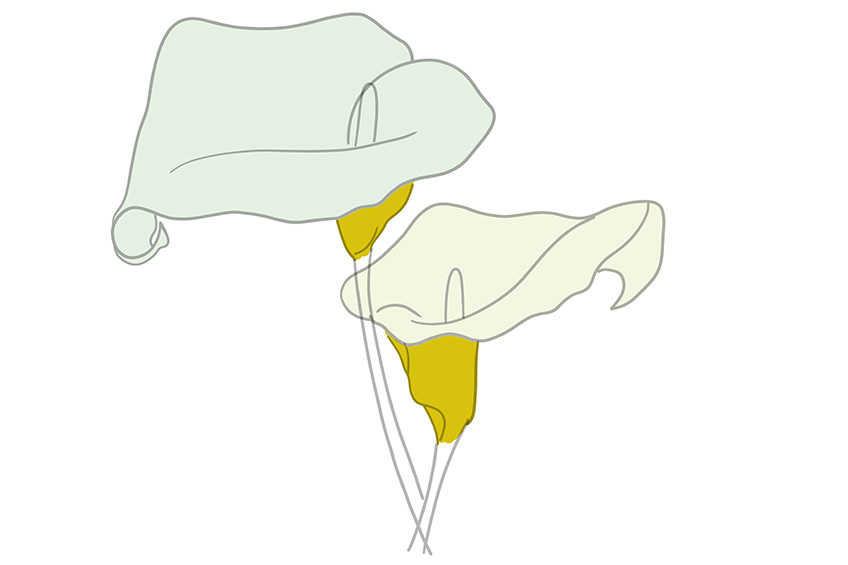

Step 7: Apply Color to the Stem of Your Calla Lily Drawing
Apply a dark green shade of paint to the stems of your calla lily drawing by using a small paintbrush. Cover any overlapping foundation lines from the beginning steps of this how-to-draw-a-calla-lily tutorial.
These lines can also be erased.
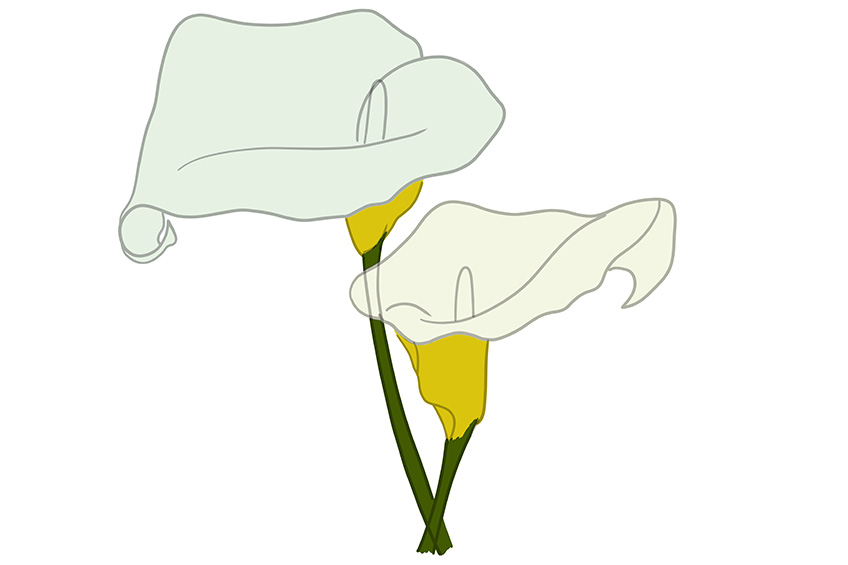

Step 8: Color the Spadix of Your Calla Lily Outline
The spadix is the final part of your calla lily outline that needs a coat of paint. Take a small paintbrush and yellow paint and fill in the spadix of your realistic calla lily drawing.

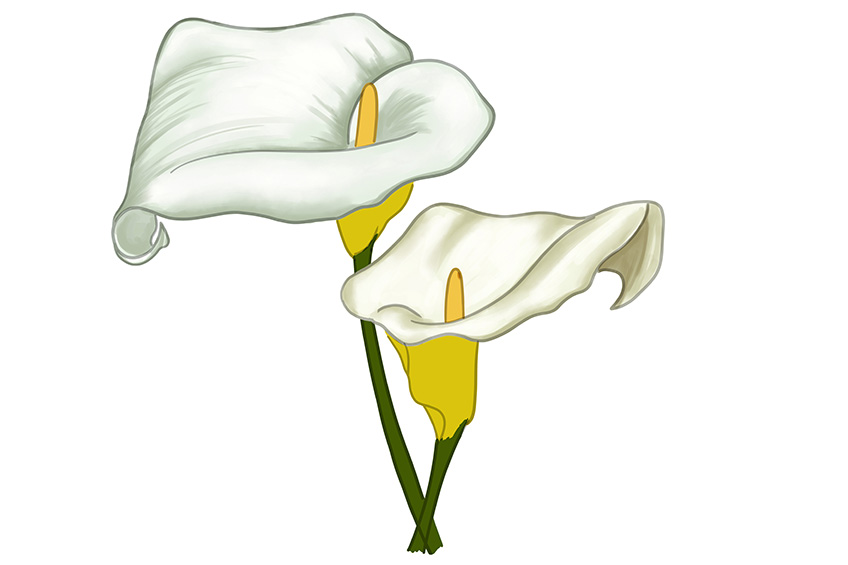
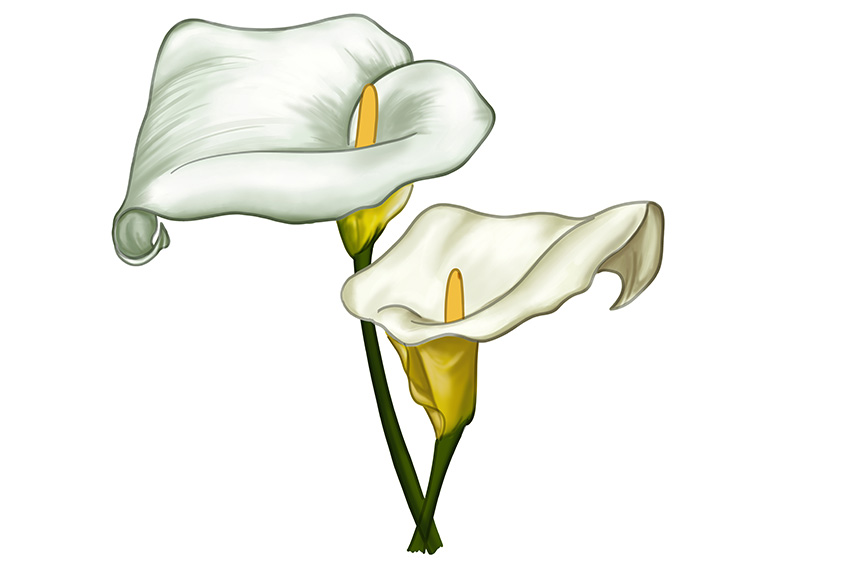
Step 9: Add Highlights to Your Lily Flower Drawing
Your calla lily drawing should be completely coated with color now! You can start adding highlights. To do this, you should add white paint using a soft paintbrush and gently apply brush strokes along the curves and edges of each calla lily.
Be sure to leave a visible amount of the original color in the middle of each petal.

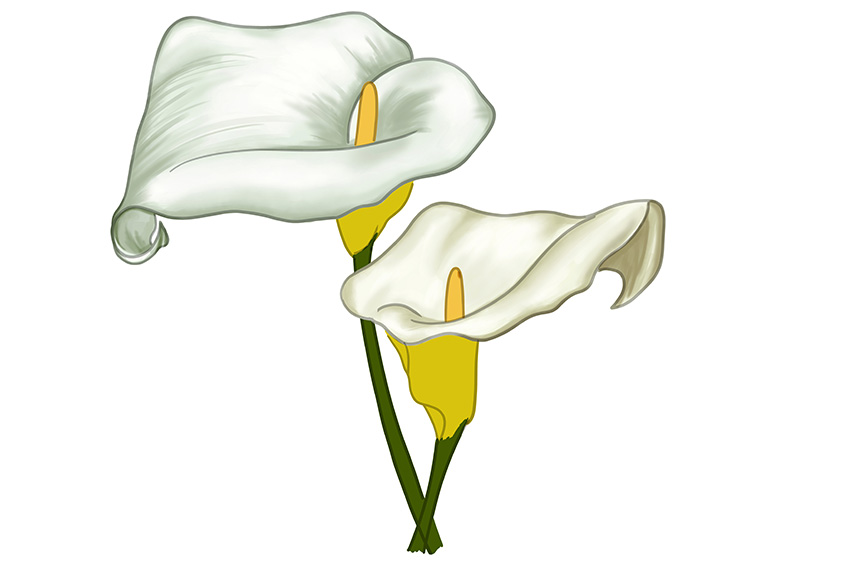
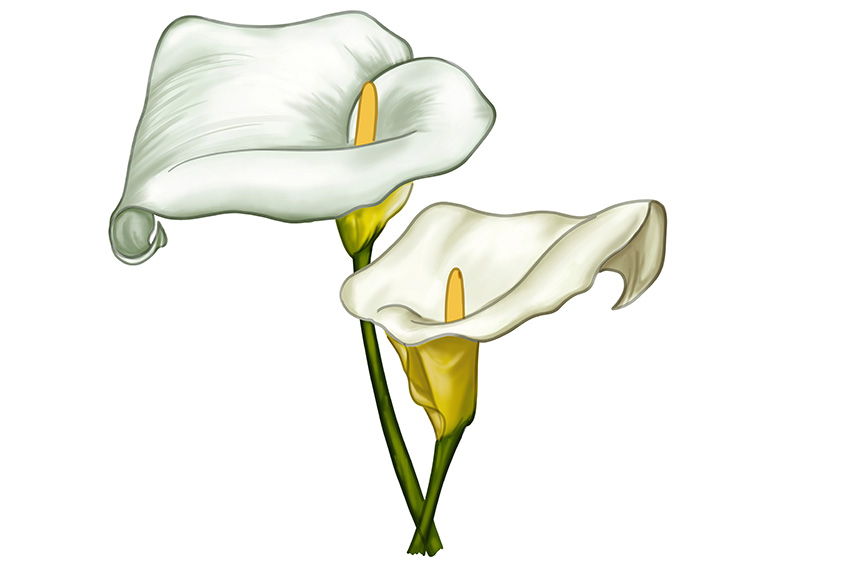
Step 10: Create Texture in Your Calla Lily Drawing
Concentrating on the petals, you can create texture on your realistic calla lily drawing by adding a darker shade to your sketch. Take a fine paintbrush and a dark gray shade of paint and create texture lines along the edges of the flower. Paint gentle lines from the middle of the petal to its edges, and along the underside. Next, you will take a touch of dark olive-green paint and lightly add lines to the smaller calla lily flower edges and curves.

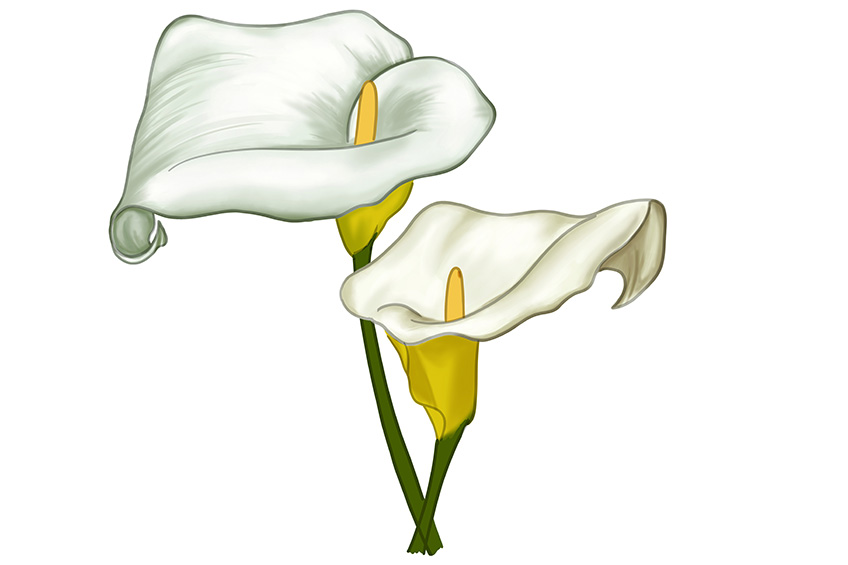
Step 11: Shade the Flowers of Your Realistic Calla Lily Drawing
Once you have completed adding the texture lines to your calla lily, you can gently blend the lines using a small blending paintbrush.
This action is to moderate the intensity of the texture lines by smoothing them out.

Step 12: Create Texture on Your Lily Flower Drawing
To create the tone, you must boost the general texture of your lily flower drawing. Using a shade of gray paint and a sharp paint brush, carefully sweep the paintbrush along the textured lines of the inner flower. Once that is complete, you can use a softer paintbrush to tone down the flower edges. Now, add some highlights using white paint.


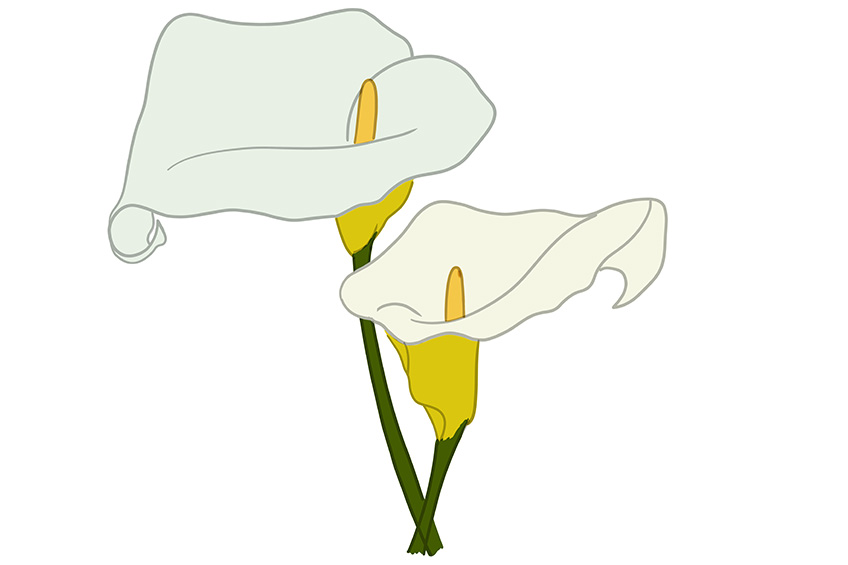
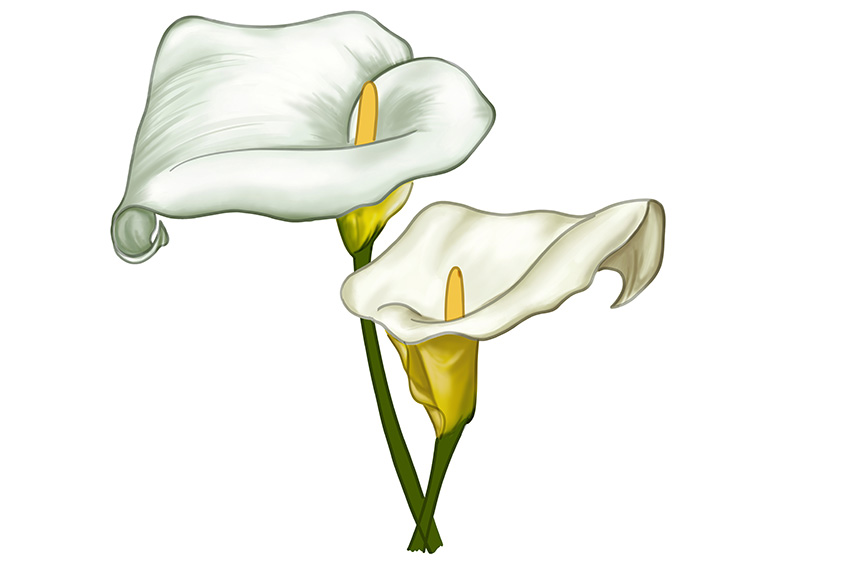
Step 13: Add Contouring to Your Calla Lily Sketch’s Flower Cups
Moving your focus to the flower cups of your realistic calla lily flower drawing, use a touch of gray paint with a small paintbrush and begin contouring light on each of the individual lily flower cups.
Be sure to allow the base coat to still be visible through this coat of paint.

Step 14: Shade the Flower Cups of Your Calla Lily Drawing
It is a good idea to begin shading the flower cups of your lily flower drawing. You can enhance the edges of the contouring lines using a soft paintbrush and a touch of black paint. Next, take a soft paintbrush and smooth the area where the stem meets the flower cup. You can also smooth the shading between the two.


Step 15: Apply Highlights to the Flower Cups of Your Calla Lily Sketch
This step is all about creating highlights on the flower cups of your lily drawing. Use a soft paintbrush and a smidgen of white paint and gently add fine highlights to the edges of the individual flower cups.

Step 16: Shade the Stem of Your Realistic Calla Lilly Drawing
By adding a touch of black paint, you can continue to shade the stem. Using a soft paintbrush, begin to add shading to both flower stems. Be sure to have the original coat of color peeping through.
Don’t cover it completely!

Step 17: Add Highlights to Your Lily Flower Drawing’s Stem
The stem of your lily flower drawing should be dark at this point. You need to add highlights to the stem of your realistic calla lily drawing now. Take a soft paintbrush and a touch of bright green and a smidgen of mustard yellow paint, and apply the highlights onto the shaded area of your stems.

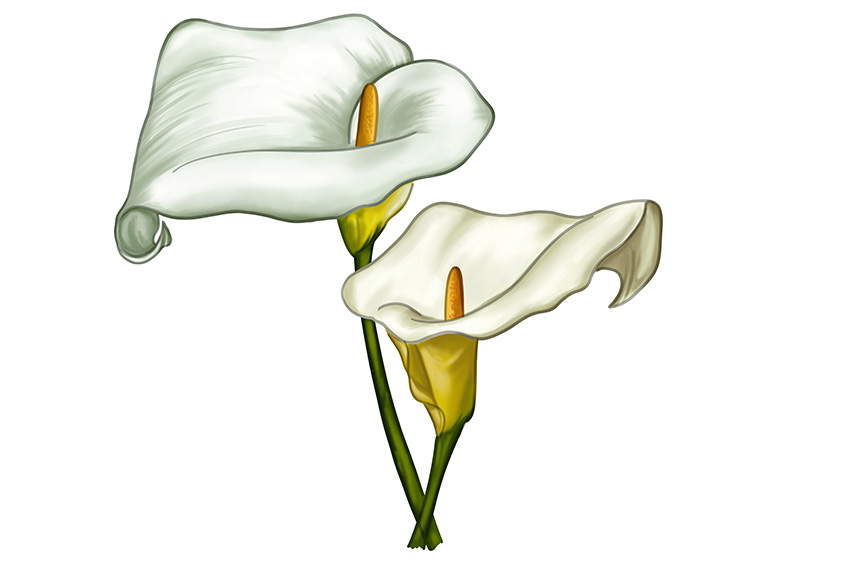
Step 18: Shade the Spadices of Your Calla Lily Drawing
Do not overlook the spadices of your realistic calla lily drawing, it still needs some shading, too! Load a soft-tipped paintbrush with black paint and gently apply shading to each edge of the spadix.


Step 19: Create Texture on Your Calla Lily Outline’s Spadix
To add texture to the spadix, use a soft paintbrush and dark yellow paint, create tiny dots on the edges of both spadices, and be sure to allow the original coat to be visible by keeping this coat of paint light.

Step 20: Enrich the Texture of the Spadix of Your Calla Lily Drawing
To enrich the texture of the lily flower spadix, you must carefully blend the dots you made in the previous step by using a small paintbrush and a tiny bit of mustard yellow paint.
Do this to both individual lily flowers.


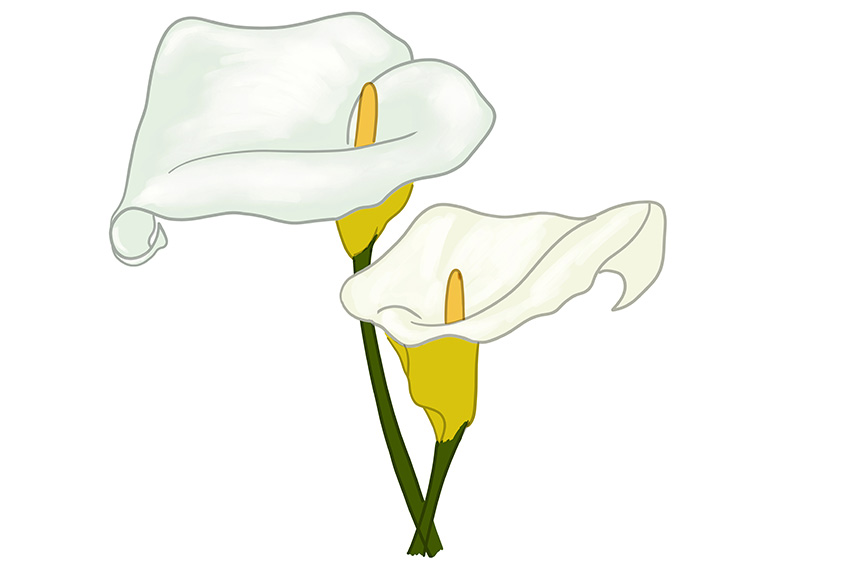
Step 21: Complete Your Sketch of a Calla Lily Flower
Gently trace over the whole calla lily outline using matching colors and perfect the final product. Should there be any overlaying pencil foundation lines that are still visible, you can erase them to help create a more seamless effect.


Wow, you did it! We hope you had fun while learning how to create a realistic calla lily drawing! Our easy-to-follow tutorial on how to draw a calla lily has hopefully helped you to create a drawing you are proud of!
Frequently Asked Questions
How Easy Is It to Sketch a Realistic Calla Lily Drawing?
Sketching a realistic calla lily drawing is much easier than you would have thought! This simple 21-step how-to-draw-a-calla-lily tutorial shows you the stages of creating a realistic calla lily from scratch! From creating the foundation lines to adding color and texture techniques, you can bring your calla lily drawing to life!
Which Is the Best Color to Choose for a Lily Flower Drawing?
The most common colors of the calla lily are white and yellow. But did you know that the lily flower blooms in different colors? These stunning flowers propagate in a mix of bright colors. These include dark maroon, bright pink, orange, and lavender! Because this is a creative guide, you can choose whichever color you fancy!