
How to Draw a Hydrangea – Capture the Beauty of Hortensia
This post may contain affiliate links. We may earn a small commission from purchases made through them, at no additional cost to you.
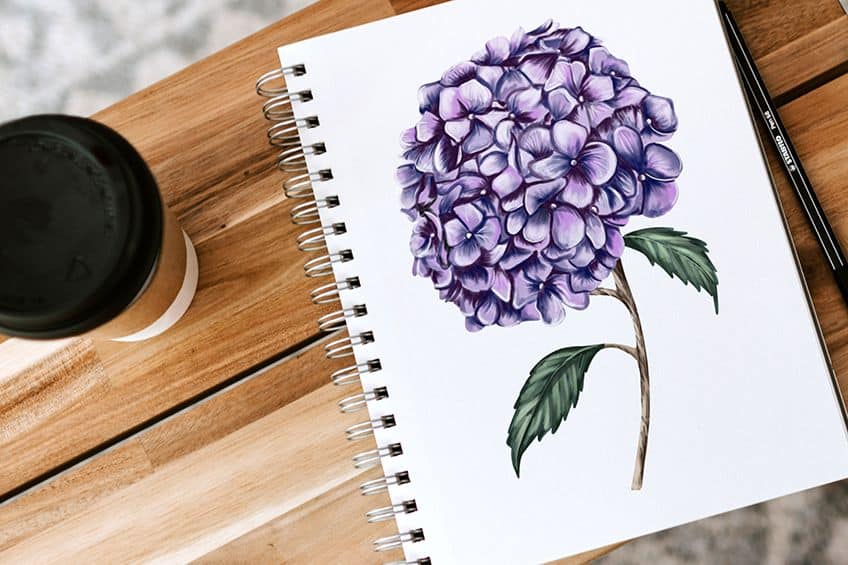
Hydrangea flowers bloom in shades of lilac, cream, pink, and blue. The name of this plant derives from the Greek words for “water” and “vessel” in reference to its seed pods which resemble little flower pots. Also known as Hortensia, these wonderful flowers grow on bushes and can resemble something out of a fantasy book, even though they are very real plants! Without wasting too much time, let’s start this fun and easy how-to-draw-a-hydrangea tutorial!
Table of Contents
- 1 How to Draw Hydrangea Flowers
- 1.1 Step 1: Drawing the Base of Your Hydrangea Sketch
- 1.2 Step 2: Constructing the Blossoms on Your Hydrangea Drawing
- 1.3 Step 3: Sketching Your Easy Hydrangea Drawing’s Center
- 1.4 Step 4: Sketching the Petals of Your Realistic Hydrangea Drawing
- 1.5 Step 5: Drawing the Stem of Your Hydrangea Sketch
- 1.6 Step 6: Adding Leaves to Your Hydrangea Drawing
- 1.7 Step 7: Begin Adding Color to Your Easy Hydrangea Drawing
- 1.8 Step 8: Applying Color to the Stem of Your Hydrangea Sketch
- 1.9 Step 9: Add Color to the Leaves of Your Realistic Hydrangea Drawing
- 1.10 Step 10: Creating Your Hydrangea Sketch’s Definition
- 1.11 Step 11: Applying the Second Coat of Color to Your Hydrangea Drawing
- 1.12 Step 12: Blending the Colors of Your Realistic Hydrangea Drawing
- 1.13 Step 13: Adding Highlights to Your Easy Hydrangea Drawing
- 1.14 Step 14: Shading the Flowers of Your Hydrangea Drawing
- 1.15 Step 15: Adding Contours to the Stem of Your Hydrangea Drawing
- 1.16 Step 16: Adding Highlights to the Stem of Your Hydrangea Sketch
- 1.17 Step 17: Adding the Finishing Touches to the Stem of Your Hydrangea Drawing
- 1.18 Step 18: Applying Texture to the Leaves of Your Hydrangea Drawing
- 1.19 Step 19: Continue Shading of the Leaves of Your Hydrangea Drawing
- 1.20 Step 20: Creating Texture on the Leaves of Your Hydrangea Drawing
- 1.21 Step 21: Adding Highlights to the Leaves of Your Easy Hydrangea Drawing
- 1.22 Step 22: Completing the Leaves of Your Hydrangea Sketch
- 1.23 Step 23: Finishing Your Realistic Hydrangea Drawing
- 2 Frequently Asked Questions
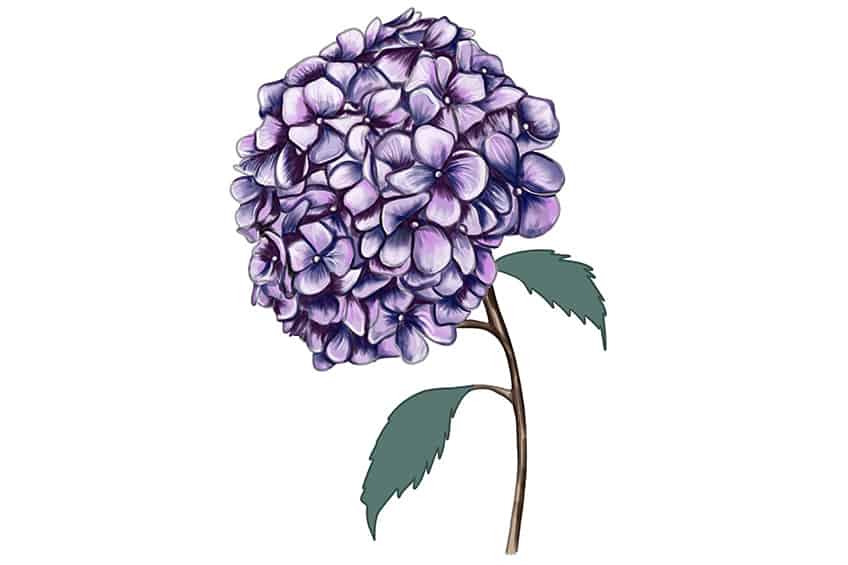
How to Draw Hydrangea Flowers
The key to making a realistic hydrangea drawing is to create a collection of tiny hydrangea flowers on one stem. We will guide you on how to sketch the basic foundation lines of the flower, how to add details, color, and finally, shading, texture, and highlights.
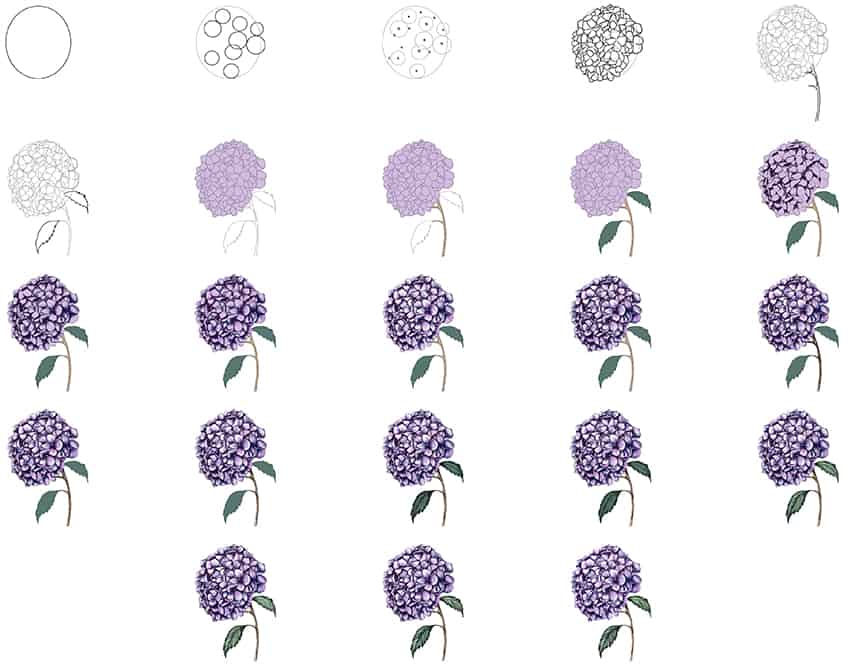

Above is a step-by-step visual guide showing the steps you will be following to create a realistic hydrangea drawing! Study the steps before we begin learning how to draw hydrangea flowers. The next step in preparation will be to decide which color you want for your hydrangea flower. These whimsical plants come in an array of pink, lilac, blue, and cream shades. For today’s hydrangea sketch, we will use lilac. Grab your art tools, and let’s get started!
Step 1: Drawing the Base of Your Hydrangea Sketch
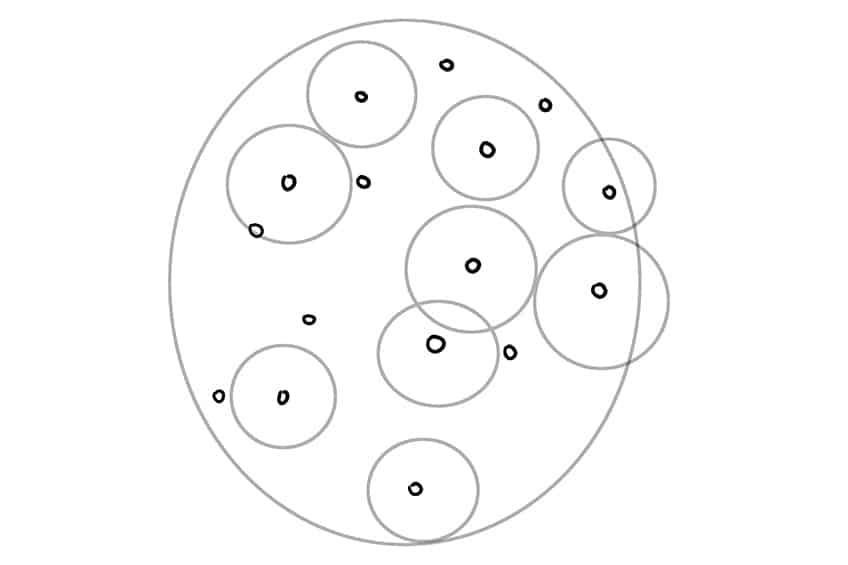
The first step to your easy hydrangea drawing will be to draw the foundation circle. Find the middle of your sketch pad and make a simple circle. This is a foundation line and will be erased at a later stage. This circle will be the guide for you to add small flower petals.


Step 2: Constructing the Blossoms on Your Hydrangea Drawing
In this second step, you will do something similar to what you did in step one and add smaller foundation circles within the large foundation circle. These smaller circles will be the beginning stages of the hydrangea blossom outlines.
These circles can overlap.


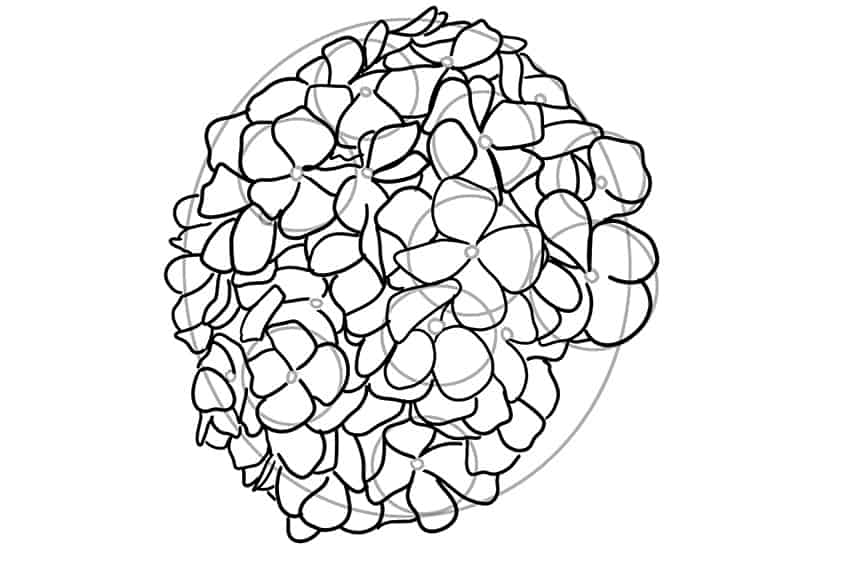
Step 3: Sketching Your Easy Hydrangea Drawing’s Center
Next, you can add tiny circle centerpieces to each small circle. These will be the pinpoints for each hydrangea blossom. You will begin each petal from this point. To produce a realistic hydrangea drawing, you must draw lots of little petals expanding outwards to create a full effect.

Step 4: Sketching the Petals of Your Realistic Hydrangea Drawing
To create the hydrangea flower petals, you must begin each petal from the center dots within the small circles. Use the small circle outline as a guide to making small individual flowers. This step will require a lot of patience but will be completely worth it. Every hydrangea flower has four petals, and you may have them overlap each other.

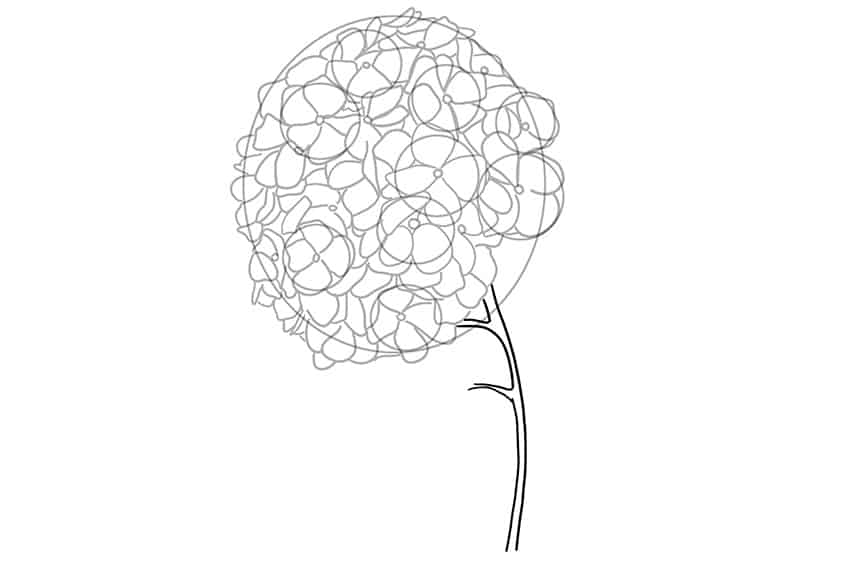
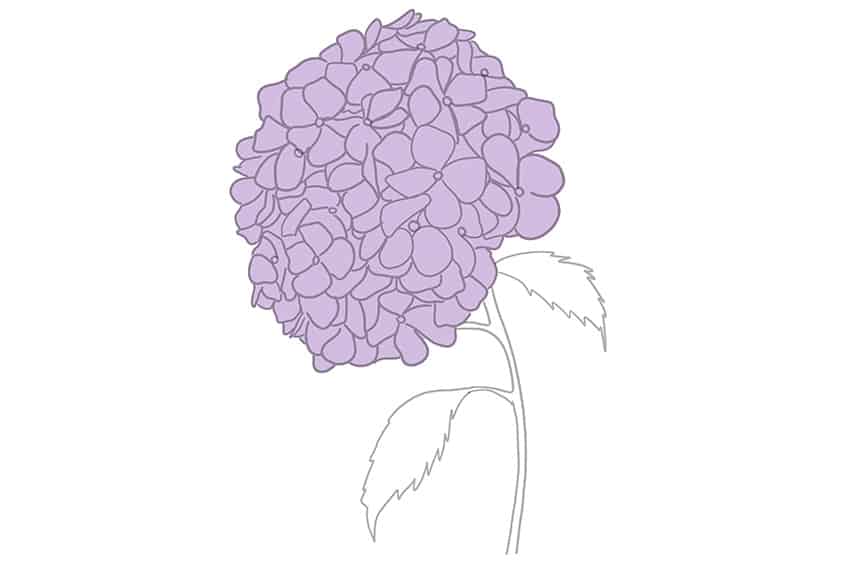
Step 5: Drawing the Stem of Your Hydrangea Sketch
You have done a sterling job with creating your hydrangea sketch thus far! Next will be to add the stem and branch outline. To do this, you can draw two lines moving downwards from the bottom right-hand side of your flower petals. The line doesn’t have to be straight, and you can slightly curve it to the left. Add two small branches on the left side.
One of these should be close to the bottom of your petals and will essentially be behind the stem to create depth.

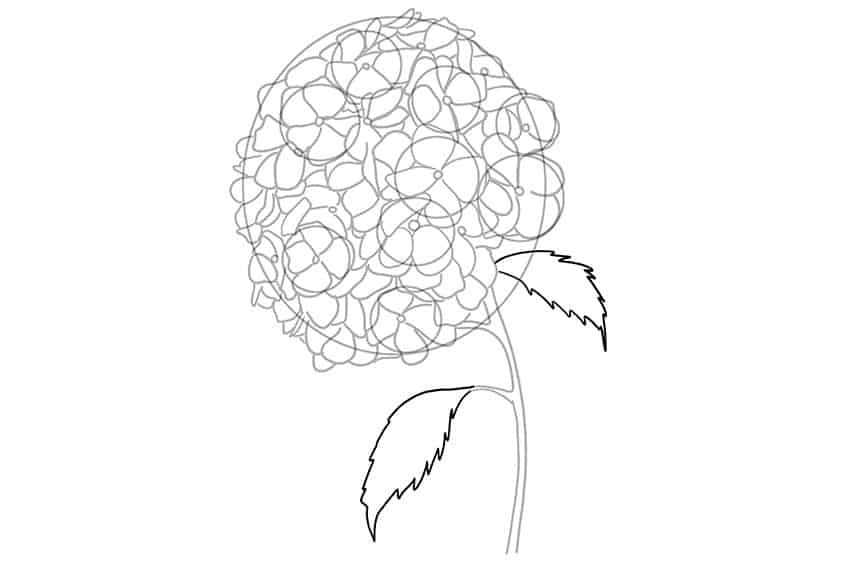
Step 6: Adding Leaves to Your Hydrangea Drawing
Net, you will add two leaves to your hydrangea drawing. First, you can draw the leaf that sits behind your flower. Draw this leaf extending from the top branch. Now, add the second leaf to the lower branch. This leaf can be larger than the first, and the tip can droop downwards.

Step 7: Begin Adding Color to Your Easy Hydrangea Drawing
The fun part of how-to-draw-hydrangea flowers begins with step seven! Select your chosen color for your hydrangea sketch. We have chosen to use lilac for this tutorial.
Using a regular paintbrush and a light shade of your chosen color, complete the base coat of your hydrangea drawing.

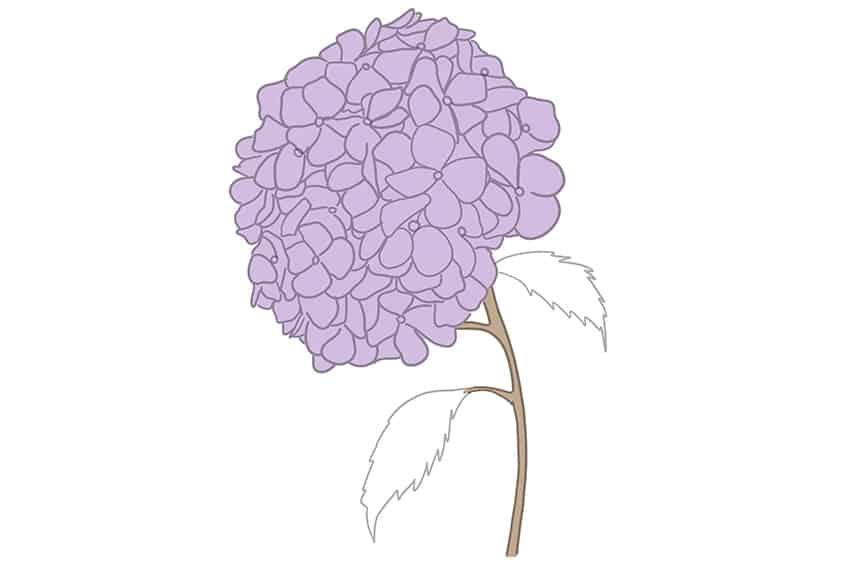
Step 8: Applying Color to the Stem of Your Hydrangea Sketch
You will continue adding the base coat to your hydrangea drawing’s flower stem and branches. Use brown paint and a small paintbrush to gently cover these areas.

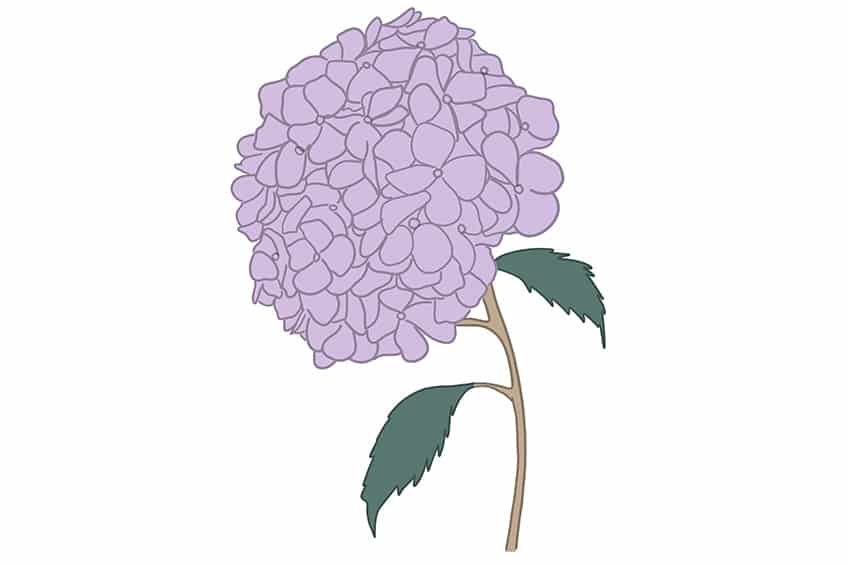
Step 9: Add Color to the Leaves of Your Realistic Hydrangea Drawing
Use a regular paintbrush and dark green paint and add the base coat to the leaves of your easy hydrangea drawing.

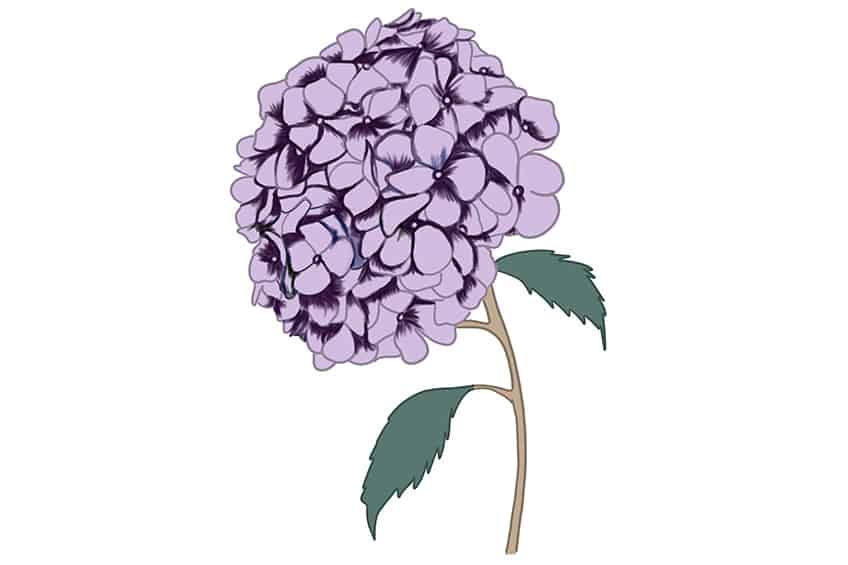
Step 10: Creating Your Hydrangea Sketch’s Definition
Once you have completed the base coats of your hydrangea drawing, it is time to begin adding structure or definition to the petals. You will do this by adding the second layer of color to the center of each flower. Use a small blending paintbrush and a darker shade of lilac, and use gentle brushstrokes flowing outwards on each flower petal.
The idea is to begin defining the individual flowers.

Step 11: Applying the Second Coat of Color to Your Hydrangea Drawing
Creating beautiful color depth to your hydrangea drawing is easy, simply take a small blending paintbrush and a shade of dark blue paint. Gently add depth using brushstrokes reaching from the centerpiece of each flower blossom. The color from the previous step should still be slightly visible.

Step 12: Blending the Colors of Your Realistic Hydrangea Drawing
In the previous step, you added a dark shade to the center of each petal. Now, you will do the opposite and add a light shade of pink paint. Using a small paintbrush, you can add color to the edges of each flower petal. Use a small blending brush to blend these brushstrokes.
For this part of your hydrangea sketch, you are simply adding color.


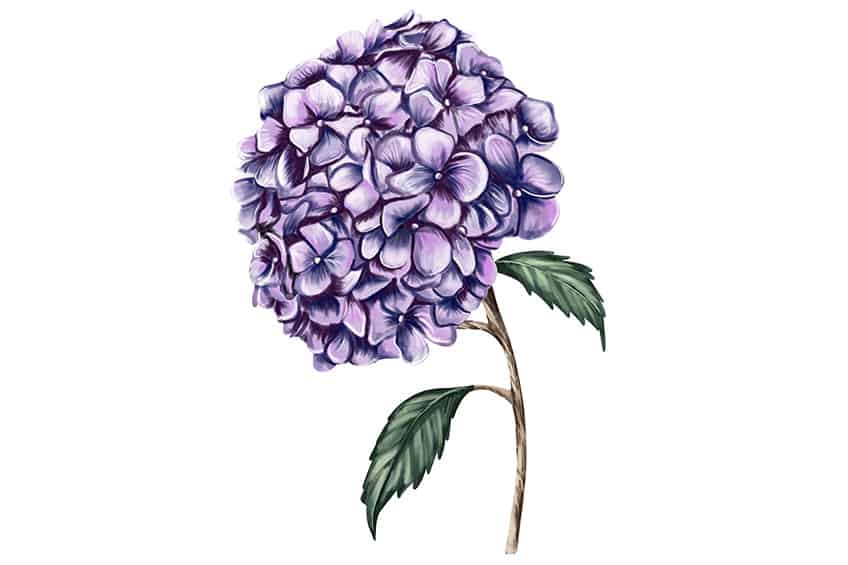
Step 13: Adding Highlights to Your Easy Hydrangea Drawing
To give your hydrangea drawing a realistic edge, it is always a good idea to add highlights. To do this, you simply take a sharp paintbrush and make fine hairline strokes with white paint on the edge of each flower petal. This brings your realistic hydrangea drawing come to life!


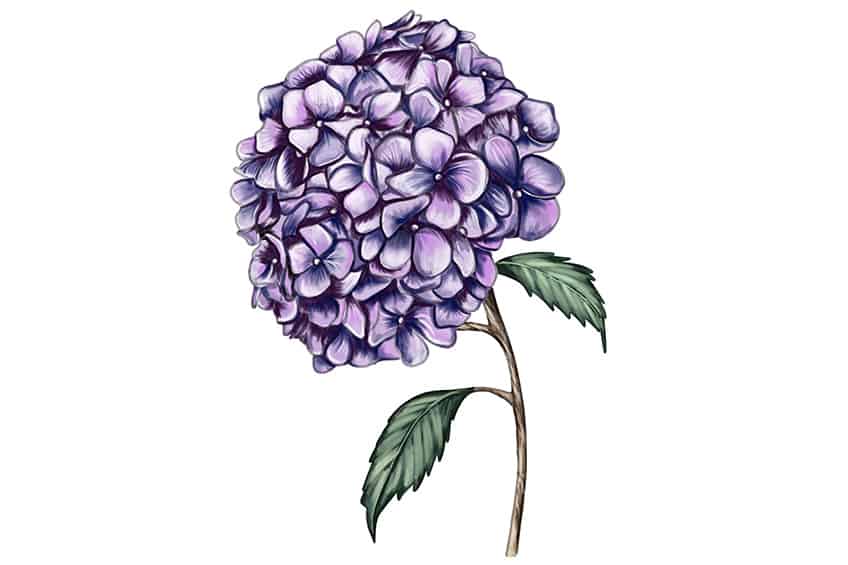
Step 14: Shading the Flowers of Your Hydrangea Drawing
For every highlight, you need a shadow. Take a small blending brush and a smidgen of black paint. Very slowly and carefully, begin to add touches of dark paint to create a shadow around the edges of your flower petals.
Take note to work gradually, because you can’t erase black paint with ease! It is always better to add dark colors slowly and surely.


Step 15: Adding Contours to the Stem of Your Hydrangea Drawing
Moving on from coloring your hydrangea drawing and allowing the paint to dry, you can shift your focus towards the stem and leaves. Take a small blending paintbrush and black paint and begin creating shadows along the edges, leaving the base color visible.

Step 16: Adding Highlights to the Stem of Your Hydrangea Sketch
The stem should be a dark color at this point. You can add highlights to it now. Take a small blending paintbrush and a light tan brown, and begin to add highlights to the center of the stem and branches.

Step 17: Adding the Finishing Touches to the Stem of Your Hydrangea Drawing
Adding the finishing touch to the hydrangea drawing’s stem will require you to create small textured streak lines gently wrapping around the stem. The hydrangea bush is a hardy plant, so imagine the rough texture when you are painting the stem. Do this with white paint and a sharp paintbrush. You can then add to the lines using a tan color.


Step 18: Applying Texture to the Leaves of Your Hydrangea Drawing
When learning how to draw hydrangeas, you may forget about the leaves. But, the leaves of your realistic hydrangea drawing still need your attention! Apply texture to each leaf by creating a center vein and smaller veins.
Use a sharp paintbrush and black paint.

Step 19: Continue Shading of the Leaves of Your Hydrangea Drawing
In this step, you will need to soften the leaf veins by adding the same green paint you used as the base color, take a small blending brush, and smooth out the veins you created in the previous step.

Step 20: Creating Texture on the Leaves of Your Hydrangea Drawing
Apply some bright green paint by using a small soft paintbrush and gently add color to the center of the leaves outwards to the edges to give the leaves texture.


Step 21: Adding Highlights to the Leaves of Your Easy Hydrangea Drawing
To add highlights to your hydrangea drawing’s leaves, you will need to add small brush strokes to the tips of each leaf using white paint and a sharp paintbrush. Starting at the tip of the leaf, move along the center.

Step 22: Completing the Leaves of Your Hydrangea Sketch
This how-to-draw-a-hydrangea tutorial is almost complete! For this step, you will be adding a finishing touch to the leaves by using a touch of black paint with a small blending brush and softly shading along the edges of your leaves.
Be sure not to go overboard; less if more when black paint is concerned!


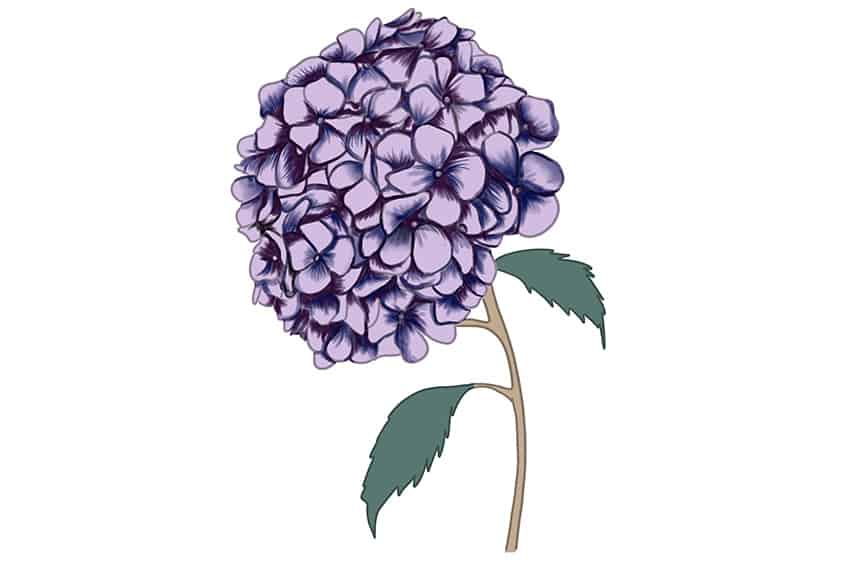
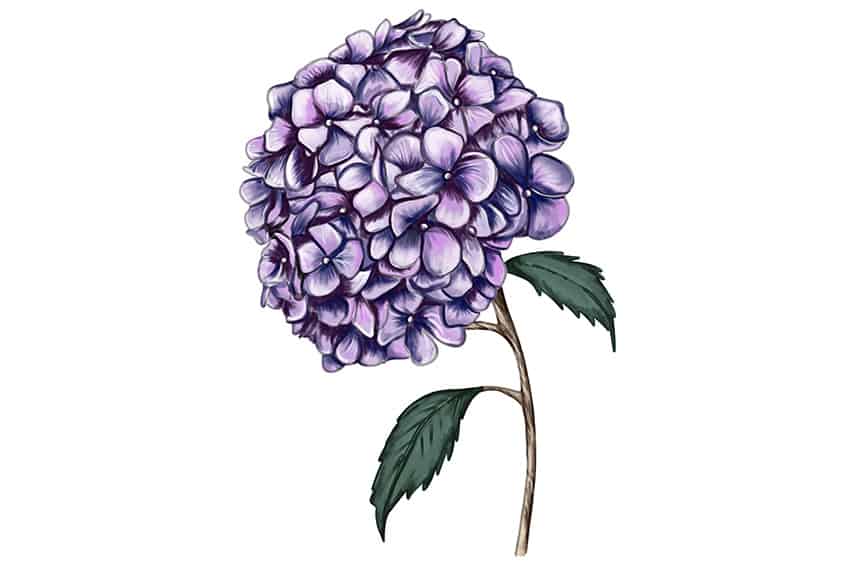
Step 23: Finishing Your Realistic Hydrangea Drawing
This is the final step of your realistic hydrangea drawing lesson! In this step, you can erase any overlapping pencil lines from the foundation stages. Begin to gently trace around the edges of the hydrangea sketch outline using the matching color of your artwork.

Well done! You have just completed our fun and easy tutorial on how-to-draw-a-hydrangea. This type of flower is not a simple plant to draw and has lots of tiny details to consider – from the foundation outlines to the colors and shading of each flower petal! If you are feeling confident about your realistic hydrangea drawing, perhaps you would be interested in joining our other drawing tutorials to learn how to draw a wide range of flowers!
Frequently Asked Questions
How Do I Create a Realistic Hydrangea Drawing?
At first glance, drawing the hydrangea flower may seem overwhelming because of its extensive detail and expansive flower head. Once you break down the flower sketch into steps and stages, the drawing will be less intimidating. This fantastic how-to-draw-a-hydrangea tutorial is an easy enough guide for artists of all ages to follow to be able to produce a realistic hydrangea drawing!
Is It Easy to Paint a Hydrangea Flower?
The painting stage of our how-to-draw-a-hydrangea tutorial is easier than you would expect. It all boils down to creating layers of color, sketching contour lines, and creating texture through shading and blending techniques. All of which you will learn in this easy-to-follow guide on how to draw hydrangeas!