
How to Draw a Cupcake – Make a Cute Confectionary Sketch
This post may contain affiliate links. We may earn a small commission from purchases made through them, at no additional cost to you.
The cupcake is a delightful treat, a perfect bite-size indulgence. Cupcakes bring happiness to everyone with their cute sprinkles and colorful frosting. In today’s drawing tutorial, we will do an easy cupcake drawing and look at how to create a realistic cupcake sketch from scratch. First, you will learn how to create the foundation outline and learn-how-to use shading and highlights to give your cupcake drawing a realistic feel. Learning how to draw a cupcake couldn’t be more fun, so let’s get started!
Table of Contents
- 1 A Step-By-Step Guide on How to Draw a Cupcake
- 1.1 Step 1: Outline the Liner of the Cupcake
- 1.2 Step 2: Sketch the Frosting Outline of Your Cupcake Drawing
- 1.3 Step 3: Draw the Sprinkles Outline of Your Cupcake Sketch
- 1.4 Step 4: Add Detail to the Frosting Outline of Your Realistic Cupcake Drawing
- 1.5 Step 5: Apply a Base Coat to the Case of Your Cupcake Sketch
- 1.6 Step 6: Apply Color to the Frosting of Your Easy Cupcake Drawing
- 1.7 Step 7: Add Color to the Sprinkles of Your Cupcake Sketch
- 1.8 Step 8: Apply Shading to the Case of Your Realistic Cupcake
- 1.9 Step 9: Apply Highlights to the Case of Your Cupcake Sketch
- 1.10 Step 10: Highlight the Cup of Your Realistic Cupcake Drawing
- 1.11 Step 11: Apply Texture to Your Easy Cupcake Drawing
- 1.12 Step 12: Add a Second Coat to the Frosting of Your Cupcake Drawing
- 1.13 Step 13: Apply Highlights to the Frosting of Your Cupcake Drawing
- 1.14 Step 14: Apply Shading to the Frosting of Your Realistic Cupcake
- 1.15 Step 15: Add Highlights to the Sprinkles of Your Easy Cupcake Drawing
- 1.16 Step 16: Create the Ground Shadow of Your Realistic Cupcake
- 1.17 Step 17: Add the Finishing Touches to Your Cupcake Drawing
- 2 Frequently Asked Questions
A Step-By-Step Guide on How to Draw a Cupcake
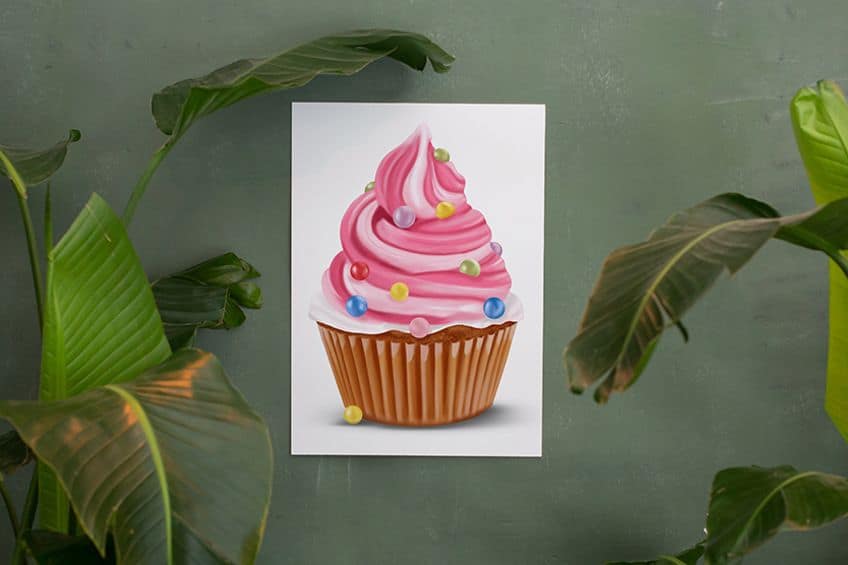
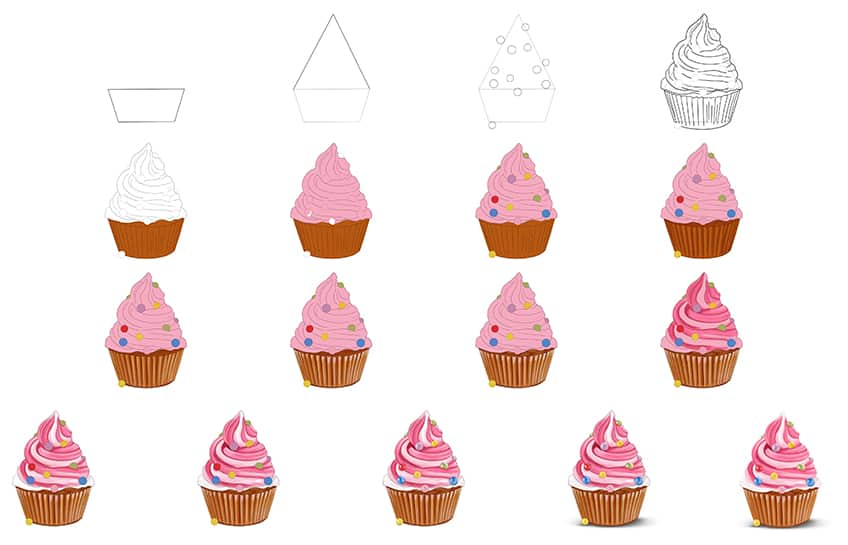
To begin this easy cupcake drawing lesson, you will need to study the example image below to see how you will construct the realistic cupcake in 17 steps. The process may seem daunting at first, but with this how-to-draw-a-cupcake tutorial, you will master being able to create a cupcake sketch before you know it! The first steps will be to create the foundation lines, and then – we will show you how to add the detail. Once complete, we will guide you on how to coat the cupcake in color, and how to add texture and detail to bring the realistic cupcake to life!

This easy cupcake drawing guide has been designed for acrylic paint, and all beginners are encouraged to use the same medium for this lesson. However, you can adapt this tutorial to suit whatever medium you wish to use. Colored pencils, digital design tablets, gouache, or watercolors are great options for more skilled artists.
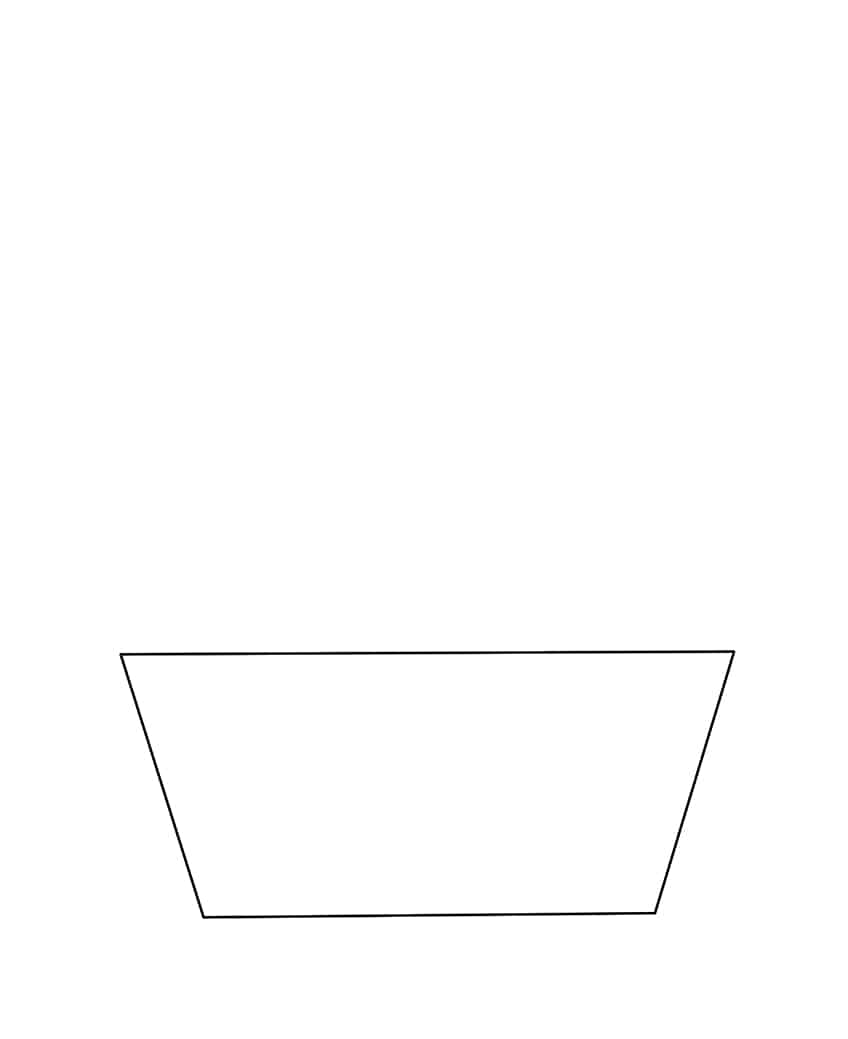
Step 1: Outline the Liner of the Cupcake
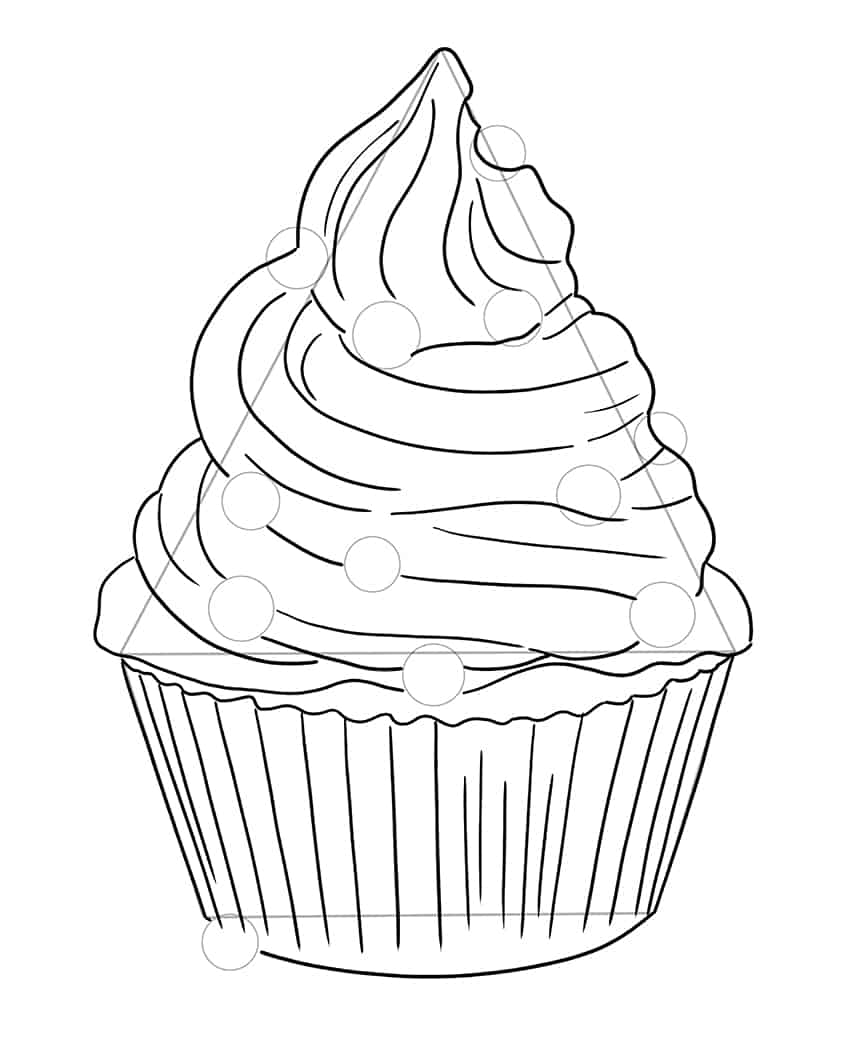
Find the middle of your drawing pad and begin by sketching a simple case or liner for your cupcake. The shape will look like a rectangle with a short base line, longer top line connected by two diagonal lines extending outwards on either side. Be sure to leave space above it to draw the tall frosting so it will all fit nicely on the page.

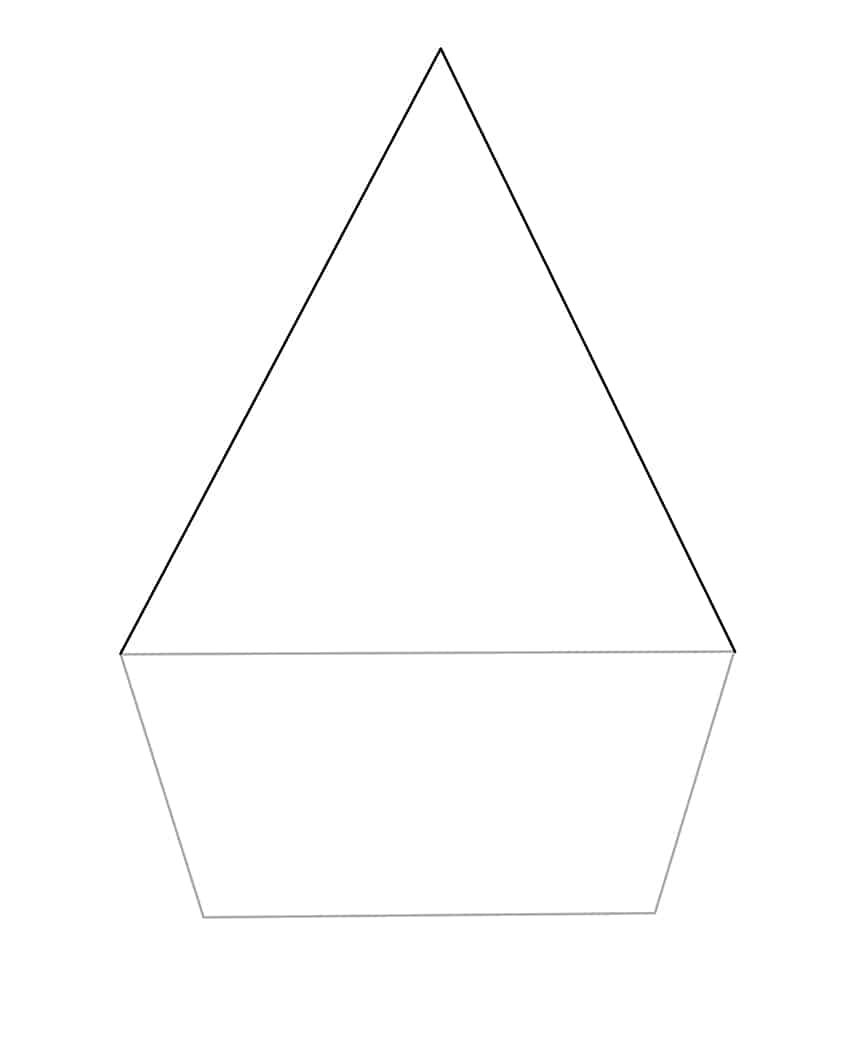
Step 2: Sketch the Frosting Outline of Your Cupcake Drawing
You can continue creating the foundation outline of your easy cupcake drawing. Draw a tall triangle shape, the base of your triangle to sit on top of the cupcake base you drew in step one.
This triangle shape should be used as a guide for your frosting detail.

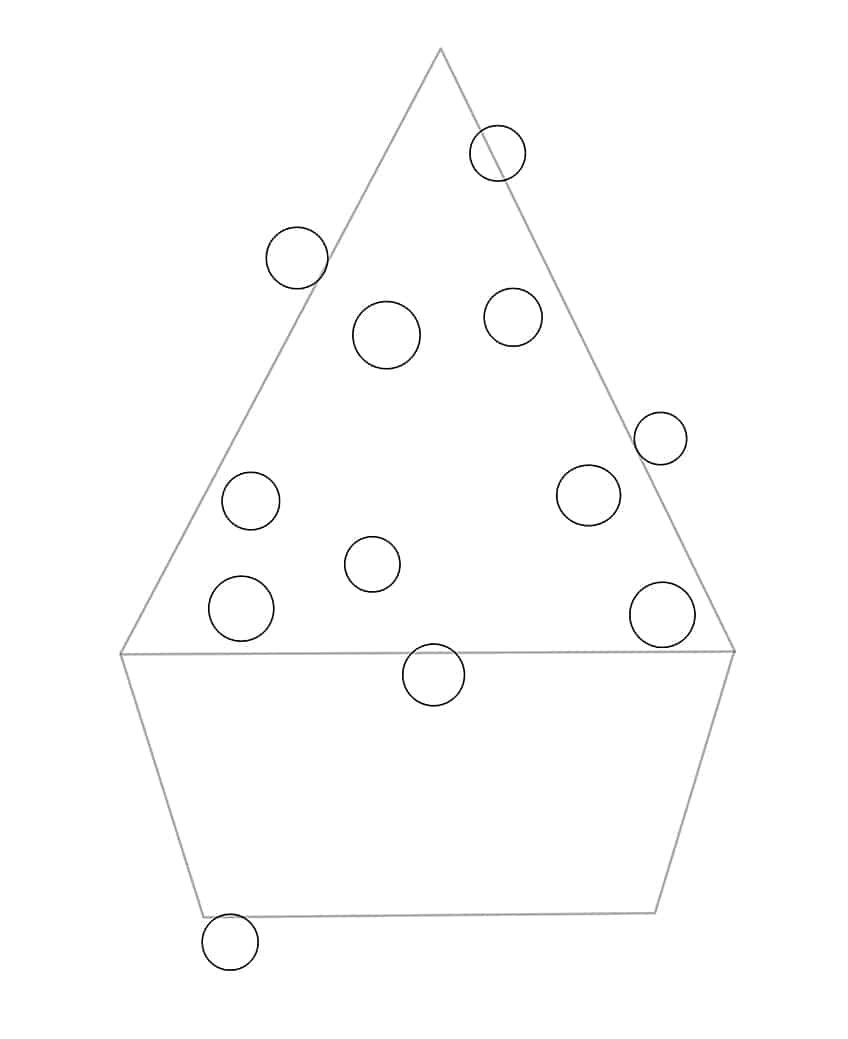
Step 3: Draw the Sprinkles Outline of Your Cupcake Sketch
You will now add the circular sprinkles to your realistic cupcake sketch. Draw various-sized circles around the frosting triangle outline. Be sure to add them all over the frosting and add one to the bottom area as if it had fallen off the cupcake.

Step 4: Add Detail to the Frosting Outline of Your Realistic Cupcake Drawing
Imagine how frosting would rest on top of a cupcake, swirling upwards. You will use the triangle as a guide while you create the waves and curves extending upwards. Now to add detail to the cupcake base!
Draw the ridges of the cup, and make zig-zag dents and vertical lines around the base.

Step 5: Apply a Base Coat to the Case of Your Cupcake Sketch
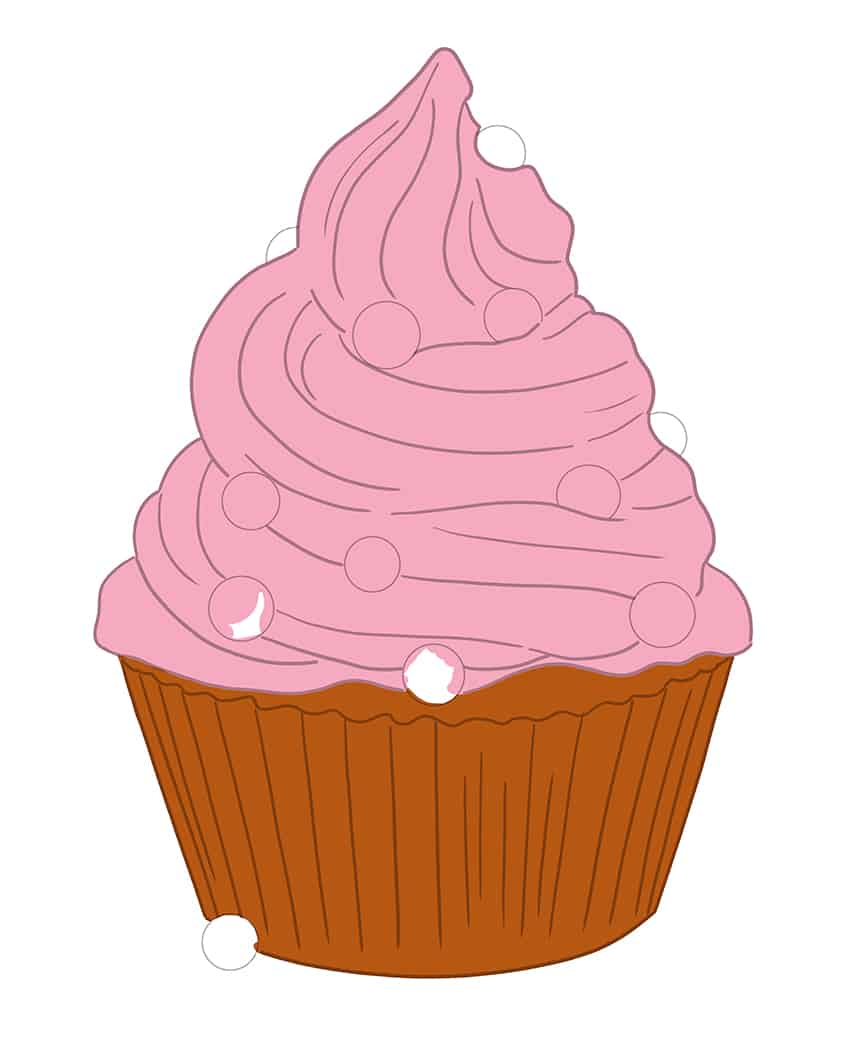
To add the base coat to your easy cupcake drawing, you will apply a light brown pigment with a normal-style brush. Concentrate on the cup only.


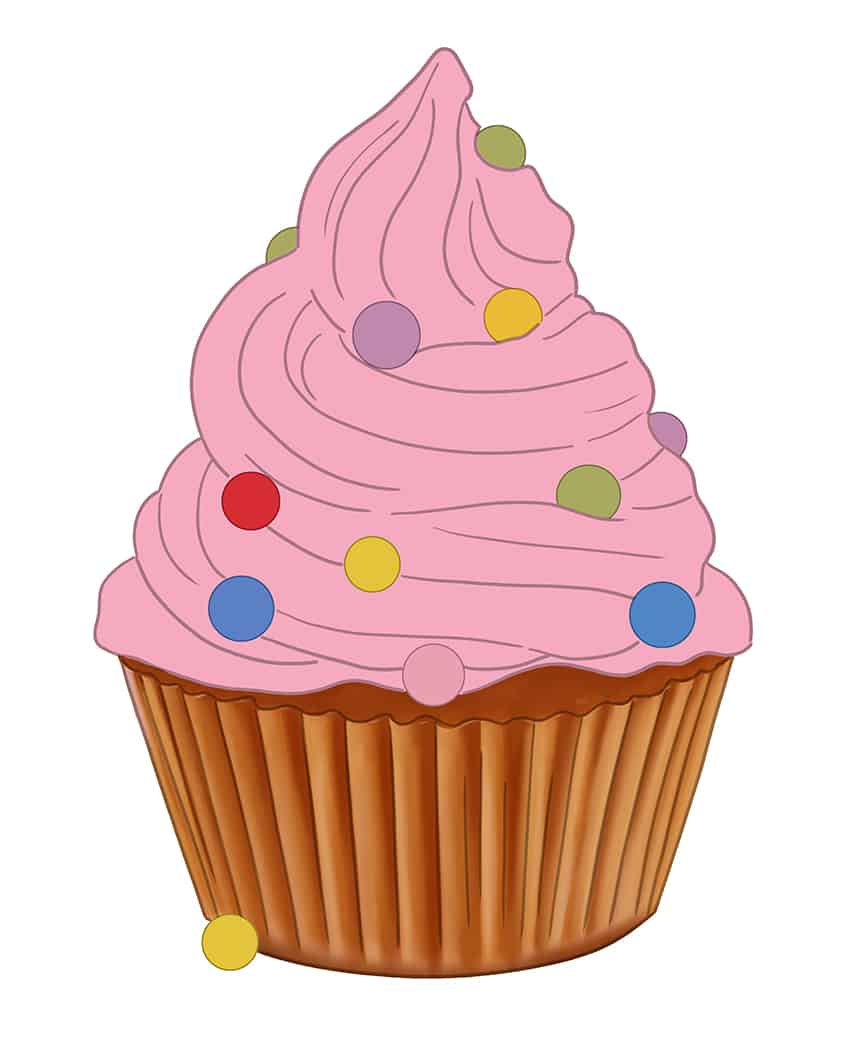
Step 6: Apply Color to the Frosting of Your Easy Cupcake Drawing
Coat the frosting in a light pink pigment and use a soft-tipped brush. Remember, this is only the base coat. Leave out a couple of the round sprinkles.

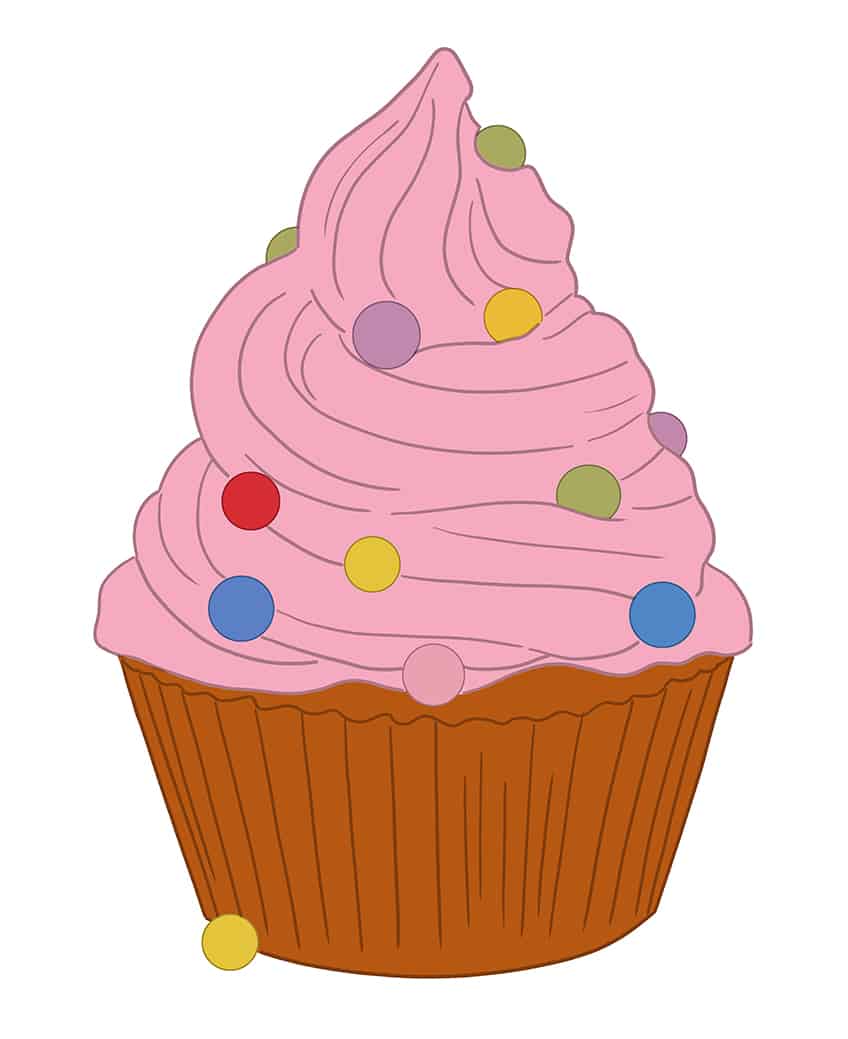
Step 7: Add Color to the Sprinkles of Your Cupcake Sketch
Choose a few bright colors for the cupcake sprinkles and use a sharp and smaller, pointed paintbrush.
Use varying colors as you fill in your cupcakes sprinkles.

Step 8: Apply Shading to the Case of Your Realistic Cupcake
To make your drawing of a realistic cupcake pop, you must add shading to the case of your cupcake. Take a dark brown pigment, and gently use a blending style brush as you add shading to the right side of each fold on the case.

Step 9: Apply Highlights to the Case of Your Cupcake Sketch
To continue drawing your realistic cupcake, you must add highlights to the shading you created in the previous step. Apply a light line next to the shadow detail and blend the colors. Use light tan paint.

Step 10: Highlight the Cup of Your Realistic Cupcake Drawing
You will continue building the layers of the cupcake case. Use a touch of white paint and enhance the highlights you made using the light tan pigment. Using a small blending style paintbrush, you can gently add touches of white to the highlighted areas of the texture lines and tops of the case fold.


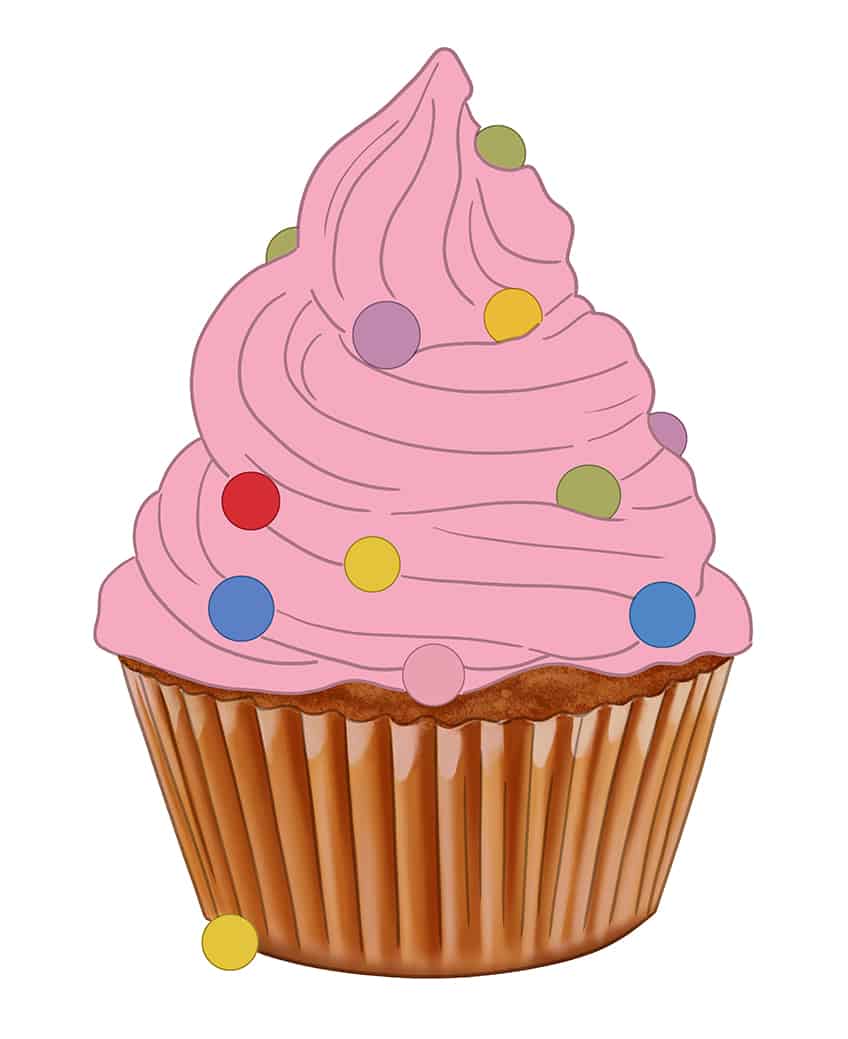
Step 11: Apply Texture to Your Easy Cupcake Drawing
You have done a wonderful job creating color layers for your cupcake case, but what about the actual cake portion? Use some brown or light tan paint along with a rough paintbrush.
Use the base coat as the background, and dab over it to create texture.

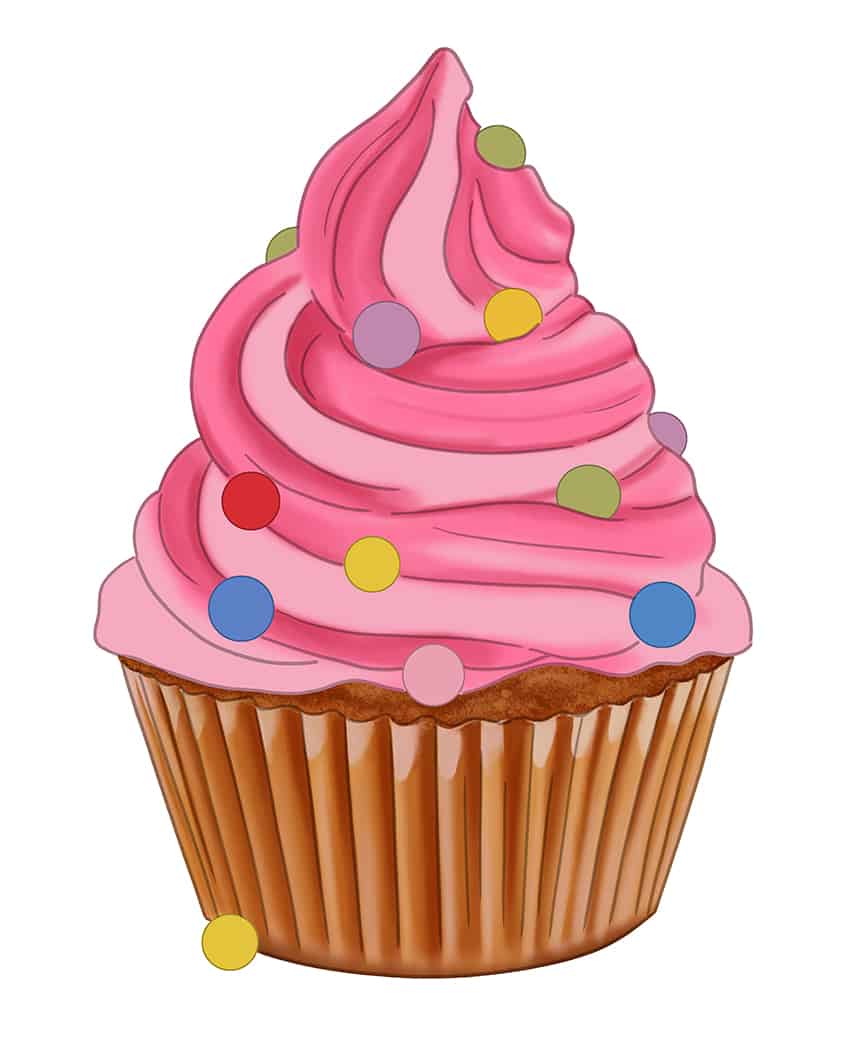
Step 12: Add a Second Coat to the Frosting of Your Cupcake Drawing
Step 12 is fun! You will apply a second coat and more detail to your cupcake frosting. Choose bright or dark pink paint and add to the swirls of the frosting. Be sure to have some of the base coat shining through in some of the frosting swirls. Be sure to keep your painting style smooth and with no streaks.

Step 13: Apply Highlights to the Frosting of Your Cupcake Drawing
For this step, you can apply highlights to the frosting of your realistic cupcake. Use a touch of white and gently paint onto the light pink areas on the frosting swirl. Use the mixture of white and pink to create the swirl motion.
Once you have completed this, you can coat the bottom frosting in white.
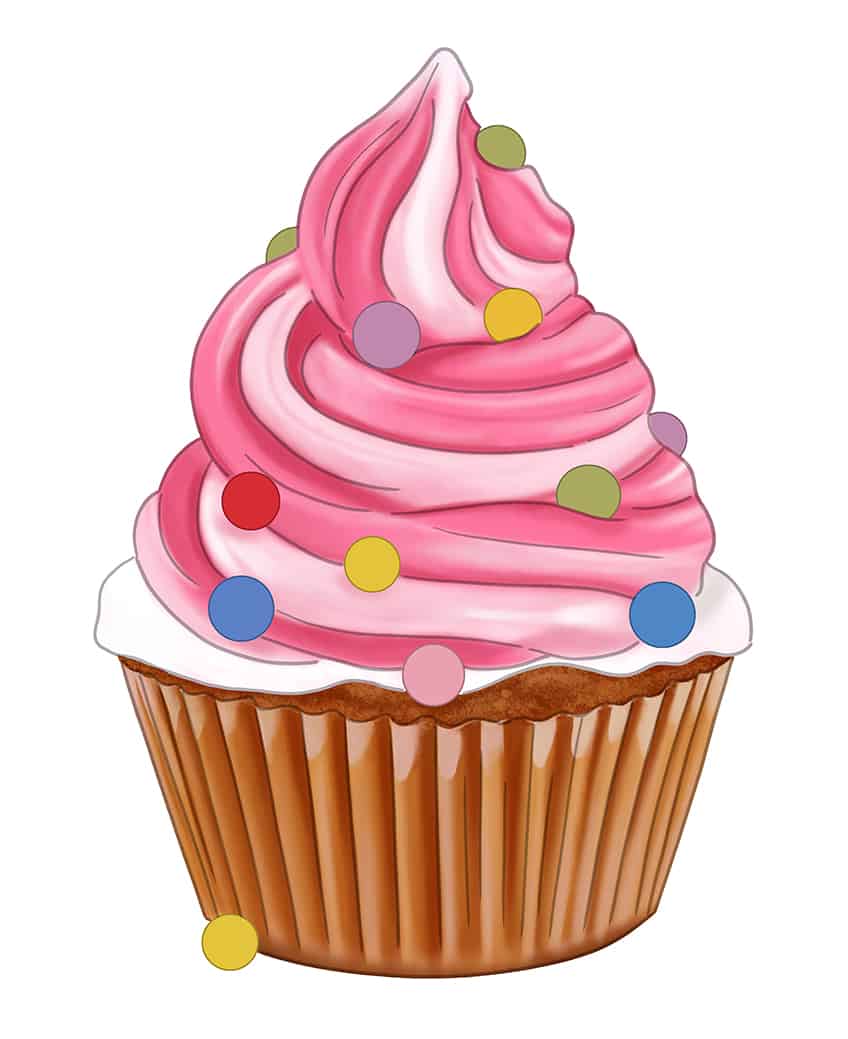

Step 14: Apply Shading to the Frosting of Your Realistic Cupcake
You have done a lot of highlighting! It’s time to do the opposite and add some shading to the frosting. Use a blending style brush and add a bit of black paint to the parts of the frosting where there is depth, and the cream frosting folds in on itself.
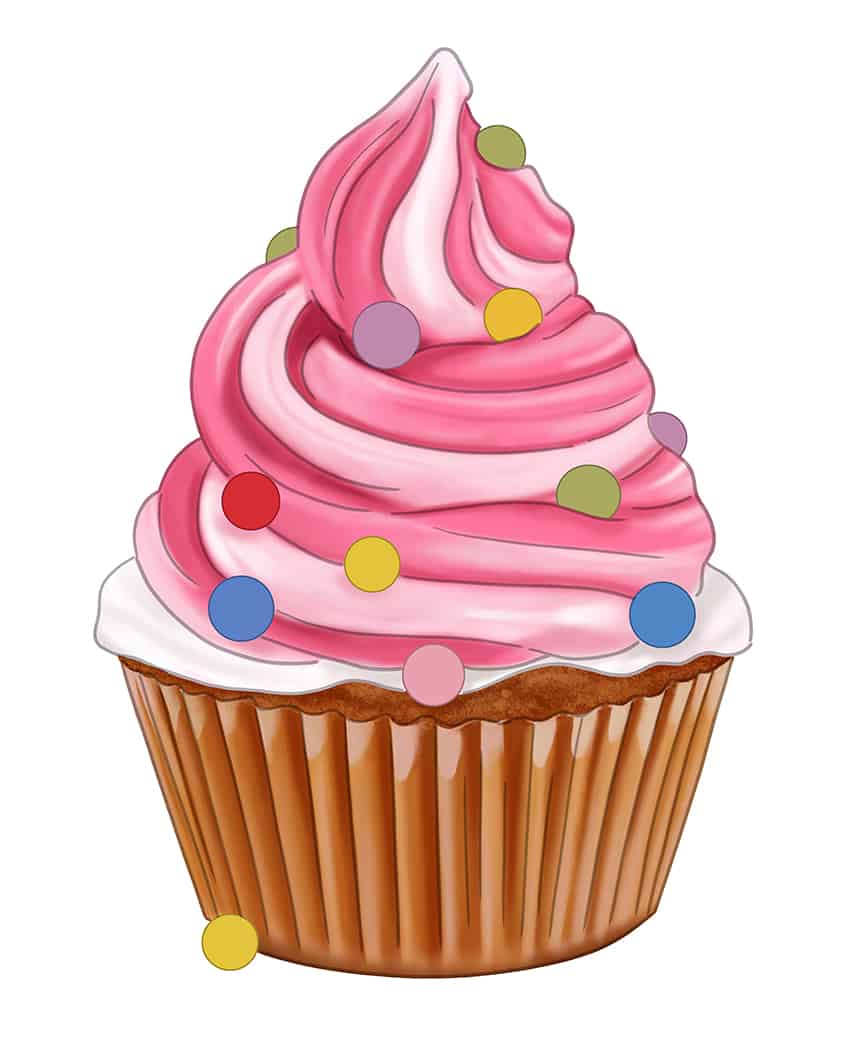

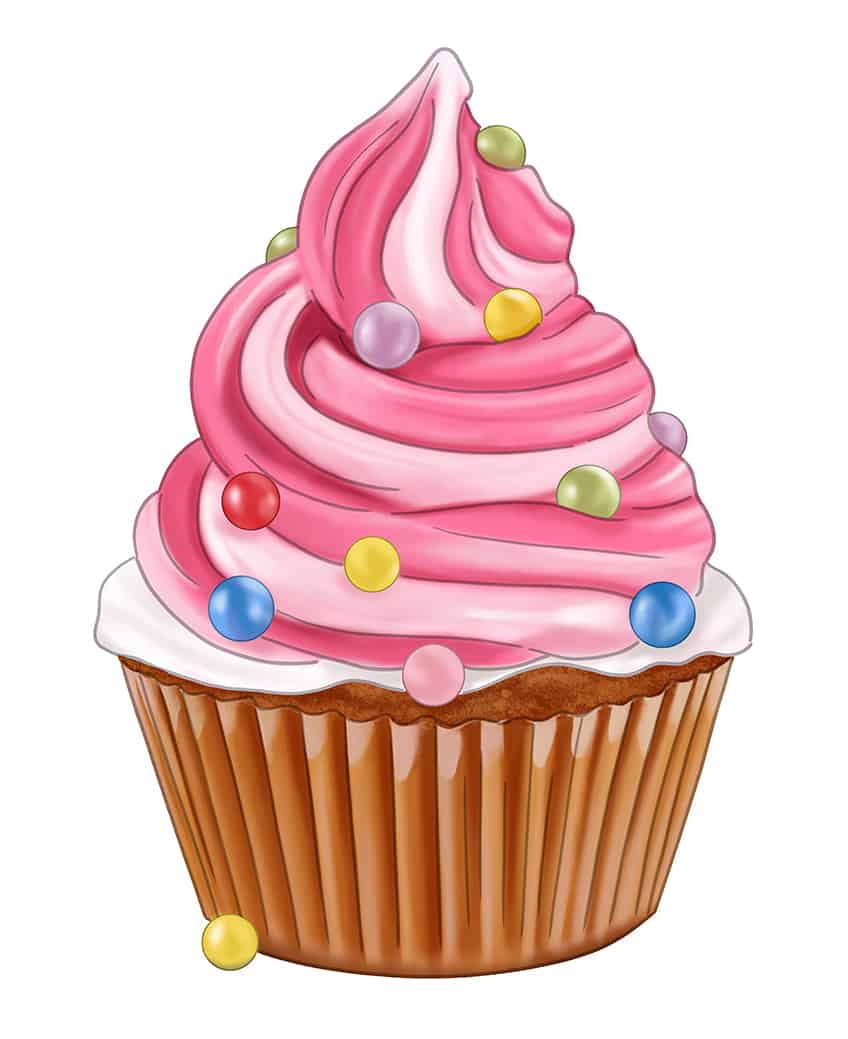
Step 15: Add Highlights to the Sprinkles of Your Easy Cupcake Drawing
You must add a highlight to each of the colorful sprinkles, and to give the cupcake sprinkles a reflective spot, you will use a touch of white and a blending style brush to paint little highlights on each ball.

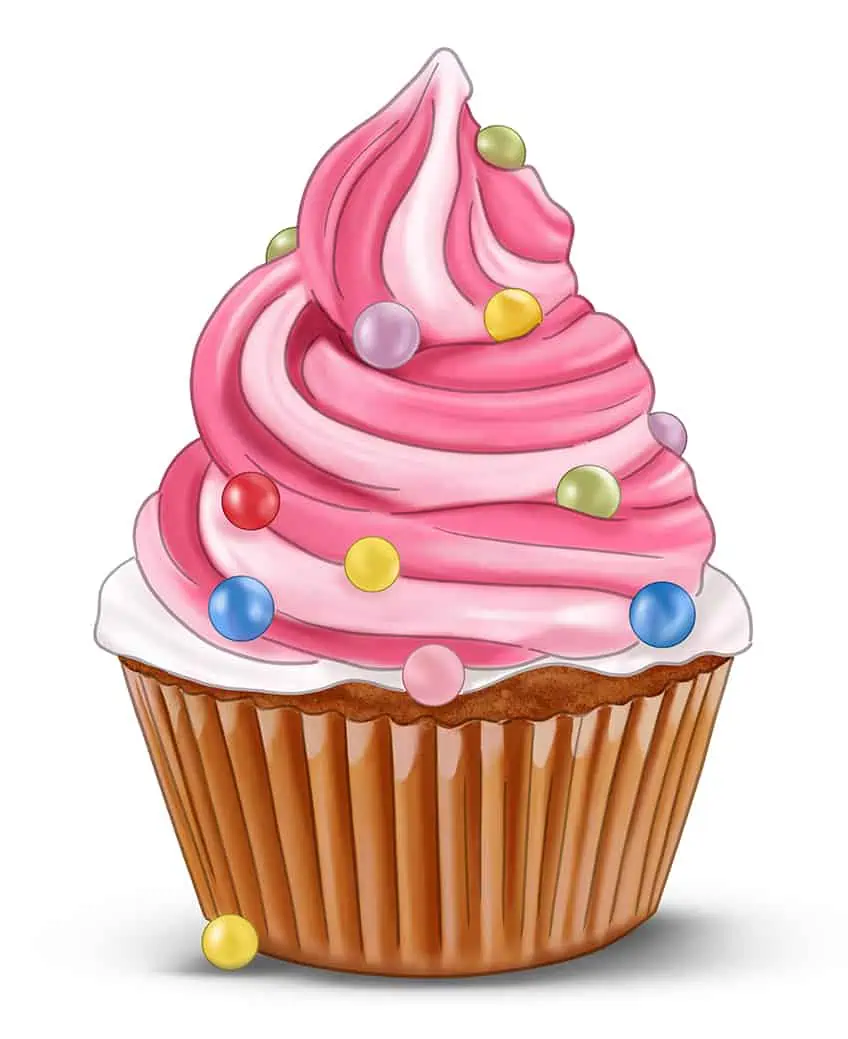
Step 16: Create the Ground Shadow of Your Realistic Cupcake
To complete a realistic cupcake, you must create a ground shadow. Because the cupcake currently appears to float in the center of your drawing pad, you must create its shadow to make it look as if it is sitting on a surface. To do this, you can use some black paint and a soft brush.
Use gentle strokes to apply shading going outwards in both directions away from the base.

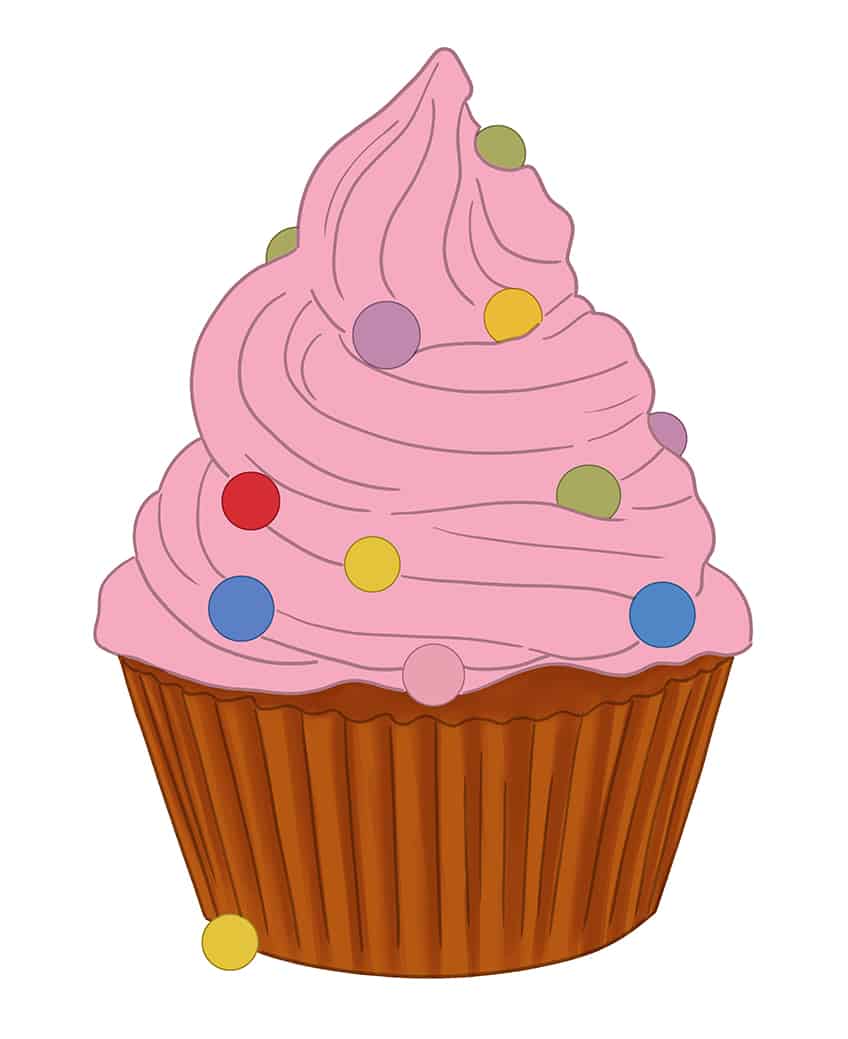
Step 17: Add the Finishing Touches to Your Cupcake Drawing
To complete your realistic cupcake, you can touch up the outline and erase any pencil marks from your foundation stage. Trace over the outline using the matching colors of the cupcake and frosting.
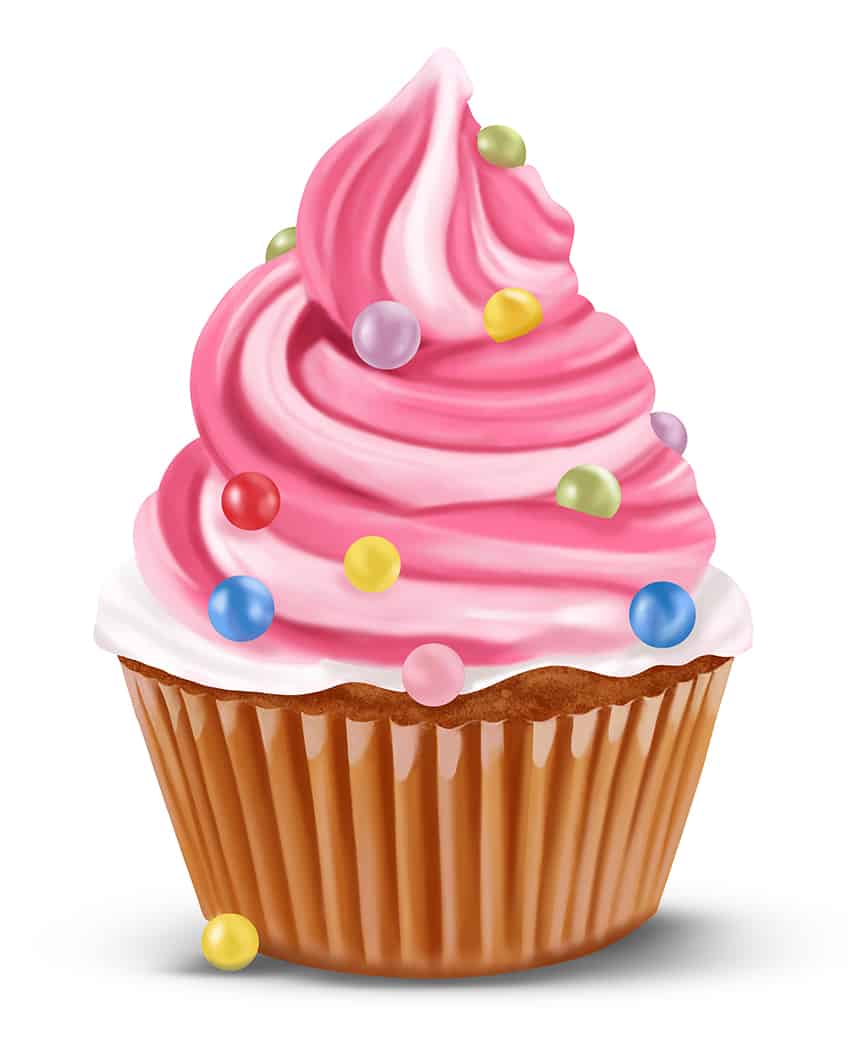

Well done! You have reached the end of our easy cupcake drawing tutorial. We hope you had fun while learning how to draw a cupcake. Now you can draw a realistic cupcake anytime, be it for a birthday card or a party invitation! Happy sketching!
Frequently Asked Questions
Is It Easy to Learn How to Draw a Cupcake?
Drawing a cupcake is very simple. Follow this step-by-step guide on how to draw a cupcake, and you will be a master cupcake sketcher in no time! This lesson will show you how to draw a realistic cupcake and how to use painting techniques to bring your cupcake drawing to life!
What Color Should I Use for My Cupcake Sketch?
In this easy cupcake drawing tutorial, you will learn how to add color and shading to your cupcake sketch. The best part about creating this illustration is that you can choose whatever colors you want! We have opted for frosting in pink and colorful sprinkles.