
How to Spray Paint Kitchen Cabinets – Getting a Smooth Finish
This post may contain affiliate links. We may earn a small commission from purchases made through them, at no additional cost to you.
The thought of painting a cabinet can seem quite overwhelming due to the steps needed to follow and the daunting nature of the task at hand. Should you choose to work using a spray gun you will find the application of the paint easier and quicker which will give you an attractive, smooth finish. What follows is a guide to help you understand how to use a sprayer unit to paint your cabinets and which is the best paint to select.
Table of Contents
- 1 How to Spray Paint Kitchen Cabinets – Guide
- 2 Tips and Tricks for Spray Painting Cabinets
- 3 What your Spray Painter should Deliever
- 4 Painting Cabinets With HVLP Spraying Systems
- 5 Airless Paint Sprayers
- 6 Considerations When Buying an Airless Paint Sprayer
- 7 Comparisons of Paint Application Methods
- 8 Frequently Asked Questions
How to Spray Paint Kitchen Cabinets – Guide
To ensure your finish is smooth on your cabinets it is necessary to follow certain steps. The first of which being that your spray tip should be the correct one for your application purposes and that you have ensured to remove any dust and dirt from your cabinets before beginning. You can remove the dirt by sanding your cabinets down. You will then need to ensure you have the correct primer and compatible paint. To ensure you have the best and smoothest results we recommend you sand the surfaces down lightly between each coat of paint, ensure the paint has dried completely before attempting to sand it.
You want to work with a spray unit that is easy to clean and maintain, and simple to operate. You will need to decide between an HVLP system or an airless spraying system as each have their positive attributes. Using your selected spraying unit as well as the correct application process will ensure you completely transform your cabinets. Your primer has to be compatible with your paint type to ensure you achieve the desired results.
What follows are a look at some of the other aspects you will need to take into consideration when tackling your cabinets, as well as some of the steps you will be required to follow to achieve smooth, consistent results
Painting Over Painted Cabinets
It is easy to paint over previously painted cabinets, to begin with, note that the surface will not require stripping before you start applying the new paint (this is also true for cabinets that have been previously stained or varnished). Start by removing any traces of grease. Using sandpaper, you can then texturize and scuff the cabinets, in doing so the paint will adhere better to the surface. You can start painting as soon as you have finished sanding down the surface and have cleaned it sufficiently.
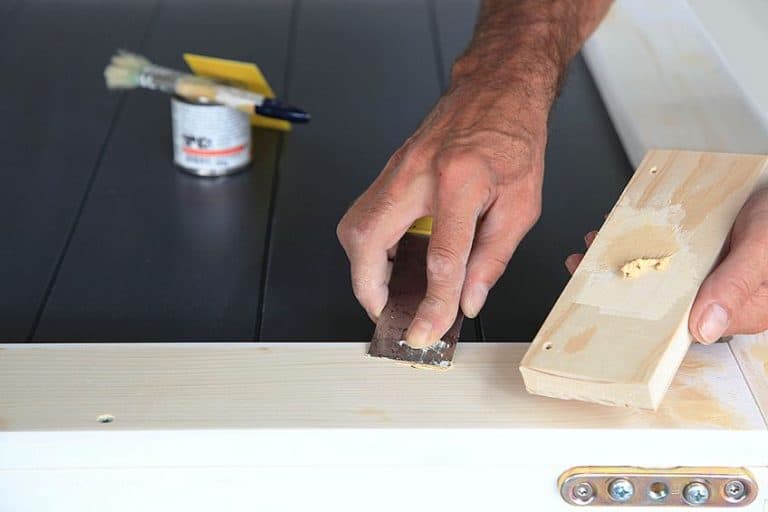
How to Sand Cabinets Before Painting
- You must sand down the surface before you begin painting. You will need to sand all surfaces, wood or otherwise to ensure they have been texturized or sanded effectively. It is so important to do pre-preparation sanding do not listen to any advice that says this is not necessary.
- If the surface has any existing paint or stains you will need to use sandpaper with a grit of 150 to strip, clean, and sand it effectively. If the cabinet has preexisting varnish, then you will only require 80-grit sandpaper. As you sand ensure you assess the surface and look out for any flaws or inconsistencies before you begin with the painting. If there are any serious scratches or gouges you can use a wood filler to smooth out the surface once again.
- Do not sand any deeper scratches as this will only further damage the surface and create an unlevel surface. When cleaning off the residue using a clean wet cloth and not paper towels. When you have finished sanding you can start priming the cabinet’s surface to begin painting. You want to use a primer that can mask and stains on the surface effectively.
How to Prime Your Cabinets
- It is important that you prime your cabinet surfaces, a primer layer ensures a professional-looking finish. A well-primed surface allows for better adhesion of the paint and gives you a smooth finish with stunning long-lasting color.
- Always work from the top of the cabinet downwards as this decreases the chance of your paint running. You can use a brush or a roller to smooth your already primed surface.
- We cannot stress enough how important it is to ensure that the primer you have selected is compatible with your paint type. When you have finished priming your surfaces and allowed them to dry, you can begin painting.
- You will only need 2 layers of primer on your cabinets unless you need to mask a dark stain, then we recommend using 3 to 4 coats of primer.
- You need to allow at least 1 to 2 hours for the first coat of primer to dry before you apply the next layer (always test the surface before beginning with the next layer). Allowing sufficient drying time for the first layer will help ensure that your surface does not peel or bubble. This is a very time-consuming process, as you can only paint one side of each cabinet door at a time.

Masking Cabinets Before Spray Painting
You will have to mask your area before you can begin spray painting as it stops your surfaces and items from being sprayed with paint unintentionally. All surfaces such as walls, countertops, ceilings, or any appliances need to be covered and securely taped. This is a simple step and all you will need is newsprint paper, don’t bother with plastic sheets. Remember that the inside walls of the cabinets also need to mask, unless of course, you intended to paint them as well. You may need an additional work area to paint the cabinet doors potentially an outdoor area or garage if you have access to one.
Tips and Tricks for Spray Painting Cabinets
- Test your spray gun before you begin to paint the surface. Try testing it on some loose cardboard which will allow you the opportunity to calibrate it sufficiently to be suited for your project.
- To ensure the smoothest finish use a fine tip and nozzle.
- The velocity of the paint sprayer is affected by the pressure levels so ensure you keep this low enough to avoid over-spraying and the mess it will cause
- You need to handle an airless spray gun with care as it can be a safety hazard. The pressure levels can potentially break the skin
- You want to ensure that your workspace is well ventilated
- Ensure you are using the correct primer and that is not flammable
- Follow all the required steps before you start working, including reading the product guide. You need to ensure you take care of your safety which includes wearing the necessary protective gear.
What your Spray Painter should Deliever
If you are a novice when it comes to spray painting, we can help you determine which are the best tools for the job at hand. Before you go out and buy anything you will first need to understand the correct products you will need to best fit your chosen project. When selecting the paint for your sprayer there are many elements you need to consider.
Turbine Power
A turbine assists a paint sprayer to function as it creates the levels of pressure which propel the paint directly into the spray gun. The sprayer’s moor system will determine the variant of the paint required. You will need a quality sprayer to achieve a consistent pressure level so you must select the correct one. An industrial paint sprayer is not the most affordable option as they use a lot of energy that being said they do give you great force and power. You want a device that offers a good balance between power and energy consumption.
Nozzles and Tips
Many paint sprayers, in particular the higher-end models, offer you the option to spray varying patterns. What is great about a sprayer that offers you this option is that you have a lot of flexibility and can decide how heavy the level of spray is that you are working with. Your outlet pattern can either be vertical, circular, or horizontal, you can either have this feature built into your sprayer or you can use a sprayer that comes with additional nozzles and tips. Using different outlet patterns for different areas will ensure better coverage and overall a smoother finish.
Paint Container
If you have a decent-sized container, you will not have to continuously refill the sprayer, which is why a smaller container can be quite time-consuming due to having to refill it all the time. Taking into consideration the type of project and the total surface area you will need to cover will help you select the best sprayer for your specific needs. The majority of the sprayer is equipped with a 35 – 40 fluid ounce container (1 – 1,2liters) and this should be perfect for most projects. If you are planning to tackle a larger project you might have to look at using a larger container (perhaps try a gravity feed canister as they offer lots of volumes).

Weight
When spraying cabinets, you want a sprayer that has great mobility and you can operate with ease. You should look for a unit that is lightweight so you can handle it with ease, this will allow you better control and as a result a better finish. If you have selected the correct hand sprayer for your project your work will move quickly and will be hassle-free. A light sprayer unit is also a great option to deal with the hard-to-reach corners on cabinets.
Cleaning
It is important to maintain and clean your paint sprayer so that you will always get the best results when using it. All devices require consistent cleaning and maintenance to ensure they perform at their best. If you do not clean your sprayer, you could experience clogging which will block the paint from flowing out of the nozzle. Some units are easy to clean and others not, so consider this when selecting your paint sprayer. You want a unit that you can disassemble easily and then you can use soap (or detergent) and water to clean the device.
You can extend the life of your unit by cleaning and maintaining it often and with care and this will save you money over time. When you have finished a project ensure you clean all parts of your machine and double-check the functionality of each piece is in order.
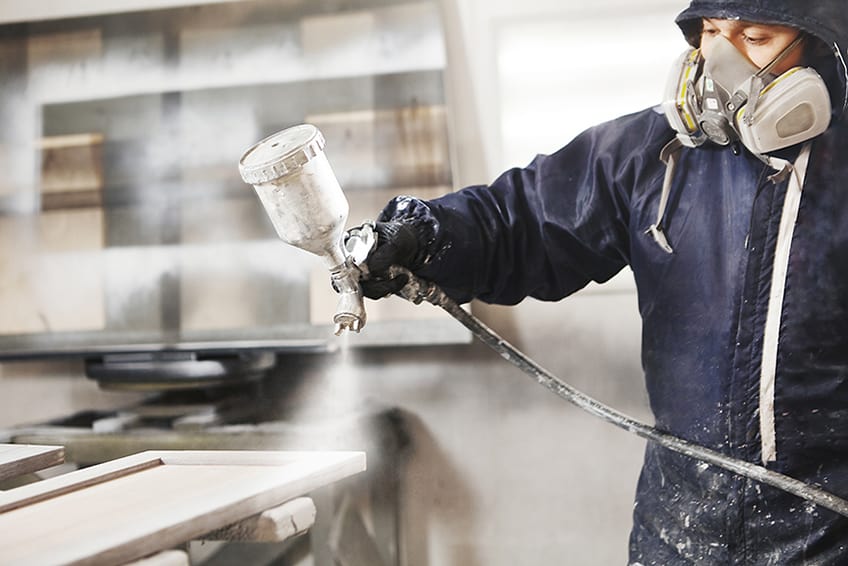
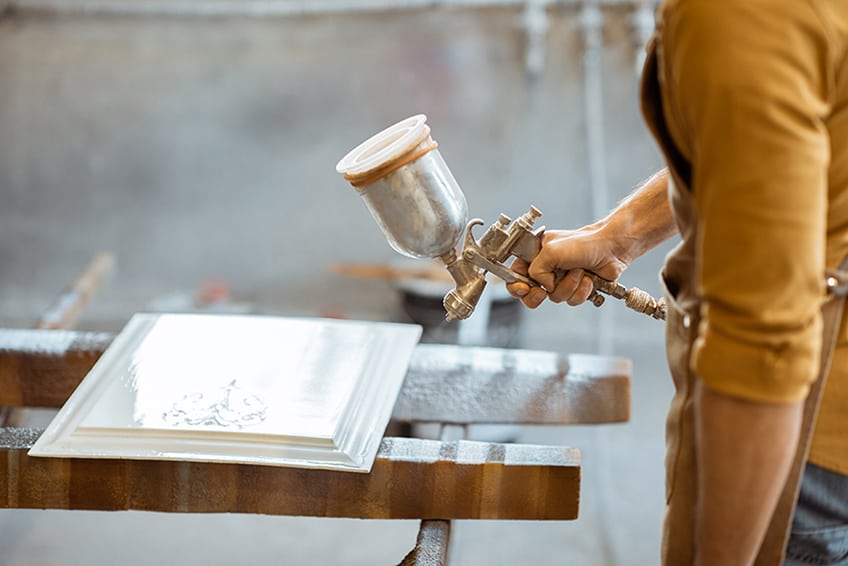
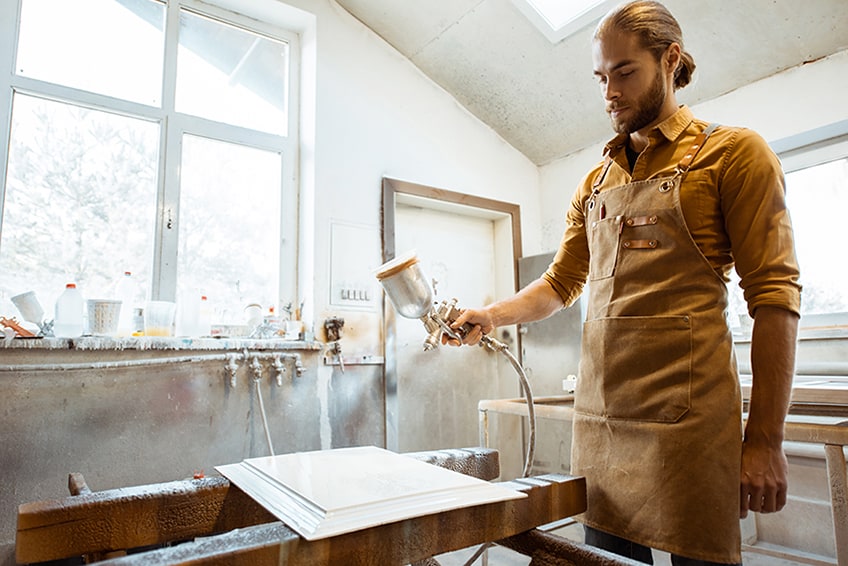
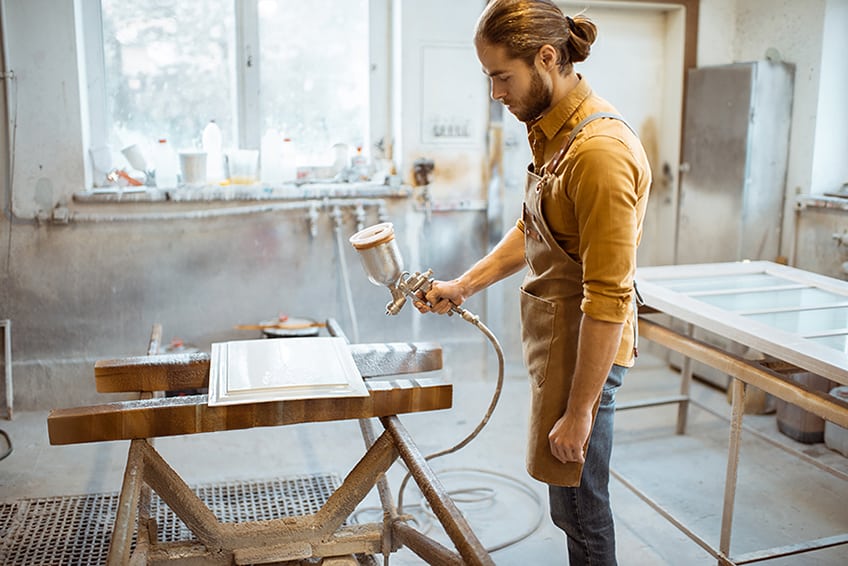
Painting Cabinets With HVLP Spraying Systems
Regardless of your level of skill when it comes to painting, a paint sprayer can be a very useful tool. An HVLP spray gun is a great option if you are looking for a versatile solution that provides you the option to do decent levels of details. These paint sprayers are ideal for use in spraying cabinets as well as an assortment of other projects. These spray guns will save you time as they atomize the paint in large volumes with the use of a low-pressure system. An HVLP device will always give you stunning results.
The paint is pushed into the barrel of the spray gun by the force of gravity, the paint then connects with the airstream from the air compressor. The pressurized airstream will then atomize the paint and this produces a mist of paint that is fine and provides a smooth finish. You get great control from HVLP paint gums making them ideal for more delicate work such as furniture and cabinet painting. You wouldn’t however use an HVLP sprayer to coat a large surface such as the walls of your house as it will prove to be impractical.
You will need to familiarize yourself with the operations and functionality of your HVLP spray gun before you tackle your cabinets. We strongly suggest you use an industrial-level air compressor in conjunction with this sprayer unit. You want to take note of the optimal psi setting when purchasing your HVLP spray gun (you ideally want a psi of at least 70 for paint).

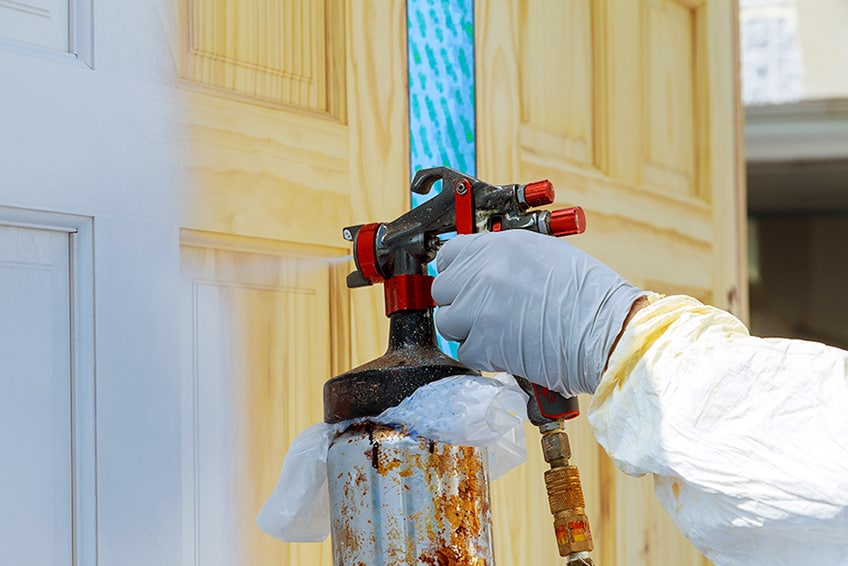
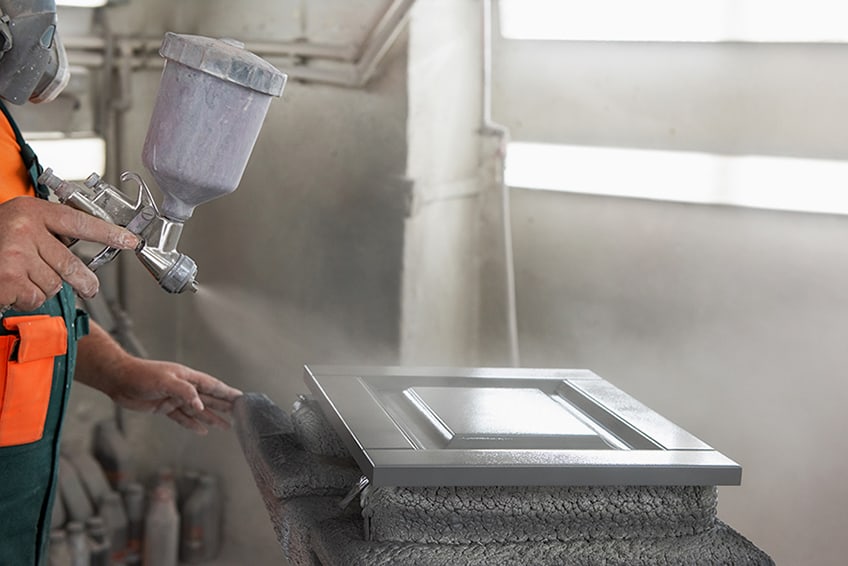
Airless Paint Sprayers
Once this unit has pumped 3000 psi of paint the unit will work with ease. The unit uses a hose, that sucks up the paint and causes it to pass through a tip forming droplets. The unit uses an electric motor making it the most powerful option available. The paint is applied in a thicker format meaning you will require fewer coats. The airless paint sprayer comes with an assortment of spray tips and it will make your work go much faster. This is the perfect option if you require a heavy-duty spray unit, they are perfect for tackling larger projects, but if you attach a finer spray tip then you can use the unit for smaller jobs such as your kitchen cabinets.
A finer spray tip, ideally 311 in size, will mean that your paint coating too thickly. The tip provides a buffer between the spray unit and the surface as you are applying the paint. This type of sprayer unit is a versatile multipurpose tool that can be used for an assortment of projects.

Considerations When Buying an Airless Paint Sprayer
Before you purchase an airless spray unit you should consider a few aspects to ensure you are getting the correct unit for your needs.
Size of the Project
You will need to define the size of the area that you will be painting as this will be one of the biggest factors impacting your decision of which spray gun to buy. You do not want a unit that is too heavy-duty in comparison to your project as you may end up over-spraying your surfaces. Over-spraying is just a huge waste of paint which can prove to be costly and creates an unnecessary mess and potential damage to your workspace and materials. The paint particles which are uncontrolled that end up in the air are very harmful to the surrounding environment. So you want to ensure you select a unit that offers a decent degree of control and customization.
Size of the Tip
To determine the volume of paint that is output by the unit is controlled by the spray outlet tip, the tip can also change the spray pattern which you will need to be different for particular purposes. To determine the best optimum tip you use a simple equation which is, each tip is categorized by a three-digit number, take the first number in the sequence by 2 which gives you the size of the tip. It will also dictate the spray arc, at 12 inches from the tip.
You should select your size of tip carefully to ensure your project will be a success so you should familiarize yourself with the operations of the spray tip and which are compatible with each spay unit. Applying different substances requires different size tips, so for example you will require .013 inches (roughly 0.22 – 0.33 mm) tip to apply stains and lacquers. While if you need to apply a primer, you would ideally require a tip that is .025 to .035 inches (roughly 0.66 – 0.88 mm) in size. You will require a wide spray tip when working with oil-based paints, be careful if you use a tip that is too narrow it will get clogged up. The reverse can happen if your tip is too wide and you may result in over-spraying.
Airless Technology
GRACO’s Magnum X5 spraying unit offers a true airless system providing a high level of service. This is thought of as the best airless paint sprayer which is perfect for use spraying cabinets. An airless unit is suited for larger projects so this unit is a must for a DIY enthusiast. A highly versatile product which means you can tackle an assortment of projects. You will achieve amazing results using it to spray paint your kitchen cabinets.
Pressure Variables
The suction hose requires a high-pressure piston to spray directly from the 5-gallon (18.91 liters) paint container. This decreases steps in the procedure and in doing so saves you time as you do not have to decant the paint, this also means your paint will not be thinned out.
Sturdy and Well-Built Components
GRACO has used the highest quality materials to manufacture this spraying unit. The unit also has a DuraFlex hose which is 25 feet (7.62 meters) in length, the hose is very durable and highly flexible. With the use of this unit, you can handle up to 50 gallons (189.271 liters) annually of paint. It also comes equipped with a 563 stainless steel spray gun that is simple to maintain and durable.
Compartments for Storage
This system is particularly nifty as it has storage compartments which means your tools are stored securely and you have easy access. It is great to have all your tools require together!
Comparisons of Paint Application Methods
There is an assortment of different methods you can use to apply the paint to your cabinets such as using a roller, a brush, a spraying unit or an airless paint sprayer. Next, we will look at the comparison of the different methods of application.

Rollers vs. Paint Sprayers
You can apply paint in controlled layers of thin paint ensuring you avoid any paint from running or it is applied too thickly when you work with a spraying unit. You will have to use particular effective methods to ensure you achieve these types of results. If you do not use the correct methods you can end up with thick spots of paint or worse paint running on your cabinet doors. If you do not use the correct techniques, you can also potentially damage your equipment. Over time with bad application techniques, you will damage the tip and it will deteriorate, you need to ensure you follow careful operations of the unit and maintenance. This can result in over-spraying up to 50% and paint being wasted. You will use significantly less paint when using a roller instead of a spraying unit, it is estimated that a spraying unit uses roughly 20 – 40 % more paint but this figure is of course impacted by which spraying unit you use.
If you were to use a roller the paint would be applied thickly over the cabinet and you will have to smooth out your work. Sadly, this means potential drips and running of the paint and the finish just will not be consistent. You can be left with a roller mark, so rather turn to a sprayer for more consistent results.
Paint Sprayer vs. Paint Brushes
With one easy application, a sprayer unit will ensure excellent results. Through spraying, paint droplets are applied to the surface through atomization. This method is very effective and substantially more so than painting with brushes. On average three or four brush strokes are required to match one sweep of the sprayer.
You will be able to complete your cabinets, when using a spray unit, in one afternoon as it offers amazing area coverage and your application and drying time are significantly reduced. Your painting will be consistent even on the hard-to-reach corners and nooks. Brushes are not great on edges whereas a sprayer will ensure smooth edges. You will have to allocate time to smooth any inconsistencies over if you choose to use brushes, making the overall process take that much longer. Rather turn to a sprayer for use on your cabinets to ensure consistent results in a timely fashion.
HVLP Spray Gun vs. Airless Paint Sprayers
As a beginner, it is a good option to use an HVLP spraying system as you will be able to work it effectively without any previous experience. All the details you need to be able to operate the HVLP are in the product guide. You can also avoid creating any paint wastage and mess when using the HVLP system thanks to its low-pressure mechanism. You can use the HVLP to apply varnishes and stains with ease and it is ideal for small projects allowing you to even use water-based products. If you have to tackle intricate areas this unit offers precision and control.
In comparison, an airless spray system requires you to have more technical knowledge to operate it, yet it does allow for the application of a few additional product types like primer or latex. Due to the high-pressure levels (roughly 200 psi), an airless system consumes high volumes of paint, as a lot of paint molecules pollute the surrounding environment. When using the airless system, you will need large quantities of paint, the positive aspect of this system is it is ideal for painting a large area and works quicker than your other options.
Frequently Asked Questions
Is a Roller or Brush Recommended for Painting Cabinets?
You can paint a cabinet with either a roller or a brush but using a spray gun is the best option as it goes quicker and you have a greater level of control. Working with a spray gun will ensure you avoid running and dripping, over-applying paint layers, or getting a finish that isn’t smooth.
Do I Have to Sand before Spray Painting the Cabinets?
You must sand down your surfaces as it allows for adequate adhesion of the primer coat. You will always need to prepare any surface with priming by texturizing it.
Can I Use a Paint Sprayer to Paint Cabinets?
This is the tool that we recommend you use for painting cabinets as it makes the process go quicker and your finish is superior in comparison to if you used a brush or roller. You can give your home’s interior a new life by simply giving your cabinets a fresh coat of paint. Hopefully we have now equipped you with the knowledge to tackle your cabinets!