Best Epoxy for Tumblers – What Kind of Epoxy to Use on Tumblers
This post may contain affiliate links. We may earn a small commission from purchases made through them, at no additional cost to you.
You can use Epoxy Resin to customize your tumbler. Combine it with glitter, paints, or whatever else you can imagine to create fascinating Epoxy Tumblers. Below you will find advice on which Epoxy Resins are best for tumblers, and we show you how you can do it!
Table of Contents
Considerations for Finding the Best Resin for Epoxy Tumblers
When you are looking to make a list of best resins for tumblers, always be sure to consider the following points:
- How liquid is the epoxy?
- Does it comply with FDA standards?
- Does the resin contain UV resistance?
- Is it simple to work with?
- How long will it take to yellow, if it does?
- Are other resin tumbler makers using it?
- Is it resistant to heat, enough to use for tumblers?
- Is there any odor when working with it?
When you compare all the notes from the above list, you will see that there is not one resin that checks all the boxes. Fear not, the resins we list below we deem to be the best for creating epoxy tumblers as they tick many of these boxes. And we’ll share the reasons we chose them.
Remember, for any resin you plan on using, to refer to the Safety Data Sheet. Also, do your research if it states that a resin is food safe or meets FDA regulations. This is a crucial step to take yourself, especially when you plan to use the epoxy resin for anything that will encounter skin or food.
Best Epoxy Resin for Tumblers
Looking for the best epoxy resin to use for tumblers? With so many different products out there, finding the right one can be difficult. Below are some of the top product picks for this kind of project.


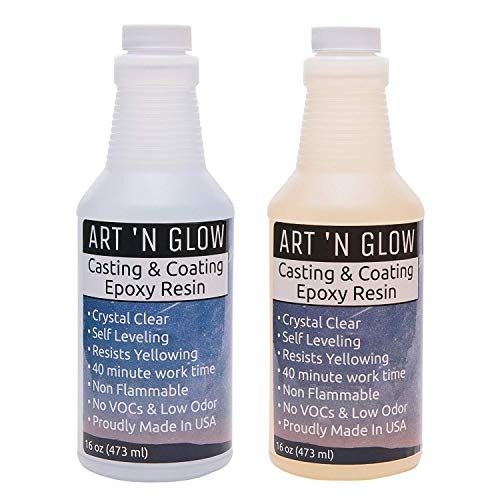
Art N Glow Epoxy Resin
This self-leveling, self-degassing, and odor-free resin can easily be used as a casting resin or a tabletop resin. When cured, it is crystal clear, which is one of the main reasons artists love working with it. As always, make sure you use this in a well-ventilated space, even though it is odor-free. It is incredibly easy to use, and a 40-minute work time gives you enough time to work with it, making it great for beginners.
The UV resistant Art N Glow will combat yellowing over time. Note, though, that we recommend that no epoxy resin piece should be outside all of the time, as prolonged time in the sun will eventually make it turn yellow. For articles that will only spend some time outside, this should not be a problem. Another plus, the equal mixing ratio makes it straightforward to work with – which is why beginners love it!

- Use for all of your casting AND coating applications.
- Cures crystal clear and hard as a rock
- One to one mix ratio, 40 minute work time
Art N Glow sells in 3 kit sizes, namely 16-ounce, 32-ounce, and one-gallon kits. 72 to 78 degrees is the optimal working temperature range, so try and keep your workspace between these to maximize your results. Your epoxy will cure better the closer you are to 78 degrees, and the cured resin can withstand temperatures of up to 120 degrees. You can also alter the heat of the resin when working with it. By placing it in a bucket of warm water, you can make it easier to work with a cooler resin. Keep in mind that, since the warmer resin cures quicker, you’ll have a shorter period in which to work with it. Another benefit is that warming up the epoxy helps bubbles from escaping.
Pour slowly and keep a steady hand to make sure you don’t add any air bubbles. Also, try to pour it down the side of the bucket holding the resin. If some bubbles did form during pouring, use an artist’s torch to get rid of them.
To prevent stickiness, cloudiness, or other issues when pouring multiple coats to thicken your epoxy layer, be sure to wait three to five hours between pours. If you’ve waited too long, first sand the epoxy before adding the next layer.
Pros
Cons
- Quite a long curing time
- Can produce bubbles while pouring
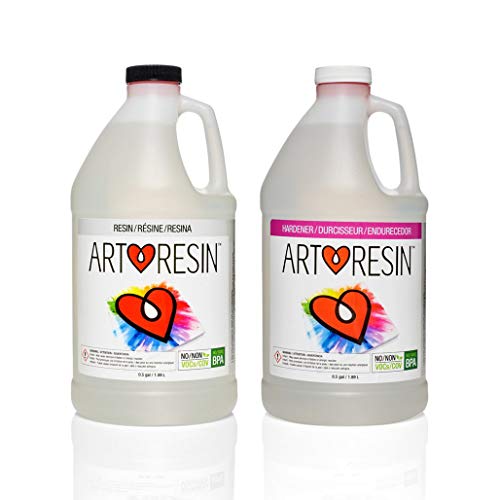
Art Resin
For a gorgeous, durable finish, the clearcoat, high-gloss epoxy resin from ArtResin, is a winner. This easy to use, crystal clear resin was specially designed to be used in creative projects.
Created to protect against yellowing, ArtResin preserves, and complements your work. An excellent choice for many projects, including photos, jewelry, wood, and paintings. It’s straightforward to prepare, with a simple 1:1 mixing ratio. Equal parts Resin and Hardener are mixed, stirred, and then poured or spread over your project. This self-leveling topcoat takes 72 hours to cure fully. Non-flammable and low-odor, ArtResin is also certified non-toxic — no VOCs or fumes. ArtResin Epoxy Resin Kits also contain user instructions.

- Highest Quality Epoxy for Art purposes, Non-toxic
- Very easy to use with 1 : 1 mixing ratio
- UV stabilized for unparalleled non-yellowing protection
You can mix ArtResin with several types of pigments and dyes to create a colored epoxy. Or, why not purchase ArtResin’s liquid pigment, specially made to use with their resin. We must warn you, though; it comes with a hefty price tag! As always, you can purchase many other brands if you are on a budget. PLEASE NOTE: before using it in your final project, always make sure you test a sample of the epoxy, both before and after tinting.
Pros
Cons
- Doesnt include very detailed instructions
- The resin can still cause skin irritations while in liquid form
Envirotex Epoxy Resin
A pour-on, high gloss finish epoxy resin is Envirotex Lite’s claim to fame. In optimal conditions, it’ll cure to a thick, shiny coating, and can reach full cure in around two days.
Envirotex Lite Resin was the first choice of many tumbler artists, and they were quick to mention its ease of use and extremely low odor. This last fact is confirmed in Envirotex USA’s Safety Data Sheet, stating “odor: minimal. Not Distinct”.


- High Gloss 2 component polymer coating
- Solvent free formul, Waterproof, Heat and alcohol resistant
- 32-Ounce kit covers approximately 8 square feet
You can find the following information on the rear of the Envirotex Lite resin packaging: “Complies with FDA 21 CFR 175.300 for coatings intended for indirect and direct repeated food contact use when accurately measured, thoroughly mixed, and fully cured”. Before using it, please confirm you read and ensure this FDA Compliancy for yourself.
On the Envirotex Lite website right here, you’ll find the Safety Data Sheet (SDS). Since you’re using a chemical, you’d wish to get the SDS quickly on a company’s website. Theirs was certainly easy to hunt out, and we also liked the ease of reading it.
Although most artists recommend and love working with it, Envirotex Lite can yellow over time when exposed to UV light. Take note, though, that most resins will do so over time. The amount of yellowing, also the time it takes to yellow, are two properties you need to determine.
Pros
Cons
- Can yellow over time when exposed to UV light
How to Make an Epoxy Tumbler
Interested in making an epoxy tumbler? Great idea, because this is a fun and highly rewarding process. Follow the guide below to help you get started.


Images: © Ivette Moreno / www.maestracreations.com
Materials Required
Here’s a list of everything you will need for your first tumbler:
- Stainless Steel Tumbler
- Spray Paint
- Painters Tape
- Mod Podge
- Silicone Brushes
- Fine Glitter
- Clear Coat Spray
- Epoxy (Both A and B parts)
- Disposable Rubber Gloves
- Small Mixing Cup
- Popsicle stick or another stirrer
- Adhesive Vinyl
- Cup Turner
- 180-220 grit sandpaper
- Paper plate or tray to catch drips
Setting Up the Epoxy Tumbler Turner
Surprisingly, the first terrifying part of making tumblers with epoxy is really to use the epoxy. Don’t let it put you off. It’s easier than it may seem.
To set up your work area, and before you begin mixing and applying the epoxy, make sure you choose a spot near a power outlet, and where you’ve got some space to work with. Keep in mind that the cup turner will run for at least 6 hours at a time, and that your tumbler should be completely horizontal. If it’s not, this can lead to drips or uneven application of the epoxy resin.
Tip: Place a paper plate below the cup turner to catch any epoxy that might drip.
Choosing the Right Tumbler
As fully cured ArtResin can handle a maximum temperature of 120F, or 50C, hot, freshly brewed coffee or tea may cause the cured resin to soften – especially seeing as these drinks can easily exceed this temperature. So, if you plan on using your tumbler for hot beverages, the exterior will be kept cool if you make sure to choose an insulated tumbler. To prevent the resin from coming into contact with the hot beverage when you drink it, choose a tumbler with a plastic lip at the top. So, what are the more common materials that they make tumblers from?


Images: © Ivette Moreno / www.maestracreations.com
Metal
Stainless steel, in particular, is your best bet. It gives the epoxy a great base to stick to. You can use a base coat of spray paint if you want to compliment your color palette, but it is certainly not needed. Remember, always choose an insulated tumbler to protect the resin from the heat if you plan on using it for hot drinks.
Plastic
Plastic tumblers should not be used for this as the resin will peel off over time, since it doesn’t stick to plastic. If your tumbler does contain some plastic, you can still apply epoxy if you cover these with a plastic-compatible paint.
Glass and Ceramic
Only use resin-covered glass or ceramic tumblers for cold beverages. The glass or ceramic will absorb the warmth from a hot drink, and therefore the radiated heat could cause the resin to melt. As long because the exterior is made of stainless steel, you’ll still use insulated tumblers with a glass interior.
Prepare Your Surface and Tumbler
To catch any drips, make sure to cover your surface with a plastic sheet. Take the cup turner and place it on your surface. Cover any plastic parts you don’t want to cover with epoxy, with a masking tape. If you would like, you may also spray-paint the tumbler. Stick the foam football onto one end of the rod, and then push the football and rod combination right down to the bottom of the cup. Insert the other end into the motor of the cup turner. Use a level to make sure that your tumbler is perfectly horizontal. To protect the spit rod from resin drips, use some painter’s tape to cover it.


How to Mix and Apply Epoxy to a Tumbler
A common question I receive from beginners is what quite epoxy to use on tumblers. My answer? Amazing Clear Cast epoxy. Get it as a full kit, or buy the resin and hardener separately. Work in a well-ventilated space, and ensure to wear gloves. I used a 20oz tumbler, and 10ml of epoxy was enough for each layer. Pour 5ml of each (resin and hardener) in individual cups.
As you pour the thicker (Part A) of the two into the small empty mixing cup, remember that you can use the popsicle to scrape the sides, so you get the highest amount possible out of the container. Now SLOWLY pour Part B, thinner and easier flowing, into the thicker part. Use the popsicle to stir the two components together and keep stirring until the epoxy is clear and not cloudy. Mix it gently, so you don’t add bubbles.
Set your cup spinner to turn pretty slowly and then start pouring the epoxy on the cup. To smooth the epoxy across the entire length of the tumbler, you can use your free, gloved hand, or a silicone brush.
Tip: You should have covered any areas you do not wish to have epoxy on with tape by now
To make sure the tumbler is entirely covered by epoxy, make sure you pour out all the epoxy, all the while smoothing it out as the cup turner rotates. Let the tumbler turn for 10 minutes or so after you finished applying the epoxy, before carefully removing the tape you used. Remember to wear your gloves! If you wait too long, you may seal the tape under the epoxy.
You must let the cup turner run for a few hours more. After say six or so hours, you can remove your tumbler from the cup turner, and let it sit and cure for several hours more before use.
How to Make a Glitter Tumbler
The easiest way to apply glitter to your tumbler is when it’s on the turner (with tape covering the base and top of the tumbler, of course) and horizontal, regardless of which type of glitter you are applying.


Make a Unique Tumbler with Glitter
You can apply a sparkle to your work either with a glitter paint or loose glitter. If you use the latter, spray your work surface first with an adhesive spray, and then generously sprinkle your glitter. Place a paper plate under your tumbler to catch any leftover glitter. To use glitter paint, you simply brush it onto the tumbler’s surface. Let the paint or glue dry completely before you continue.
When you use a base paint on your tumbler, make sure it is the same color as the glitter you are applying to the surface, or as close as possible to it.
You need very little epoxy to apply glitter. Apply too much, and you’ll have ‘slick’ spots, which will change the hue of your glitter. Instead of covering it, epoxy will intensify it even more. See below for an idea of how much epoxy you’ll need for your tumbler.
Finish with a Layer of Resin:
Once the paint or glue is dry, mix a small amount of resin, and then you can mount your tumbler again as before on the cup turner. Remember to wear your gloves. Switch the cup turner on again, and apply the resin as the tumbler rotates. Cover the whole surface evenly and permit the tumbler to dry, usually at around 18-24 hours. Remove the tape and allow it to cure after this completely. At 72 hours, it should have fully hardened.
How to Handle Your Epoxy Tumbler
After the epoxy has cured, it is time to finish your project and clean it. Please remember always to check the inside of your tumblers!
Use an Exacto knife and heat the blade well with a torch. You can now use this to clean up the rim of your tumbler. If your blade doesn’t glide across, it isn’t hot enough – this is a vital part! If the knife is not hot enough, the seal on your cup can break, making it unsafe for further use. The broken seal also can cause moisture to urge between the epoxy and steel and cause it to peel off. If moisture collects under the resin, it can even start to grow mold.
After you trimmed the epoxy from the rim, clean the inside of the tumbler. Then set it down on a table to make sure it doesn’t rock. If you do find that your tumbler is uneven, it’s either because you removed it from the turner too soon and uncured resin collected at the bottom, or your tumbler wasn’t level when it was turning. See if you can sand the resin to flatten the bottom.
Only use alcohol to wash the spray-paint residue from within the cup! Once you made sure it’s nice and clean inside, wash it with dishwashing soap and let dry.
- Cured resin should be exposed to a maximum temperature of 120F or 50C. It means you shouldn’t leave it in a hot car, but you can wash it with warm, soapy water. Only use your tumbler for cold beverages, unless it’s double-walled or insulated.
- Only use your tumbler once it has fully cured.
- You can use sandpaper, or a sharp blade, to remove any epoxy that may have slipped under the tape. Then use a damp rag to wipe any sanding dust away. Before you use it, remember to scrub your tumbler with warm, soapy water.
Making tumblers with epoxy resin is a great idea. The process is enjoyable, pretty user-friendly, and you get amazing results every time. Working with durable epoxy resin provides many benefits to the end result. We hope you enjoy the process!