
How to Draw a Crown – Create Your Own Royal Headgear Picture
This post may contain affiliate links. We may earn a small commission from purchases made through them, at no additional cost to you.
One of the first things we think of when the words “king” or “queen” comes up is the crown worn on their heads, and with good reason! The crown represents power and has symbolized majesty for thousands of years. Glittering in gold and bedazzled in lustrous jewels, the crown can be tricky to draw and color. If you have been searching for a realistic crown drawing tutorial, then you have come to the right place! We will teach you how to draw a crown fit for a king with our easy-to-follow step-by-step crown illustration tutorial. Ready to start your king’s crown drawing? Let us get right to it!
Table of Contents
- 1 How to Draw a Crown in 19 Easy Steps
- 1.1 Step 1: Drawing the Base of Your Crown
- 1.2 Step 2: Drawing Your Crown Sketch’s Center Outline
- 1.3 Step 3: Adding the Top of Your Crown Drawing’s Outline
- 1.4 Step 4: Creating the Crown Illustration’s Side Lines
- 1.5 Step 5: Adding Circles to the Top of the Crown Drawing
- 1.6 Step 6: Adding More Elements to the Top of Your Crown Sketch
- 1.7 Step 7: Adding Some Finishing Decoration Touches
- 1.8 Step 8: Creating the Points on Your Realistic Crown Drawing
- 1.9 Step 9: Defining the Points on Your King Crown Drawing
- 1.10 Step 10: Adding a Jewel to the Center of Your Realistic Crown Drawing
- 1.11 Step 11: Adding Jewels to the Sides of Your Crown Sketch
- 1.12 Step 12: Drawing the Smaller Jewels on the Sides of Your Crown Illustration
- 1.13 Step 13: Drawing the Final Outlines of Your Realistic Crown Drawing
- 1.14 Step 14: Adding the Base Coat of Color to Your King Crown Drawing
- 1.15 Step 15: Adding Color to the Inner Crown Illustration
- 1.16 Step 16: Coloring in the Crown’s Jewels
- 1.17 Step 17: Adding the Shading to Your Realistic Crown Drawing
- 1.18 Step 18: Adding Highlights to Your Crown
- 1.19 Step 19: Adding the Finishing Touches to Your King’s Crown Drawing
- 2 Frequently Asked Questions
How to Draw a Crown in 19 Easy Steps
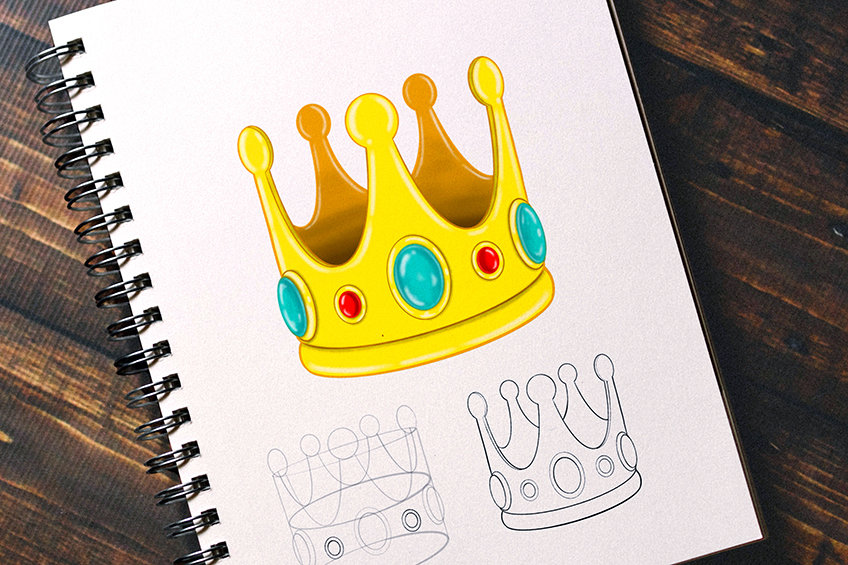
Learning how to draw a crown is easy when you have all the steps laid out for you as we have done in this king crown drawing tutorial. As with most drawings, construction lines are the first step. These construction lines will ensure that we end up with a well-proportioned and realistic crown drawing. Before any other shapes, lines, or colors can be added, our construction lines create the foundation of our finished result If you have a look at this overview of steps to follow, you will see every part of our “how to draw a crown” tutorial and know exactly what to expect. Learning how to draw a crown is easy with our fun guide!
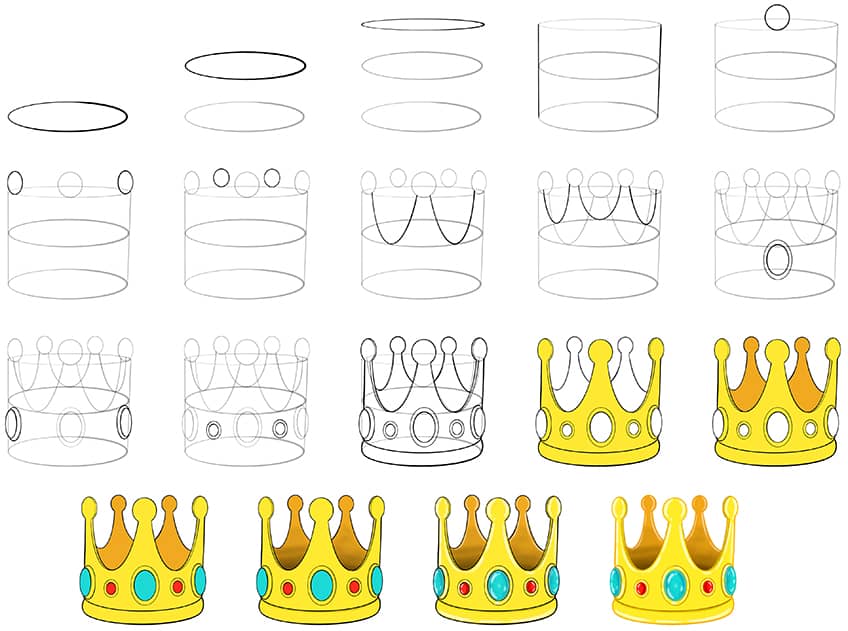

As you can see by the image, color is only added in the final stages or the final six steps of our king crown drawing tutorial. While our tutorial calls for paint, such as acrylic paint, it is possible to still follow our step-by-step instructions for any medium you choose! This includes pencils, pastels, or even a graphic drawing tablet. Should you be using a tablet to complete your realistic crown drawing, we suggest creating layers for each section (construction lines, your king crown drawing outline, and then coloring). If you are using pencils, remember to use light pressure for your construction lines as you will be erasing them.
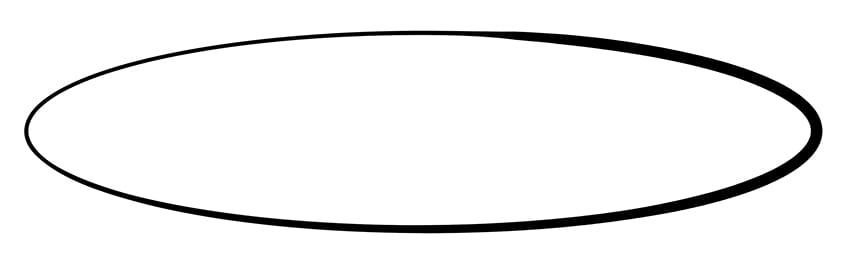
Step 1: Drawing the Base of Your Crown
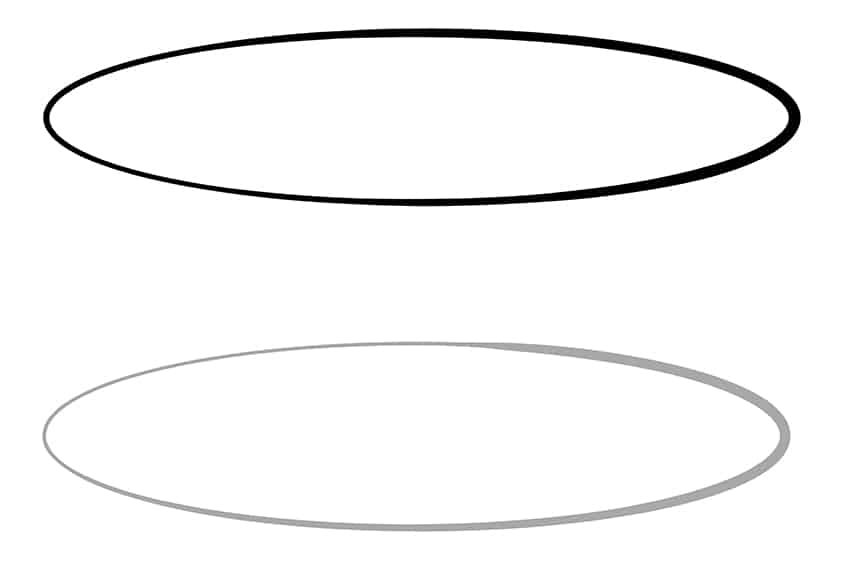
Our completed king crown drawing will be three-dimensional, so our very first construction oval will serve as a map of our crown drawing’s base. Decide where on your page you want the base of your crown to be, preferably lower down and in the center. Now, draw your long and narrow oval like in the picture below.

Step 2: Drawing Your Crown Sketch’s Center Outline
You are now going to repeat step one of your king’s crown drawing and leave a small amount of space between the first oval and the one you are about to draw. This oval will map out the crown’s upper level.

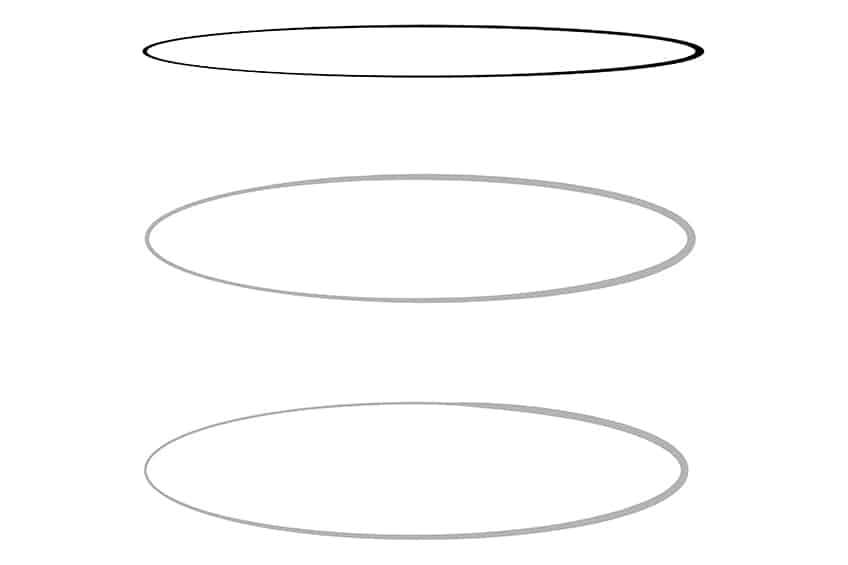
Step 3: Adding the Top of Your Crown Drawing’s Outline
We will now draw a third construction line oval above your second oval. This time, however, make your oval much narrower than the first two. The space between the ovals should remain equal.

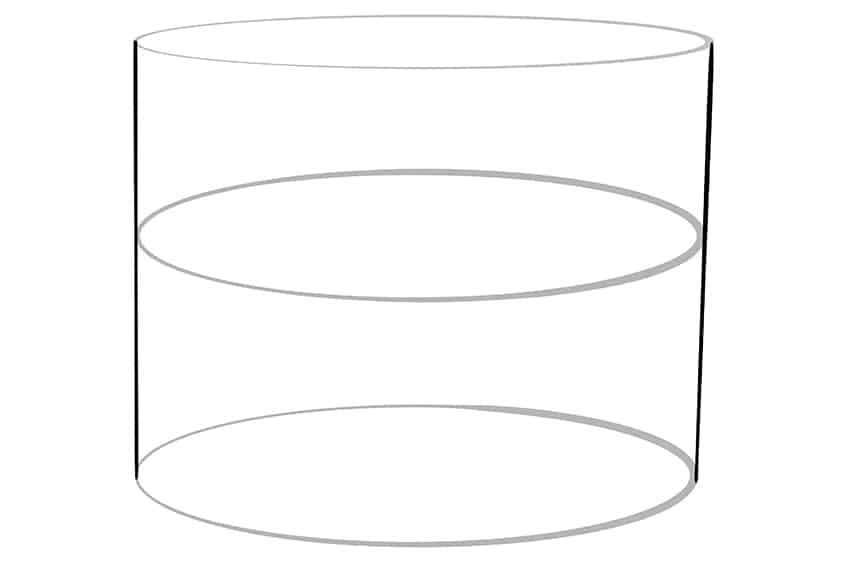
Step 4: Creating the Crown Illustration’s Side Lines
You will now draw a vertical line on either side of your ovals. Make sure your lines are straight. It is advised to use a ruler for this step of your king crown drawing.

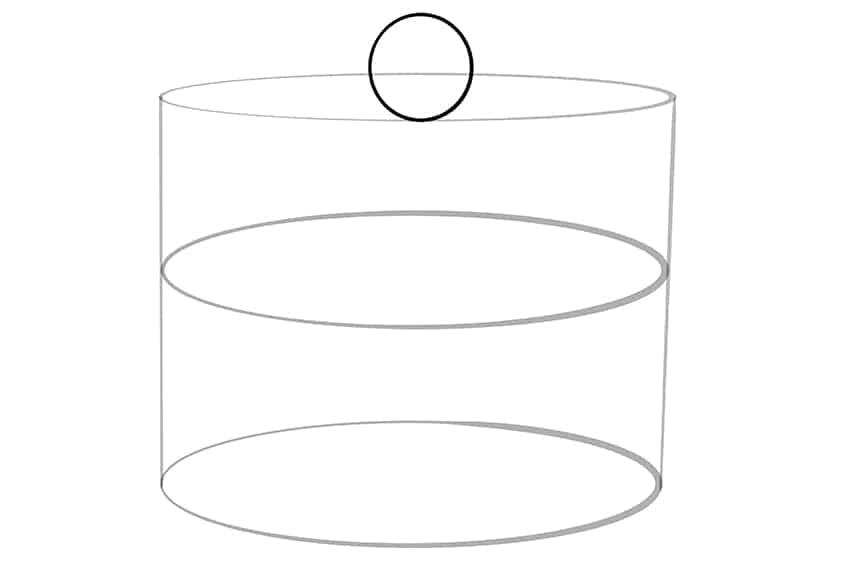
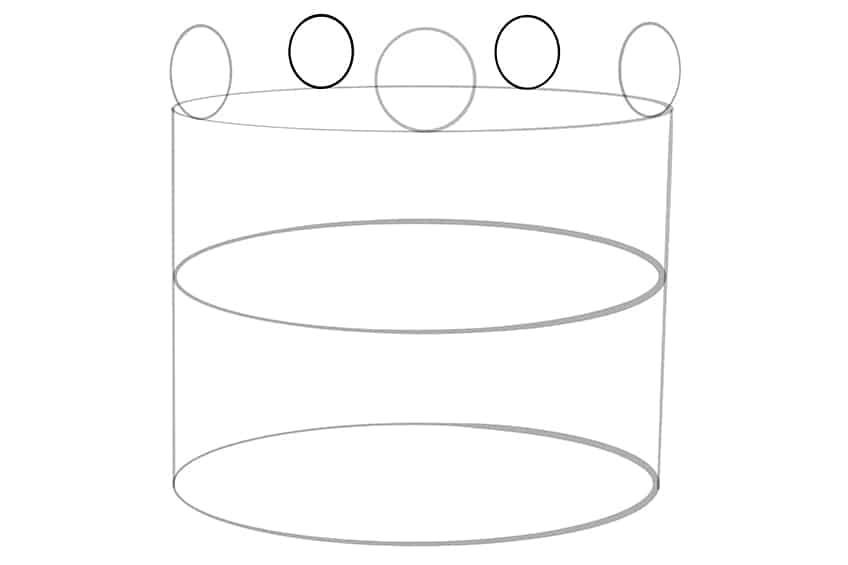
Step 5: Adding Circles to the Top of the Crown Drawing
We will now focus on the top part of your realistic crown drawing by drawing some circle shapes. Find the center point of your top oval and draw a circle. Using a compass is advised if you want perfect symmetry. As you can see by the drawing that follows, your circle should sit on the top oval’s bottom line and it should extend past the top of the oval.

Step 6: Adding More Elements to the Top of Your Crown Sketch
You will now draw two additional circles, one on each side of the top oval. Make sure these two circles are narrower and more oval-shaped than the center circle.


Step 7: Adding Some Finishing Decoration Touches
To add the final touches to your crown sketch’s upper construction lines, we will now add another two oval shapes. These should be placed on the very top line of the oval. Note that these should be quite a bit smaller than the other three circular shapes.

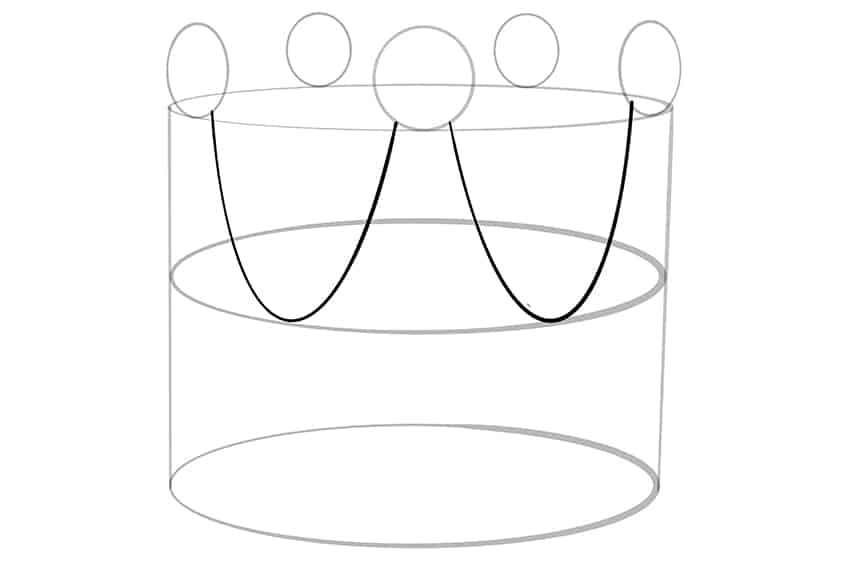
Step 8: Creating the Points on Your Realistic Crown Drawing
We will now begin shaping the points of your king’s crown drawing. In order to create the first crown peaks, you will need to draw two “U” shapes, which will extend from two side circular shapes towards the center circle at the top of the crown illustration. You want to try to keep the symmetry of these lines perfect, so use your ruler to measure for accuracy.

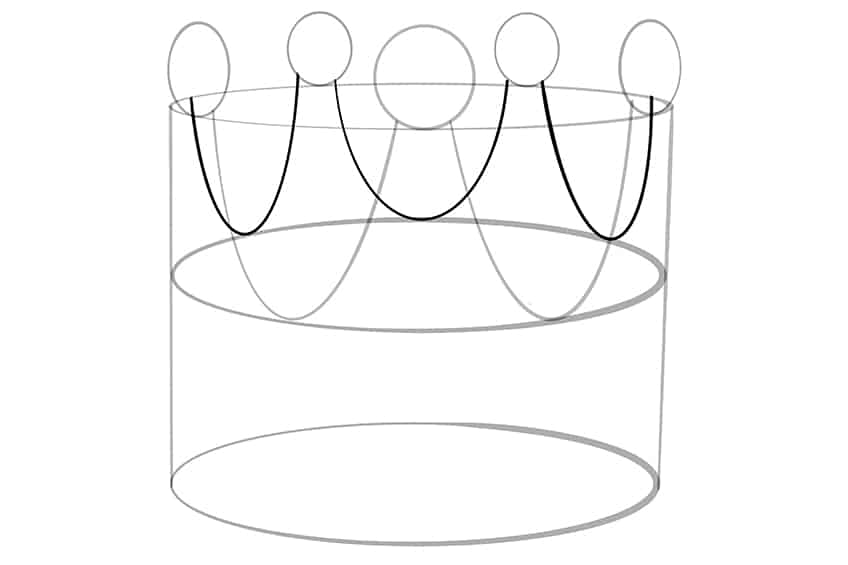
Step 9: Defining the Points on Your King Crown Drawing
In order to create a realistic crown drawing with a three-dimensional value, you must complete this very important step. You will now be drawing three more “U” shapes. This time, however, you will draw them linking the side circles to the two smaller oval shapes you drew in step seven. Have a look at our drawing that follows for a better idea of what to do for this step. You can see that these three hind “U” shapes are shorter than the previous two.

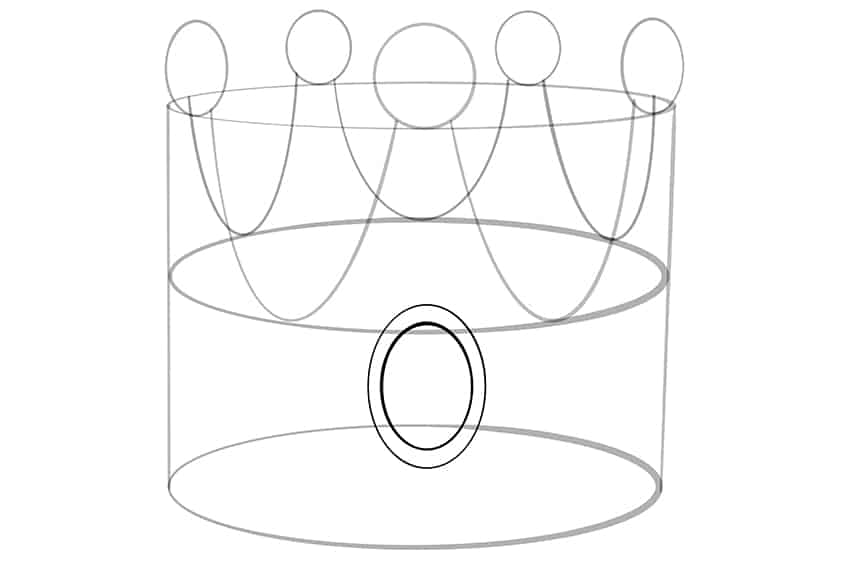
Step 10: Adding a Jewel to the Center of Your Realistic Crown Drawing
For this part of your king crown drawing, you will be adding the jewel construction lines. The first jewel is to be placed on the center band of your crown. Draw a large vertical oval-type shape that very slightly overlaps the middle oval. You can now add a slightly smaller oval inside of the one you just drew to create a border.

Step 11: Adding Jewels to the Sides of Your Crown Sketch
We are not yet done with our crown drawing’s jewels! On either side of the crown, we will draw another oval. This time it will be quite narrow. These ovals should slightly protrude past the crown vertical construction lines but remain within the borders of the center and lower horizontal construction ovals. Now, you will draw a partial oval on the inner side of these ovals, much like how you created a border for the center oval.
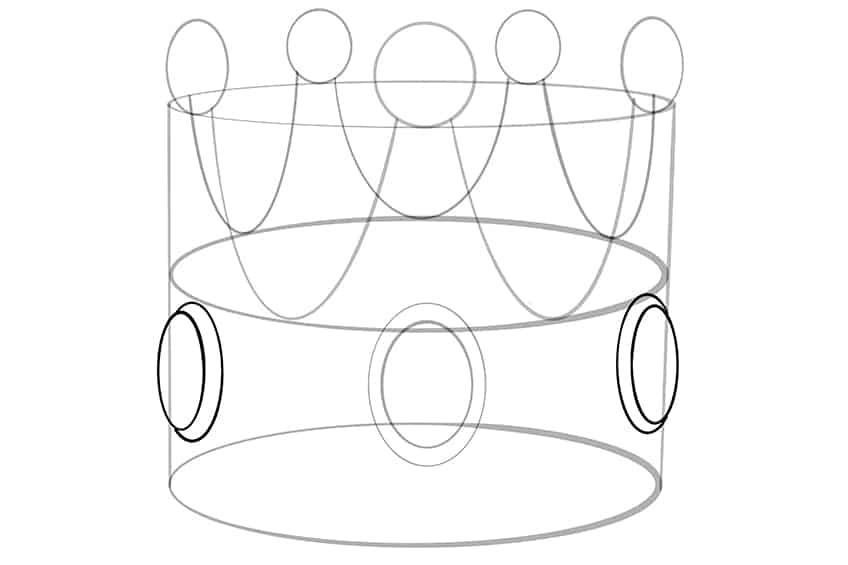

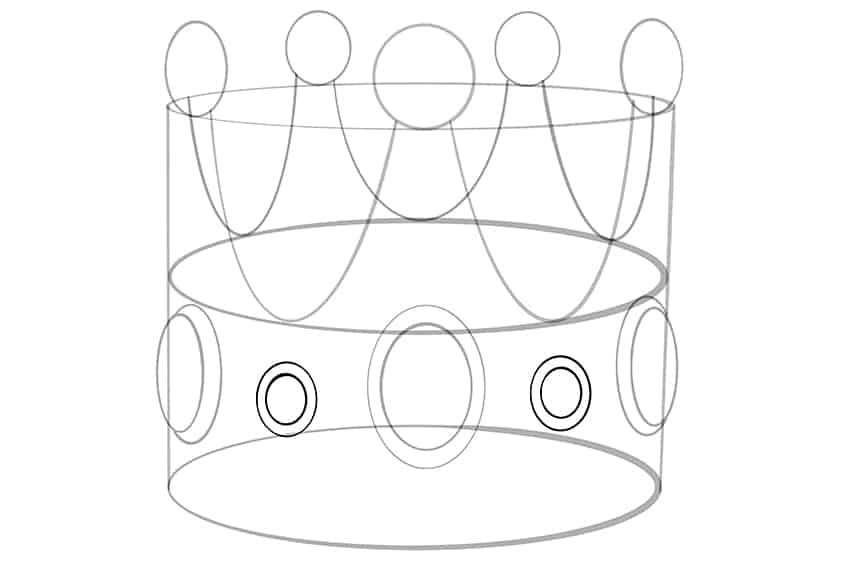
Step 12: Drawing the Smaller Jewels on the Sides of Your Crown Illustration
We can now draw the final two crown jewels on our king crown drawing. We will be adding two smaller round jewels between the large oval-shaped ones. Again, you will also draw a slightly larger circle around each of these to create a border.

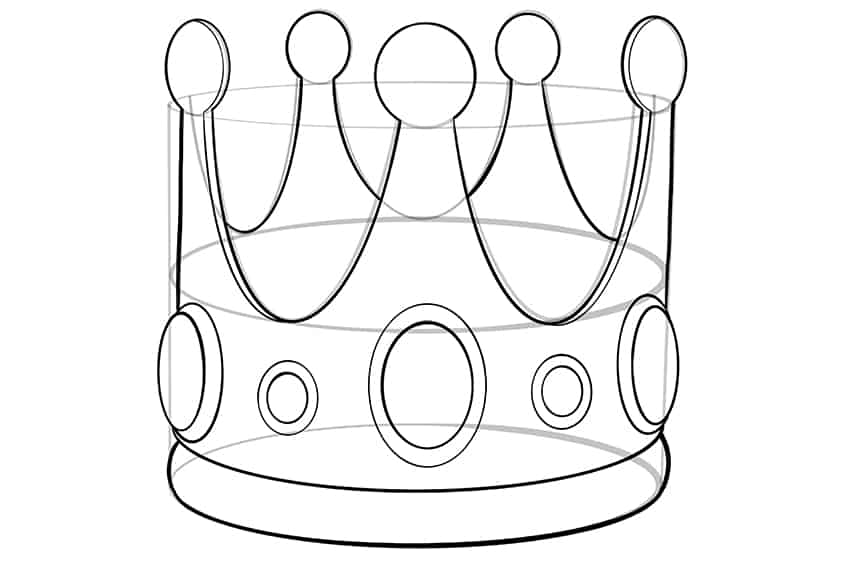
Step 13: Drawing the Final Outlines of Your Realistic Crown Drawing
Now for the exciting part of your realistic crown drawing – drawing your final outline! All those construction lines you drew earlier were not for nothing! You can now outline your crown and its jewels. Each jewel will also need to be outlined and, once completed, you can erase the faint construction lines completely.

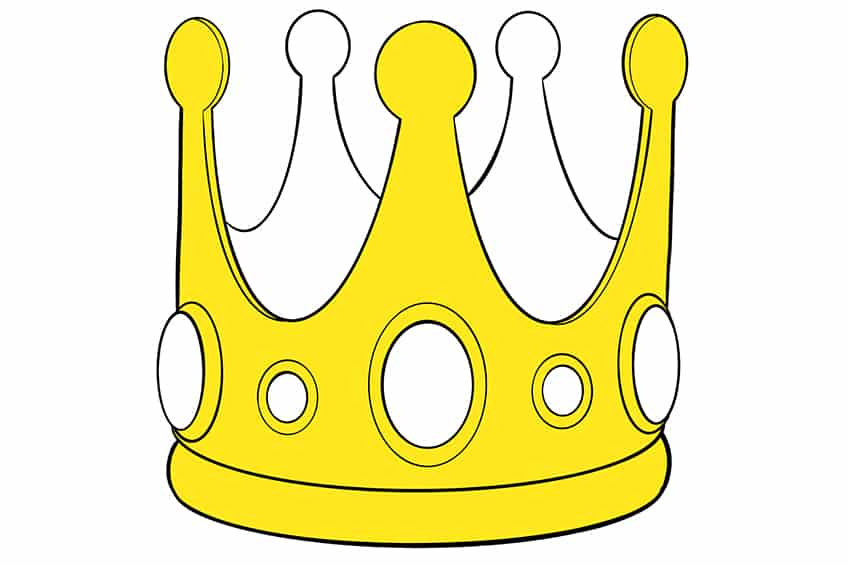
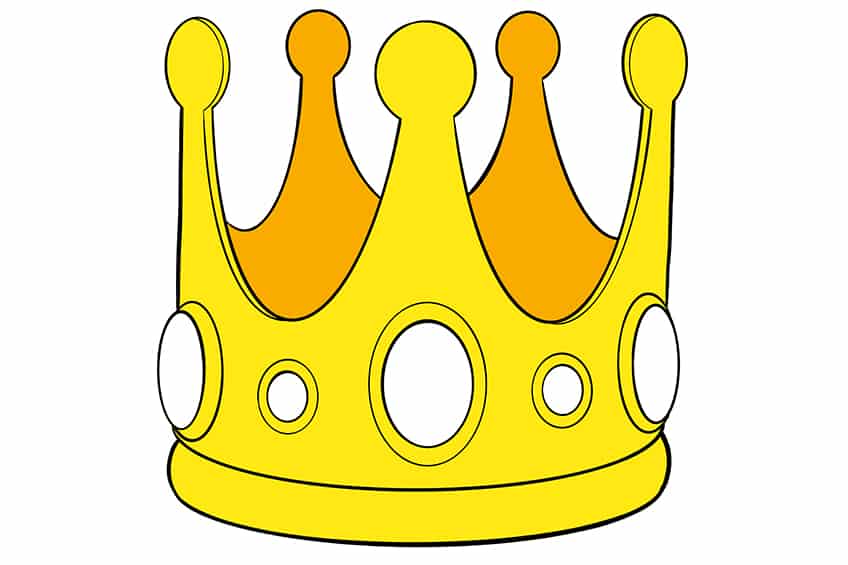
Step 14: Adding the Base Coat of Color to Your King Crown Drawing
Our first base of color can be added to your crown illustration in this step. As mentioned before, we are using paint as a medium but you can use whatever you prefer. We have chosen a bright yellow shade and used a regular-sized paintbrush. The front of the crown can be painted this color, including the bands or borders around the jewels. The inner parts of the crown as well as the jewels can remain blank for now.

Step 15: Adding Color to the Inner Crown Illustration
We will now paint the inner part of the crown using a darker yellow color. This will help make your king’s crown drawing look more realistic and give it depth and dimension. Again, we used a regular paintbrush to paint this section of our crown sketch.

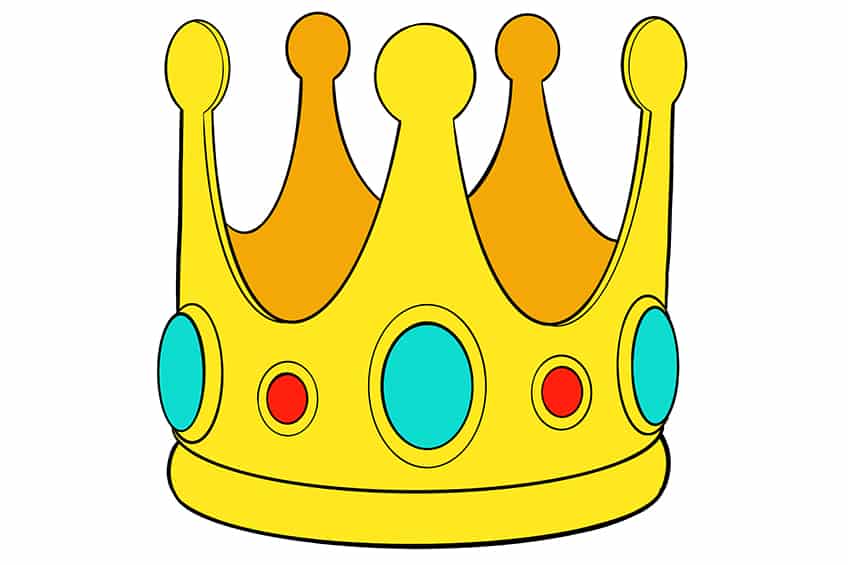
Step 16: Coloring in the Crown’s Jewels
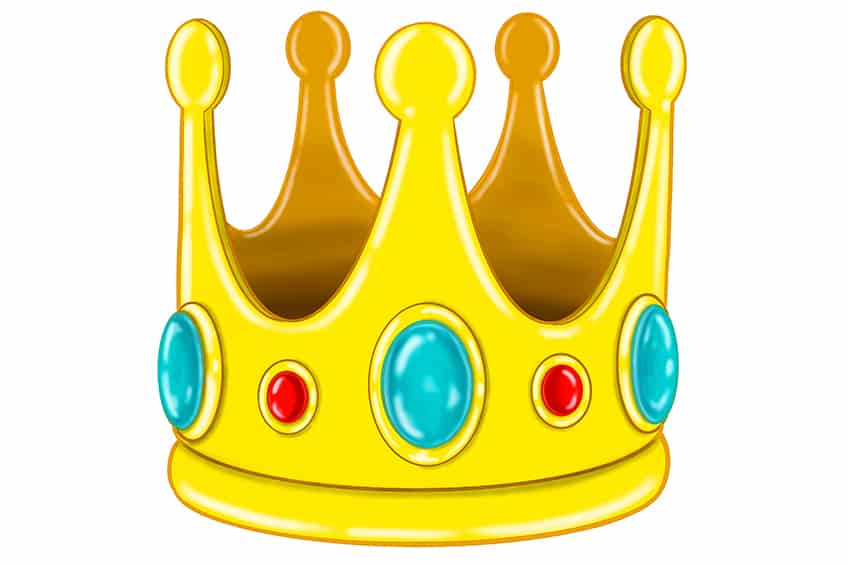
The jewels are next in line for color. We used a bright turquoise for the larger stones and a bright red for the alternating gems. We used a finer brush for this. Another great color combination would be emerald green and ruby red.

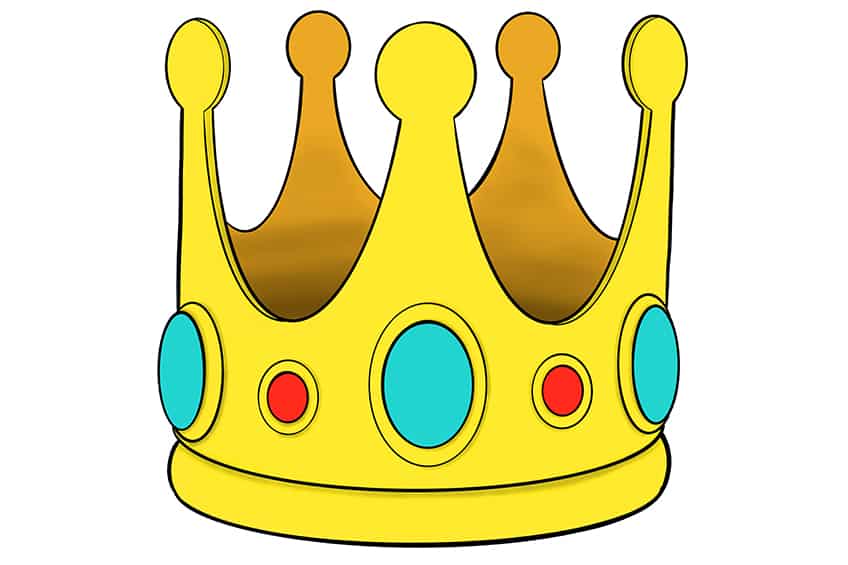
Step 17: Adding the Shading to Your Realistic Crown Drawing
Our crown drawing is in its final stages at this point. We will now add some more dimension, definition, and structure to our crown to make it look more realistic. This is done quite effectively with shading and a soft blending brush. Dab a tiny amount of black paint to add the shading to your crown’s inner frame. You will want the color to fade as you reach the peaks of your crown. With a very small blending brush and the tiniest amount of black paint, you can also add some shading to your jewels and the lower band of your crown. Be sure you use a clean brush each time if you want a seamless and well-blended shadow.

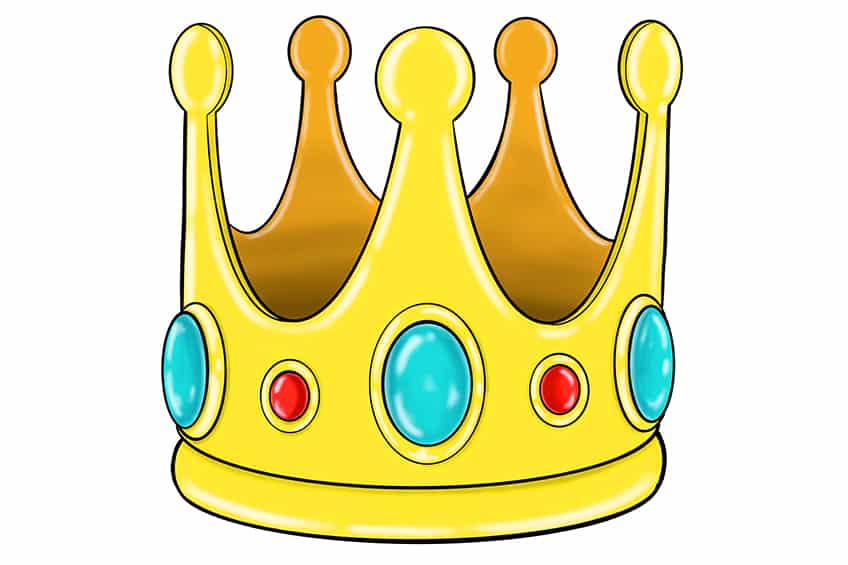
Step 18: Adding Highlights to Your Crown
By adding highlights, we can contrast the shadow we have just added. You should use a clean small blending brush and white paint for this. You can add tiny amounts of paint to each jewel to create a highlight effect. Add some white paint to other parts of your crown that would catch the light. A good idea is to imagine the crown in front of you and see where the light falls so that you can place your highlights in the correct places.

Step 19: Adding the Finishing Touches to Your King’s Crown Drawing
This is the final step in our “how to draw a crown” tutorial. Make sure that the paint is dry. It is time to erase any pencil lines that are still showing. You should also trace the outline of your crown with the corresponding paint color to finish your crown illustration.

And that wraps up our tutorial! See? Once you know how to draw a crown, it is just so easy! We hope you had fun learning and are pleased with your end results and final crown illustration. You could even use this fun tutorial as a basis for learning to draw a queen’s crown next!!
Frequently Asked Questions
How to Draw a Crown Step by Step?
This is an easy process, even though it may seem a bit daunting at first. Learning how to draw a crown is easy when you have a simple step-by-step guide to follow. Our king crown drawing tutorial will explain the process in 19 easy-to-follow steps, from the crown sketch construction lines to adding the paint and color to create a realistic crown drawing.
Which Colors Do I Need to Use for a Realistic Crown Drawing?
You can use any colors you want for your king crown drawing. The base of your crown should be a yellow or golden color. The jewels in your crown could be any color you like! Some colors that work well for the crown jewels are red and turquoise or ruby red and emerald green.