
How to Draw a Mushroom – Our Guide to Sketching Fungi
This post may contain affiliate links. We may earn a small commission from purchases made through them, at no additional cost to you.
Welcome to the magical world of mushrooms! Far more than just a grocery store item, there are so many reasons why you may want to learn how to draw a mushroom. Perhaps you are illustrating a children’s book or maybe you just want to learn the skill of drawing mushrooms. Whatever the reason, mushroom drawing is easy and fun with our step-by-step guide. By the time our mushroom sketch guide is complete, you should know exactly how to draw a mushroom, perfect for any fairytale artwork. Let us get right to it!
Table of Contents
- 1 How to Draw a Mushroom in 13 Steps
- 1.1 Step 1: Drawing the Head of the Largest Mushroom
- 1.2 Step 2: Drawing the Stem of the First Mushroom
- 1.3 Step 3: Adding a Second Mushroom
- 1.4 Step 4: Adding a Third Mushroom to the Sketch
- 1.5 Step 5: Drawing the Fourth Mushroom
- 1.6 Step 6: Outlining Your Fungus Drawings
- 1.7 Step 7: Detailing the Stems and Heads of Your Mushroom Drawings
- 1.8 Step 8: Adding Grass Detailing to Your Mushroom Sketch
- 1.9 Step 9: Adding Some Color to Your Fungus Drawing
- 1.10 Step 10: Adding Contouring to Your Mushroom Drawing
- 1.11 Step 11: Adding Shading to Your Mushroom Sketch
- 1.12 Step 12: Finishing off the Grass Details
- 1.13 Step 13: Adding the Final Outlines to Your Mushroom Drawings
- 2 Frequently Asked Questions
How to Draw a Mushroom in 13 Steps
Drawing mushrooms is a fun thing to learn, as you will discover with our quick and easy fungus drawing tutorial. There are only 13 steps in our how-to-draw a mushroom guide and we will elaborate on detailing and shading so that your mushrooms look absolutely beautiful when complete. Grab your pencils and a sketch pad and let us begin!
The image below will show you each of the 13 steps we will be explaining to you in our mushroom sketch tutorial. By following each of these steps, you will learn how to draw a mushroom in no time at all.
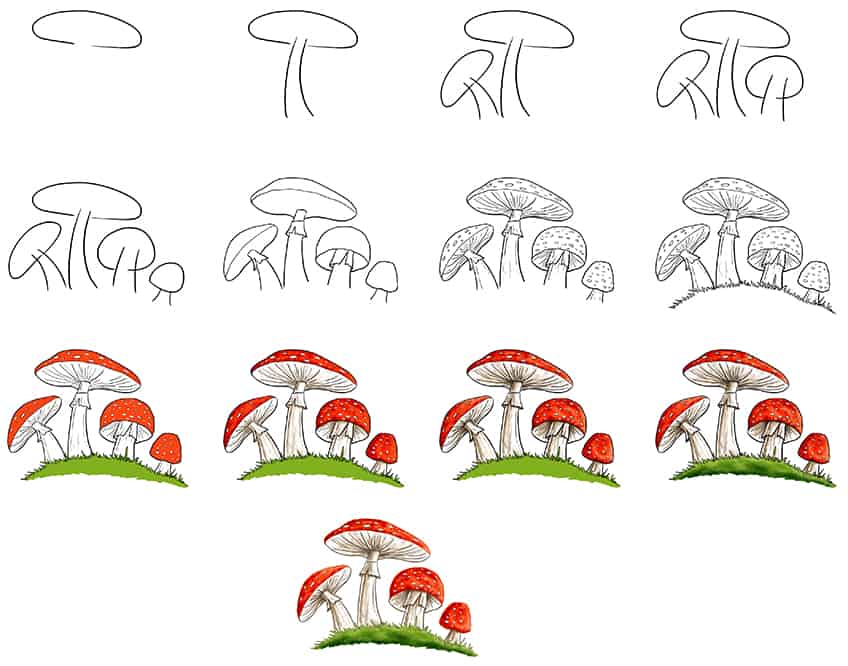

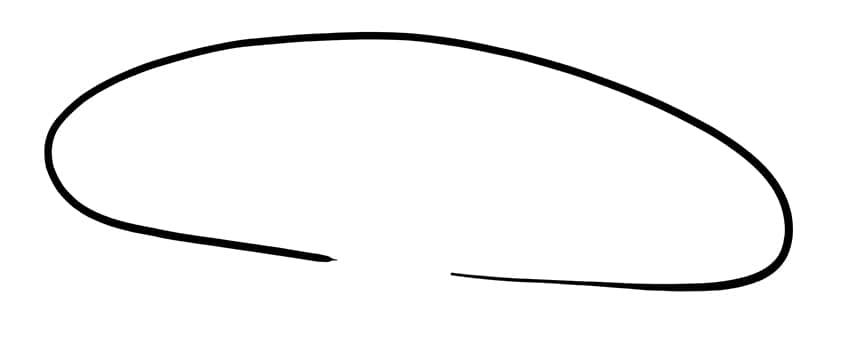
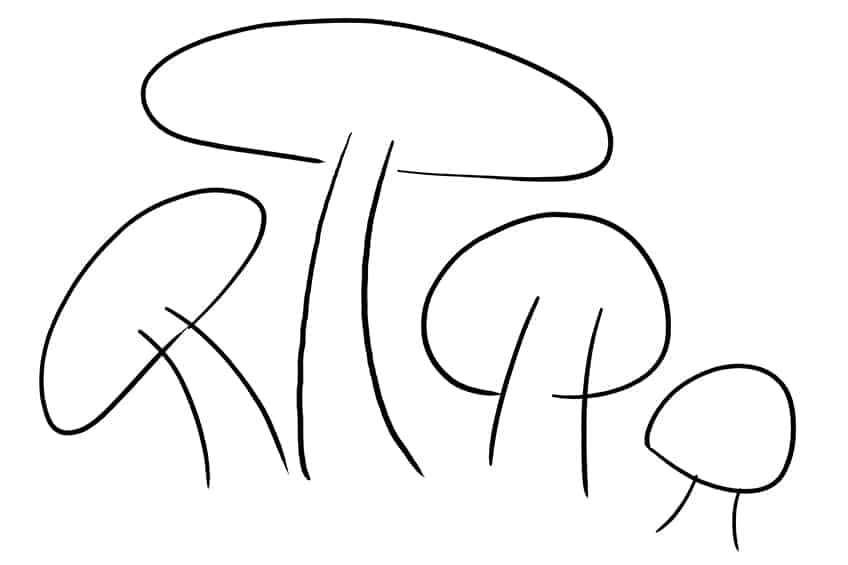
Step 1: Drawing the Head of the Largest Mushroom
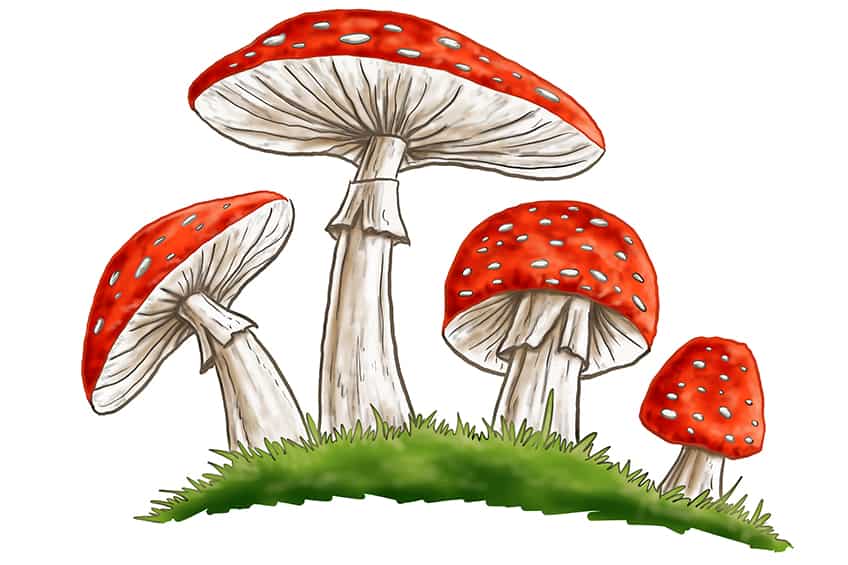
Our final image will have four magic mushrooms. To start, we need to choose where we want our first and largest mushroom to be. Now, draw a wide horizontal oval shape, but keep the middle-lower line open. The shape should not be perfectly symmetrical, so do not worry if yours is a little wonky. This is going to be the head of your first mushroom. Remember to leave enough room around it for the stem and the three additional fungi.

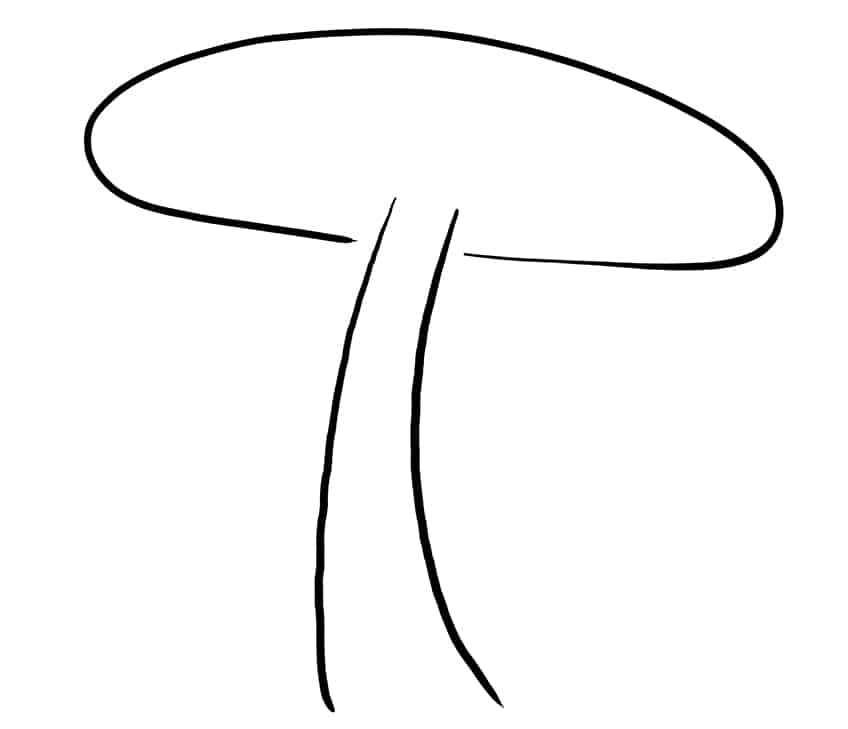
Step 2: Drawing the Stem of the First Mushroom
The next step is to draw a mushroom stem. Where you left a gap in the oval of our mushroom’s head is exactly where your step is to be placed. You can draw a long curved stem that widens towards the bottom. This will also be the largest and tallest mushroom in our fungus drawing.

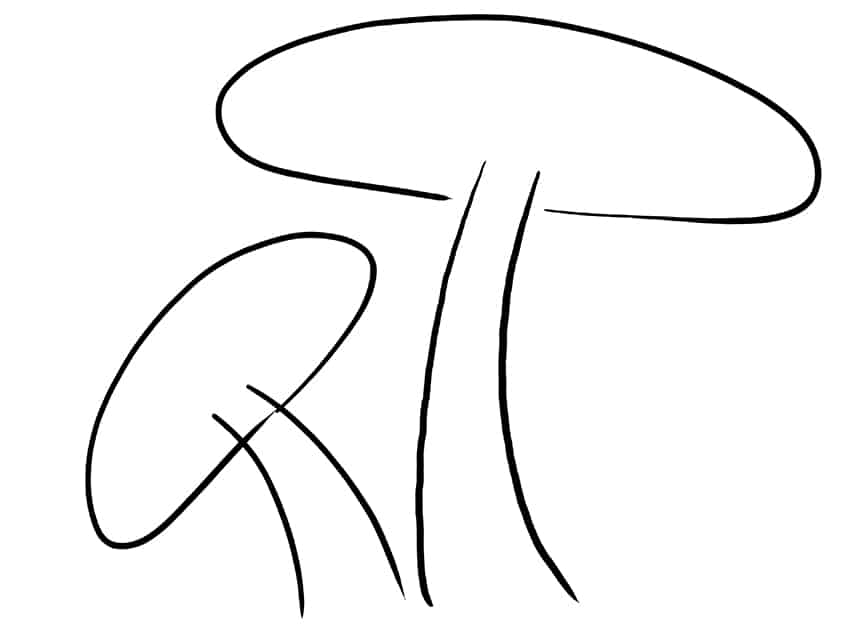
Step 3: Adding a Second Mushroom
We can now continue our mushroom drawing by sketching the second mushroom. This mushroom will be to the left of your main mushroom on this drawing. It should also be smaller and slightly skew because mushrooms that grow together are often squished into odd positions.

Step 4: Adding a Third Mushroom to the Sketch
For a third time, repeat steps one through three. This time, however, you will be drawing a mushroom on the other side of your bigger mushroom sketch. To vary things a little, we have drawn our third mushroom drawing with a rounder-shaped head.
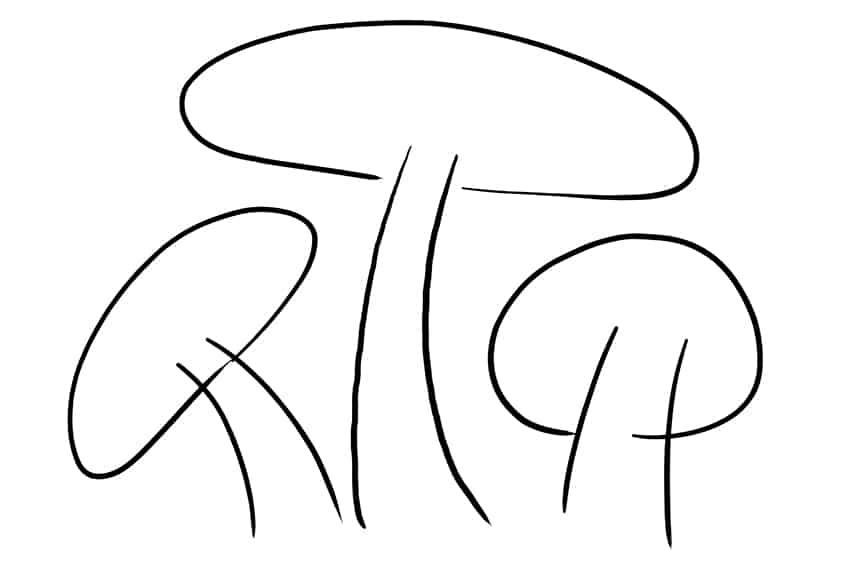

Step 5: Drawing the Fourth Mushroom
It is time to create our fourth and final mushroom drawing. This mushroom will be the smallest of all and have a short thick stem. It can be placed slightly lower down and next to your third mushroom. Once again, we have made a rounder mushroom head. This shape of fungi is often called a toadstool.

Step 6: Outlining Your Fungus Drawings
You have reached the midway mark of our “how to draw a mushroom” tutorial. See! Mushroom drawing is easy! This step is all about finishing off the outlines on our fungus drawing. The construction lines you drew in the first few steps will assist you with this part. We want to add a little bit more detailing to make the mushrooms more realistic. Each mushroom head needs to be turned into a dome and some detail needs to be added to the mushroom stems. You can also erase the lighter construction lines now.
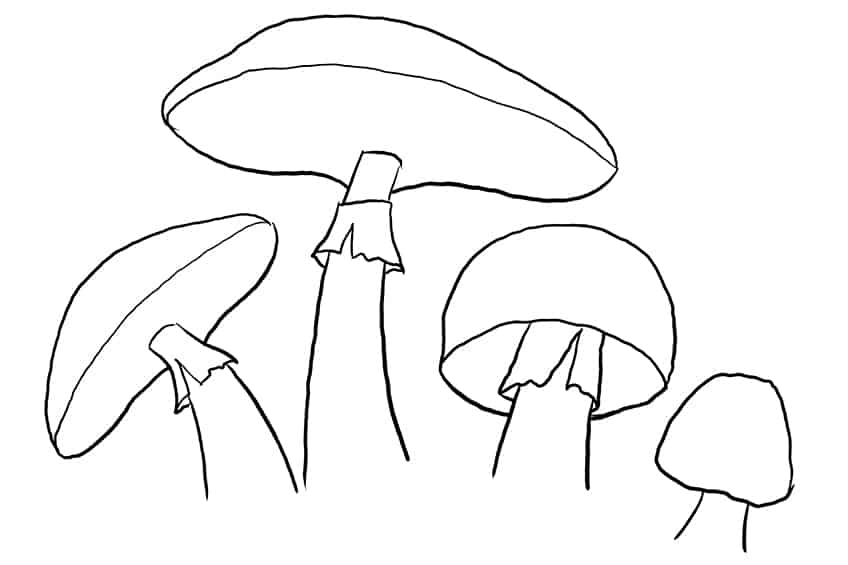

Step 7: Detailing the Stems and Heads of Your Mushroom Drawings
When drawing mushrooms, the stems and heads of the fungi cannot be ignored. In this step, we will add a few details such as dots and lines to help create textured and realistic-looking mushrooms. In a circular pattern, place some lines which should reach outward and toward the head’s base, from the mushroom stems. You can also add some sketched circles and dots on each mushroom head. These should vary in size and not be perfectly round.

Step 8: Adding Grass Detailing to Your Mushroom Sketch
Your mushrooms are now essentially complete. That said, they will need a base from which they grow. In our mushroom sketch tutorial, we have chosen grass to be our base. If you want the grass to look realistic, draw an unevenly curved base with sharp, quick strokes.

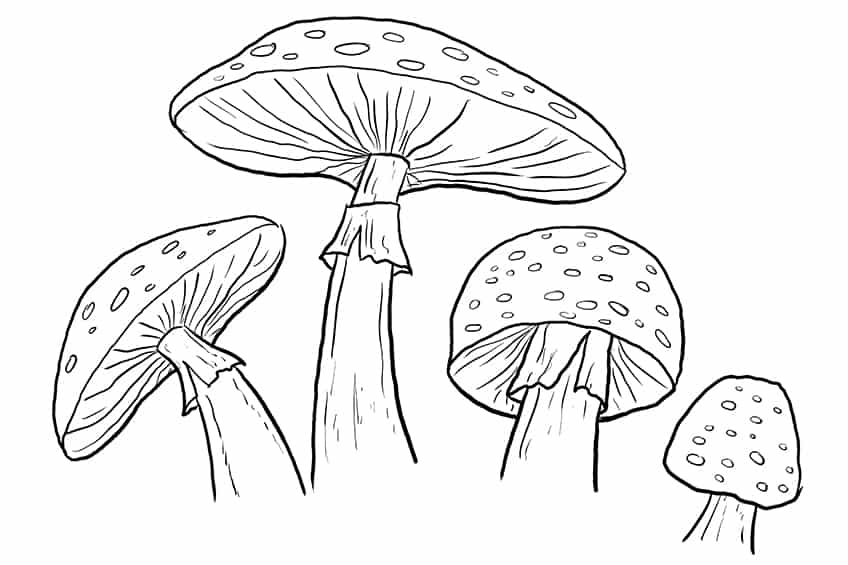
Step 9: Adding Some Color to Your Fungus Drawing
You are now finished with all the linework of your mushroom drawing. It is time to add some color. First, we will paint the grass green. It is recommended to use a fine brush for this. The domes of your mushrooms can be painted a reddish-orange color using a regular paintbrush. Just remember to take care not to color the spots in. Take a softer brush and some cream-colored paint, you can color both the stems and mushroom dome inner parts.

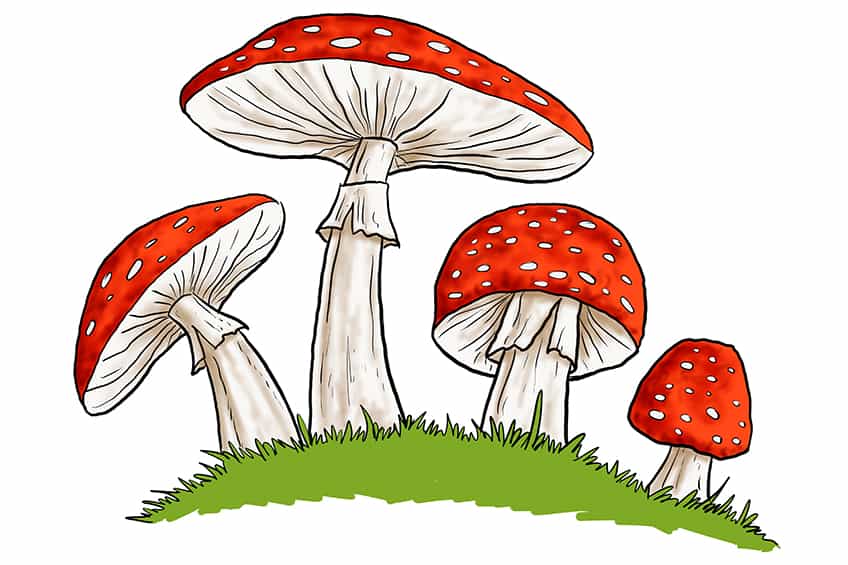
Step 10: Adding Contouring to Your Mushroom Drawing
It is now time to add some contour to our fungus drawing. Take a soft paintbrush and light brown paint and allow your brush to follow the texture lines of the inner domes and stems. Be sure to use light pressure. The idea is to make the texture lines more visible but not harsh. You should also do the same on the tops of your mushroom domes using black paint.

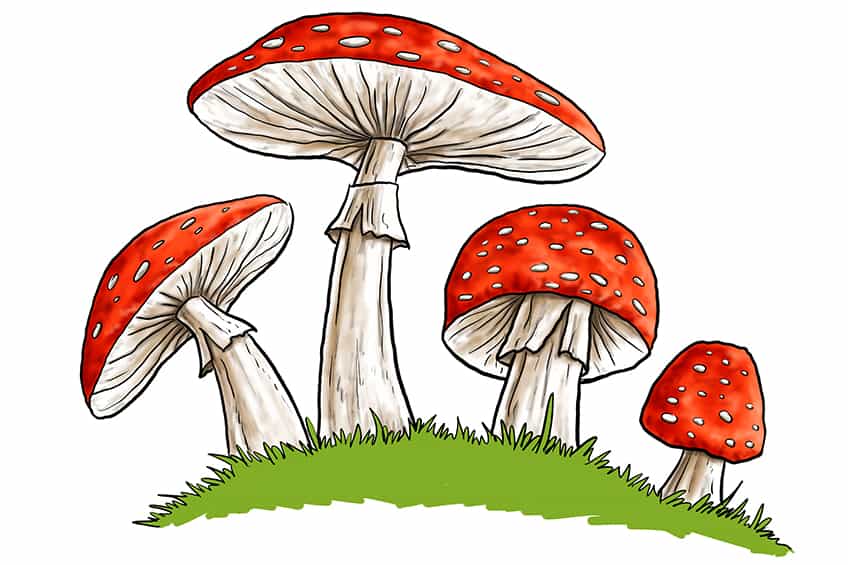
Step 11: Adding Shading to Your Mushroom Sketch
Choose a dark brown paint for a special focus on your mushroom head’s shading. Taking a soft paintbrush, you should apply the paint in a gentle manner to the inner parts of both the mushroom stems and the heads. You can also do the same on the outer domes of your mushroom sketch.

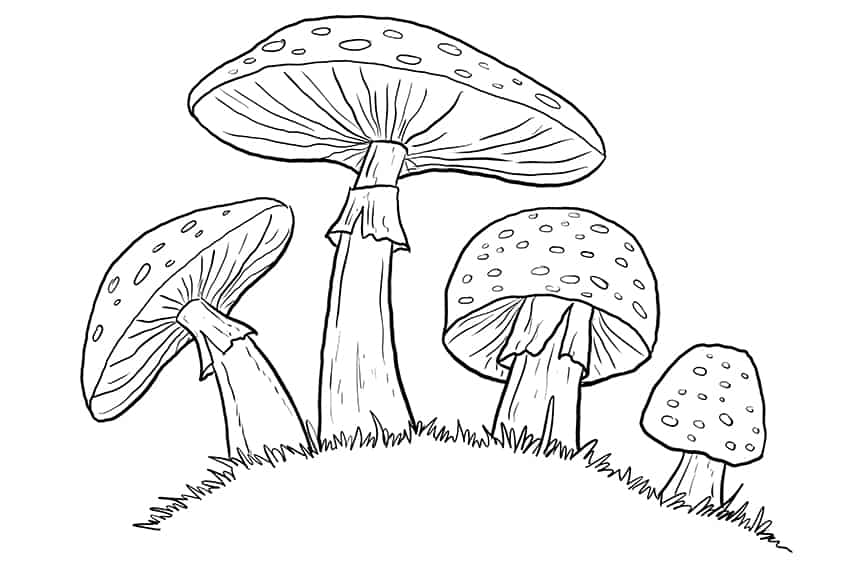
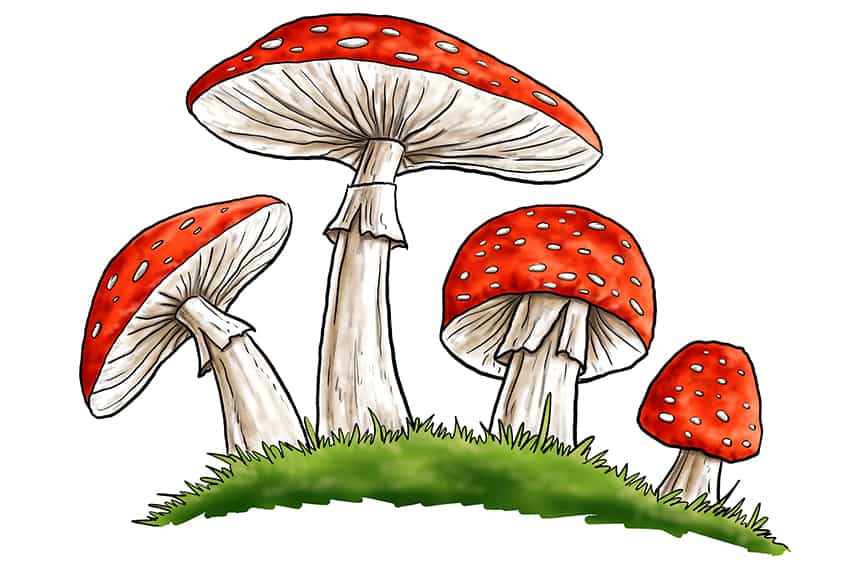
Step 12: Finishing off the Grass Details
We will now add some more details on the grass area. Choose a dark green paint and a soft brush for this. You will want to paint the lower area of the grass. Choose a lighter paint for the top part of the grass, since new growth on a plant tends to be a lighter shade.

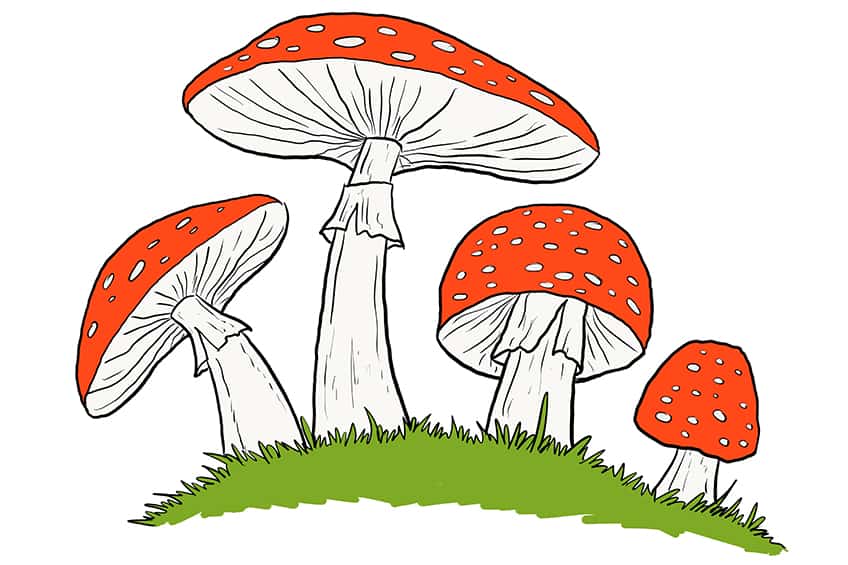
Step 13: Adding the Final Outlines to Your Mushroom Drawings
You have reached the last and 13th step of our “how to draw a mushroom” tutorial. All that now needs to be completed is the outlining of our mushrooms! Use corresponding colors for this and a good, sharp paintbrush. You will want to include the mushrooms and the grass and trace them. You should also trace the texture and inner detail lines of your fungus stems.

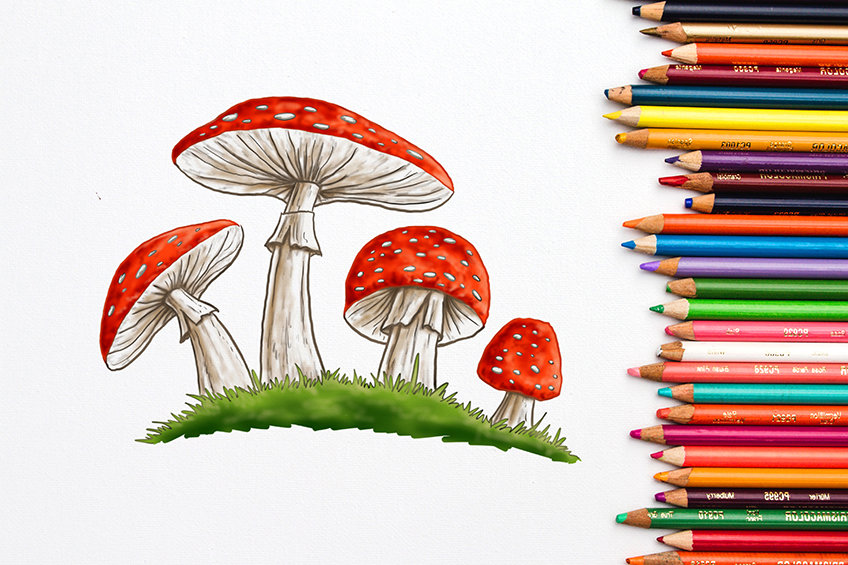
And that brings us to the end of our step-by-step mushroom drawing guide. We hope that you are feeling confident with your fungus drawing skills and are happy with the final result. As you can see, mushroom drawing is easy once you know how and if you have the correct materials to do so.
Frequently Asked Questions
How to Draw a Mushroom Easily?
Using a tutorial can help you to easily draw a mushroom. Whether you are drawing a button mushroom for eating, or a fairytale-style magic mushroom, both are easy and fun to master in just 13 easy-to-follow steps.
How Many Mushrooms Should I Add to My Fungus Drawing?
Using our easy-to-follow tutorial, you will learn how to draw what is known as a mushroom cluster. Our tutorial shows you how to draw four mushrooms, but you could draw more or less if you want to! It is entirely up to you as our tutorial is very flexible.
What Colors Should I Use for My Mushroom Drawings?
You can use any colors you want, even though our tutorial shows you how to color in fly agaric mushrooms specifically, there are so many beautiful and different colored mushrooms out there. It would be easy to swap the colors if you so wish. Remember, there are no real rules and you should allow your creativity to go wild!