
How to Strip Paint – Including all Types of Paint Strippers
This post may contain affiliate links. We may earn a small commission from purchases made through them, at no additional cost to you.
A paint stripper is the ideal product for removing paint from walls, metal, wooden furniture, and so on. The market is flooded with a lot of paint strippers, but they are not manufactured the same. Generally, the best paint remover is well known for breaking down old paint, coatings on the surfaces, so you can easily wipe or scrape it off.
Table of Contents
Guide to Paint Stripping: How to Strip Paint
The following DIY guide discusses various methods of paint stripping. You can use these methods to strip paint from surfaces such as wood or metal using a variety of paint strippers. These can be gel, liquid, or paste based paint strippers, eco-friendly, non-solvent based, and so on.
Even though these methods work on various surfaces, it is advisable to check with the specifications of the manufacturer first so as to avoid damaging your surfaces. Also, check if the paint involved contains lead. Lead paint is mostly found in older homes and most DIY doctors do not recommend sanding or burning off paint in these homes. They advise that proper experiments be conducted in ensuring that the paint does not contain lead.
Options for Paint Stripping
Consider the best option based on your situation, environment, and the kind of surface you will be working on. Always test a small portion first to ensure that you are using the correct strip to avoid permanent damage.
Liquid, Gel, or Paste Based Paint Stripper
This is one of the quickest and easiest ways of stripping paint because you can use a brush or putty knife to effectively complete the process. It is best suited for use on odd shapes or places where scraping could take a lot of time to do.
Pros
- It is easy and quick to apply
- Removes the paint very thoroughly
- Can easily get into awkward areas
- Works over a variety of surfaces
Cons
- It can produce toxic fumes
- Can burn the skin
- It requires proper cleaning before application
- It could damage some surfaces
Gel Paint Stripper
This kind of stripper should be brushed onto the surface and the paint can be stripped off using a paintbrush. Generally, a thin layer of 1 to 2 mm thick is enough to complete the job. However, always check the guidelines from the manufacturer on the exact amount to be applied.
After you have applied the gel, wait a few minutes for it to penetrate, thereby lifting or softening the paint. You can complete the process by scraping or wiping with a clean cloth or rag. Inspect the surface first to see if there is any paint remaining, before applying the second coat of gel. This process can require several times of application depending on the amount of time that has passed since the paint was applied.
Paste Type Stripper
The paste-type stripper comes in two forms either a powder or a ready-to-use version. You have to mix the gel before applying it, so make sure the paste is not too stiff or you will be forced to use a scraper or putty knife.
Begin the process by spreading the paste on the surface to be stripped. You can do this by following the guidelines on the manufacturer`s packaging, usually 1 to 2 mm thick. Follow the manufacturer`s instructions on how long you should leave the paste on the surface. This is because you will not be able to see the reaction occurring, so ensure you follow the manufacturer`s instructions.
Once the time has lapsed test a small area first to ensure that the method has worked. If it has, you will be able to lift away the paint with the paste. Finally, you can use a scraper to lift all the paste and paint away from the surface. Clean the surface with sandpaper, taking great care of not overdoing it since you might cause damage.

Sanding
Sanding is another effective way of paint stripping. When sanding, you have the advantage of covering a larger portion of space within a short time. There are also a variety of grades to select from, ranging from coarse to fine.
Using Sandpaper for Paint Stripping
Start the process using a coarse grade of sandpaper, usually 60 or 80 grit. As you continue getting in through the layers of paint, you can move down to a medium paper of 180 or 240 grit. Once all the paint has been removed, use a finer grade of about 800 to 1200 grit to add a nice and smooth finish to your surface. The final process will remove all the traces of paint from the surface, so ensure you keep your protection mask on.
Using Wet and Dry Sandpaper
The process of paint stripping can also be done with wet and dry sandpaper. This is the same as the conventional sandpaper whereby you first dip it into the water and begin sanding your surface. Wet sandpaper helps in preventing too much dust and it also adds a lovely smooth finish.
If you are stripping paint from a wooden surface, then this method will not be suitable for you. This is because water will be absorbed by the wood and will require plenty of drying time before re-painting. Wet sandpaper is also not suitable for shaped or decorative surfaces because it can flatten the edges.
Using a Wood Scraper for Paint Stripping
You can also use a scraper when hand sanding. This method requires extra caution because the scraper might bite into the wood causing chunks to come out of the surface. However, proper use of the wood scraper can yield some good results.
Pros
- It is easier to control the amount of paint to be removed
- It is ideal for small amount of paint
- It is cheap and cost effective
Cons
- It can damage the surface
- Requires a lot of hard work
- Can cause a lot of damage to detailed work
- Difficult to do over detailed surfaces
- A lot of patience is needed
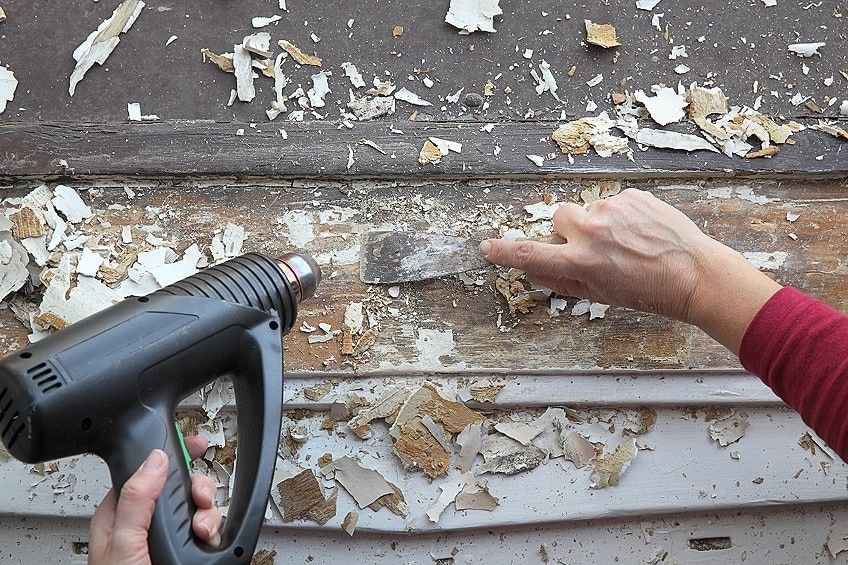
Using Heat for Paint Stripping
Heat can be used for paint stripping using two tools, blowtorches or heat guns. The blow torch works by emitting a naked flame to heat up the surface and strip paint. It comes with an adjustable knob that enables you to control the temperature. Flame intensity can be controlled using the nozzles that also control airflow.
Unlike the blow torch, the heat gun does not use a naked flame to heat the surface. The heat gun works the same way as a normal hairdryer. However, do not use a heat gun as an alternative for a hairdryer. When using both tools, always ensure that the tool is held at a safe and constant distance from the surface. To be on the safe side, hold the tool at least 6 to 8 inches from the surface you are working on. You can always adjust the distance depending on the amount and intensity of the heat you require.
With the tool held in position, move it forward and backward over the surface at about 6 to 8 inches. Do this in a sweeping motion, ensuring that you are emitting the same amount of heat. After a certain period of time, you will notice the paint layer lifting from the surface, either by bubbling or wrinkling.
When the paint is lifting, take a scraper and get ready to scrape it off. You can also opt for an old rag which will be able to wipe away any residue. Continue repeating the process until all the paint has been properly and completely removed. You can go over the surface with 800 to 1200 grit sandpaper to remove any final residue, thereby giving your surface a decent look.
Before using any of the items, always ensure that you properly practice for a certain period of time. Familiarize yourself with the process of controlling the heat intensity, experiment on how fast a surface can take to heat up before causing damage. You should get used to heating up your gun or blowing your torch before you get stuck on the actual job.
This method can also cause the seeping out of resins from the timber. Also be aware of the environment you are working on, to avoid any other stuff from catching fire, especially glass can be very dangerous when it comes to heat. If the items cannot be moved, ensure they are tied in protective layers of materials.
Pros
- Affordable to purchase
- Ability to remove paint very quickly
- Can work on several or multiple layers
Cons
- Can cause a lot of damage to surfaces
- May require several tools to complete the job
- Heating can be very dangerous

Tips and Tricks for Using Paint Strippers
- Try and avoid all products containing methylene chloride.
- Cover your surrounding environment when working, some paint strippers can be non-toxic but they can affect your flora.
- Wear the correct protective clothing like gloves and masks when using paint strippers.
- Opt to use paint strippers in well-ventilated areas. If you have to apply it indoors, always use a fan and open a window while working.
- Perform a lead test first if you are working in a home built pre-1978. If you get a positive result, use a paint stripper specified for lead paint.
- Put a tarp that is chemical-resistant over the furniture in the room you will be working in.
- Use a disposable paintbrush, and always apply the thickness according to the manufacturer’s instructions. Always apply in short strokes following the direction of the grain if you are working on wood.
- Make sure you leave the paint stripper on the surface at a period of time recommended by the manufacturer. Use a slightly dulled paint scraper or drywall knife to remove the loosened paint. Put the waste and scraper in a re-sealable waste bag. Always ensure that you dispose of the bag containing the hazardous material at a waste disposal site.
- You can use a mesh scouring brush to remove any of the paint that can be trapped in the grooves of the masonry or wood. If you are working outdoors, you can use a power washer to rinse the surfaces and thereby removing the paint.
- Use the solution recommended by the manufacturer, if the paint stripper has to be neutralized. Or you can opt for a 1:1 solution of water and vinegar.
- Use mineral spirits or water to wash those paint strippers that do not require neutralization. Leave the process to completely dry, open windows, and put a fan on to speed up the process.

Types of Paint Strippers
There are at least four types of paint strippers. Each one of them has its own properties that make it suitable for specific surfaces. Some are suitable for polyurethane; others are suitable for removing epoxy and so on.
Solvent Based
Most of the paint strippers contain chemicals that enable them to loosen the paint from the surfaces. They are effective for removing both oil and water-based paint. This also includes polyurethane from metal surfaces, wood, and masonry without discoloration. Some of the paint strippers include alcohol, methanol, and toluene.
Those with a high percentage of VOC (Volatile Organic Compound) emit bad smells that can be hazardous to health. The good thing is that paint strippers are applied in a very thin layer of about 1/8-inch, and they stay on the wall for a very short time (usually not more than 15 minutes). After that paint can be lifted easily using a paint scraper. You can use water or mineral spirits to wash the stripped surface before painting it.
The methylene chloride that is emitted from some paint strippers can cause serious brain damage, also affecting the reproductive system. To be on the safe side, add a respirator to your protective clothing. Gloves made from butyl are the best choice.

Caustic
Caustic Strippers have a tendency of converting dried paint to soap using lye (sodium hydroxide), which is an active ingredient found in the paint stripper. Once the dried paint has been converted, it will loosen up from the surface. Caustic strippers are very effective for removing oil-based paint from concrete and masonry surfaces. However, they are not really effective when it comes to polyurethane and epoxy.
Be cautious when using caustic strippers to remove oil and water-based paint because they can erode aluminum or blacken hardwood. They require at least 30 minutes sitting before the paint can be scraped off. Always apply a thin layer of caustic stripper at least 1/8-inch to 1/4-inch from the surface.
Caustic Strippers are highly alkaline, so the stripped surface has to be neutralized back to a lower pH level of seven using a solution of water and vinegar. They are low in VOC and thus considered safer than solvent strippers.
Note: Caustic strippers can cause eye and skin irritation if touched, always wear protective clothing and gloves. Avoid lung damage by wearing a respirator.
Biochemical
These paint strippers are considered a safer alternative compared to caustic and solvent strippers. They are made from terpenes, which is a solvent found in pine trees. Besides having the pine tree-solvent, they also contain an organic compound (N-methyl-2-pyrrolidone). Wear protective clothing and gloves as this organic compound could be harmful.
They are capable of removing oil and water-based paint from metals and wood. However, they are also ineffective in polyurethane and epoxy coatings. You should apply a thin layer of biochemical strippers at least 1/8 to 1/4 inch, leaving it on the surface for three to four hours. After that, you can safely remove the paint with a scraper. The final process does not require neutralization; you can just clean the surface with mineral spirits or water.
Zero VOC
VOC strippers are quite different from the above-listed strippers since they do not contain lye, methylene chloride, and so on. They are odorless and quite pricey. They are also less effective to polyurethane and epoxy but works very well on wood and metals. Benzyl and alcohol make them effective on water and oil-based paint.
They are considered to be the safest strippers although they can redden the skin from direct exposure. Always wear a respirator mask and safety gloves to be on the safe side. They require at least 3 to 4 hours sitting on the surface at 1/8 to 1/4- inch. Also, rinse with mineral spirits or water when you are done.

Frequently Asked Questions
Do Paint Strippers Expire?
There is very little evidence that mentions the expiring of paint strippers. But for the best durability, always keep your paint strippers airtight and sealed all the time. This will ensure that they stay effective for a longer period.
Can Paint Strippers Ruin Clothes?
There is no evidence that suggests that paint strippers can actually affect clothes’ appearance. But is it always best to be safe than sorry. So make sure you do not wear your favorite clothes when doing the dirty art work. Rather opt for protective clothing when dealing with paint removing products.
How Do You Dispose of Paint Strippers?
Hazardous waste collectors are the best way in getting rid of paint strippers. Do not pour the paint stripper down the sink or outside on soil. Hazardous material can be very harmful to health.
Paint stripper is necessary for all kinds of DIY and renovation projects. Make sure that you buy the best paint stripper for your circumstances, as the right product will make a major difference to the end result.