Best Brush for Polyurethane – An In-Depth Review of Top Poly Brushes
This post may contain affiliate links. We may earn a small commission from purchases made through them, at no additional cost to you.
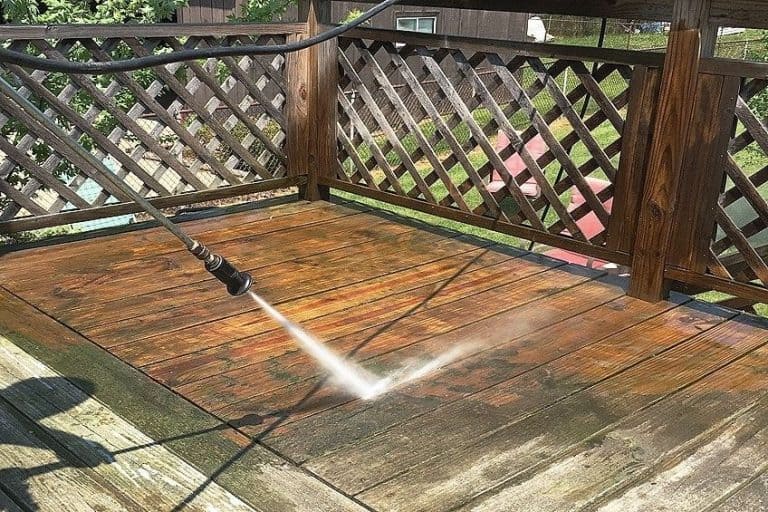
If you do not take the necessary steps to seal and protect your wood, the elements will damage it, leaving it dry and ugly. If you are looking to enhance the wood’s grain or wish for the stain to be the same as its surroundings you will need to coat the wood. Coating the wood will ensure the surface is protected from spills, scrapes, or the weather and will provide richness to the finish. In our following article, we go into detail about using polyurethane as a finish, as it provides a clear and durable finish. We aim to aid you in selecting the ideal brush for use with polyurethane.
Table of Contents
Why Polyurethane?
We have selected polyurethane thanks to the fabulous durable finish it provides and its stunning properties. To select the perfect brush for use with polyurethane you will need to consider aspects in terms of the finish. Why should I use polyurethane, will it provide me with the finish I am looking to achieve? Should you buy a water-based product, an oil-based product, or potentially a combination of both?


Oil-Based Polyurethane
When this particular polyurethane dries it provides your wood with a warm feel as it becomes a gentle amber color. You will have to wait some time between applying each coat as it takes a long to dry completely. The product gives off high levels of VOC (Volatile Organic Compound) emissions so you need to ensure you are working in a space with good ventilation. To clean the product, you will have to use mineral spirits.
Water-Based Polyurethane
When still in the container this polyurethane has a milk-white appearance but is crystal clear when it has completely dried. You will have to apply quite a few coats as its viscosity is much less than the oil-based polyurethane, but don’t worry it dries very quickly. There are much fewer VOC emissions but it is still necessary to ensure your space is well ventilated.
To clean up the product you will only require soapy water, if you make the mistake of using ammonia-based cleaners it will result in the finish turning milky white.
Water-Based, Oil-Modified Polyurethane
While still in the container the product is cloudy in appearance yet dries to a slightly amber color much like oil-based polyurethane and offers a durable surface. It can be used on most wooden surfaces and dries super fast. You will need to ensure you are working with it in a well-ventilated space as like oil-based polyurethane it gives off high levels of VOC emissions.
Luster or Gloss
In terms of the sheen, you can choose between semi-gloss, satin, or a gloss finish the choice is yours as each offers the same level of a durable finish. Keep in mind that if you select the high gloss finish all imperfections will be visible and any wear and tear that is endured by the surface over time.


Applying Polyurethane
You will have to determine if you will be applying the polyurethane outdoors or indoors. Interior polyurethane can not be used outdoors, while the majority of exterior polyurethane can be used both outdoors and indoors.
How to Apply the Polyurethane
There are three options to choose from when it comes to applying polyurethane. Which option you will go with is linked to the type of project you are doing.


Applying the Polyurethane by Wiping it on
If you have contoured surfaces such as crown molding or stairs then this is your go-to method of application. This form of the application provides a thin layer so rather only use it in areas that have minimal traffic.
Applying the Polyurethane by Spraying it on
If you have hard-to-reach spaces such as chairs spindles, verticals surfaces, louvers, and shutters then this is your go-to for application. You can apply using an aerosol spray can, but keep in mind the durability will not be as effective as brushing the polyurethane on as this application is a lot thinner.
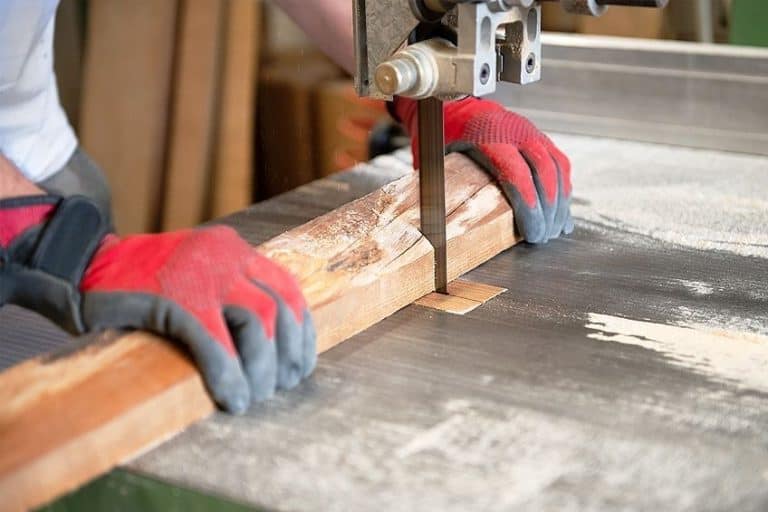
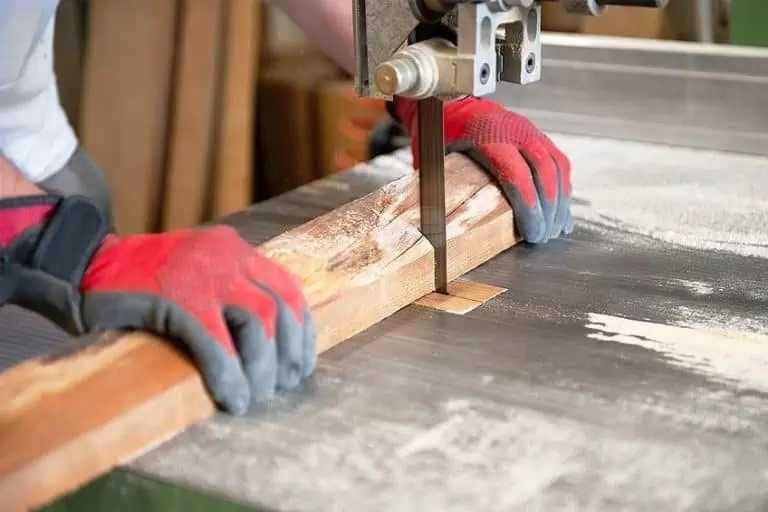
Applying the Polyurethane Using a Brush
Applying the polyurethane using a brush provides you with a durable thick layer and is ideal for use on flat surfaces. When using a poly brush it retains a large amount of finish which enables you to cover a fair-sized area before you are required to reload the brush.


Why Should You Use a Polyurethane Brush?
This article is going to focus on the application method of using a brush to apply your polyurethane as this method has many positives. When applying the coating to your wood surface the brush is very useful, a great brush will assist you in creating a stunning and effective finish to your wooden surface.
- Can reach the detailed spaces and tight nooks and crannies
- Gives a smooth finish without leaving any marks behind
- Helps you avoid surface bubbles
- The brushes will last a long time if you use them correctly and take care of them
- The bristles are resistant to the spirits in oil-base polyurethane products
Selecting the Correct Brush for Polyurethane
There are certain aspects you need to take into consideration when you purchase brushes for polyurethane, we are going into more details on these considerations to help you make the best purchase.


Handle
If you have a small and detailed project then we recommend using a thick short-handled brush, while for bigger projects rather go for a large handled, contoured brush as this will allow you a firmer grip.
Bristles
There are two forms of paint bristles which you can buy is natural and synthetic brushes. When you are applying water-based polyurethane we suggest using synthetic bristles as they will not twist out of shape thanks to being courser. When you are applying oil-based polyurethane we recommend using natural bristles as they are a lot softer.
You might decide to use a foam brush with is very affordable and after use can be thrown away though they do not give a very smooth finish.
Design and Width
You can use a 2-inch width brush when you are tackling a narrow and small project. you can use a 4-inch width brush for a larger project. You want to use a brush that is comfortable to hold and use for your hand.
Ferrule
This is the (usually metal) portion of the brush that holds the bristles in place. You can tug on the bristles to ensure the ferrule is secure. To prevent rusting, you would rather want a stainless-steel ferrule.


Split Ends
You want a brush with flagged or split ends as this allows more polyurethane to be held by the brush meaning you will have to reload the brushless as you work which will save you time.
Quality
Do not compromise and buy a cheaper brush when purchasing a brush. A good quality brush will ensure you save money in the long run as it will last longer and provide you with better results when using it.
Recommendations for the Best Brush for Polyurethane
Using the best brush for polyurethane will ensure you achieve a clear and smooth finish. There is an assortment of poly brushes available on the market to choose from so how do you know which is best. We will aid you in your quest to purchase the ideal brush for your polyurethane project.


Best Polyurethane Brush: WOOSTER Brush Silver Tip
This high-quality brush can be used to apply either oil-based and water-based polyurethane. You will get a gorgeous finish using this brush and will save yourself some money as you will not need to buy separate brushes for the different finishes of polyurethane. The manufacturers of the Wooster Brush company have been around since the 19th Century and are known for being an innovative company that is well-known for making high-performing, top-quality brushes. If you are looking for the perfect polyurethane finish then this is the brush to buy.

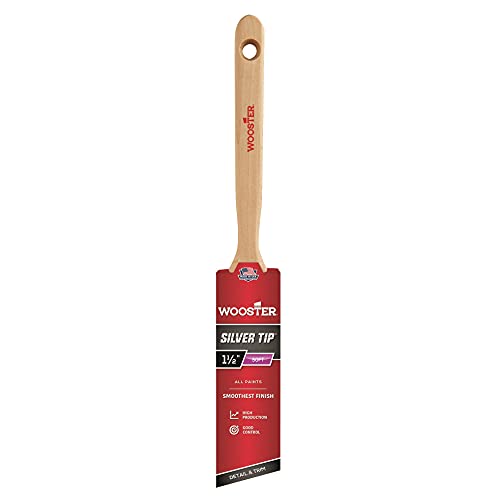
- Silvertip 1.5” angled sash brush with a satin ferrule and flexible filament
- For use with enamels, varnishes, and water-based coatings
- Brush bristles have excellent leveling and smoothing properties
The brush is made with extremely flexible and very thin bristles and its own chemically tipped (CT) polyester filaments. The bristles are super soft and will offer you a stunning finish with zero brush marks. The bristles have self-leveling properties and are smoothing when you use them to apply a polyurethane finish. The ferrule on this brush is stainless steel and will ensure that your bristles remain firmly in place. The handle of the brush is long enough to ensure you have a comfortable grip and is made of hardwood.
- Well priced
- Has a great quality stainless steel ferrule and is a strong brush
- Thin and soft bristles
- Comfortable hard wooden handle
- Only a small amount of finish is retained
Amazing All-Round Polyurethane Brush: PURDY XL Brush 3 Pack
These brushes are made with Orel Polyester and a solid round tapered Dupont, Tynex satin edged nylon bristles which ensures the brush is of stunning quality. The brush can be used for the application of both oil-based and water-based polyurethanes, it is such a versatile brush. It can be used to apply varnish and other types of paint and can be used for an assortment of paint jobs. The ferrule is made of copper and the bristles are held securely in place and the brush will not use its shape when applying any form of the polyurethane finish.
This set comes with 3 brushes a 2-inch brush, an XL 1-inch brush, and 1.5-inch brush width. The brush can hold a lot of polyurethane thanks to the combination of bristle types which will allow you to finish your project quicker. The three sizes allow you to paint harder to reach places, or the walls, or varnish on ceilings, or pretty much anywhere. The brushes can also be used to apply any varnishes or stains if required.

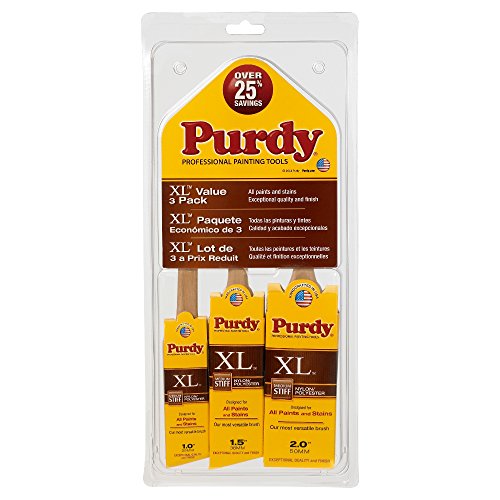
- Includes 1 inch XL Dale, 1-1/2 inch XL Glide & 2 inch XL Sprig brushes
- Versatile brushes designed for use with all paints and stains
- Ideal for interior and exterior projects with all types of paints
The brushes have a hardwood handle made from Alderwood which is easy and comfortable to hold and allows you to paint an assortment of surfaces with ease. The handles of the brush being made from hardwood are quite absorbent which allows them to absorb any sweat from your hands, ensuring they remain dry, they are also durable and non-slip.
There is an internal chisel formulation in the brush and it has been placed strategically which provides the polyurethane a maximum lift perfect for a bubble-free, even, and smooth application. These brushes are handmade from top-quality materials ensuring you have a brush that offers even strokes that do not leave marks and are durable, this brush is a must-have for an avid painter.
- Smooth application thanks to chisel formulated bristles
- Gives a smooth finish and high-performance
- Hardwood handle which is comfortable to hold
- Great for professional use due to the excellent quality of the brush
- Can be used with paint and stains
- Versatile and durable bristles
- Very costly to purchase
- Bristles may become loose
- The handle is quite thin
Great Value for Money Option: PRO GRADE Paint Brush Set
This set is made up of five brushes which range from small to large and are ideal for applying polyurethane thanks to the flat end. This set is quite versatile and can not only be used to apply polyurethane, but also stains and varnishes. You can use these brushes for use on fences and decks and they are great for arts and crafts projects and use in hard-to-reach places.
To assist in ensuring the brushes are durable there is a stainless-steel ferrule which ensures the bristles remain firmly in place, thanks to this the brush lasts for a long time and the stainless steel is resistant to rust. The bristles are thick and medium-stiff and are made from synthetic filament which ensures they hold more finish saving you money and time. You will achieve a satin-smooth finish thanks to the bristle’s design.

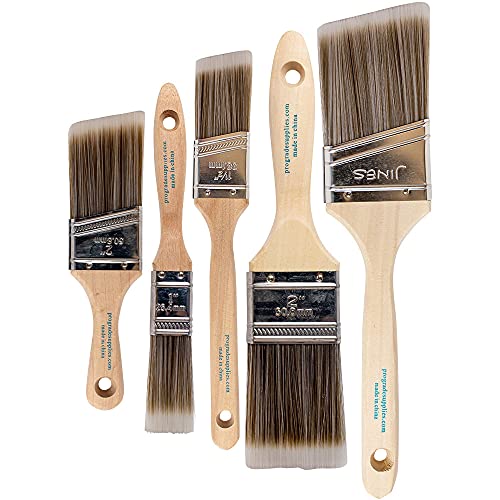
- Includes 1" Flat, 1-1/2" Angle, 2" Stubby Angle, 2" Flat & 2-1/2" Angle
- Professional results on walls, trim, cabinets, doors, fences, and decks
- The SRT filament blend holds more paint to save time with fewer streaks
Hardwood is used for the handle which is comfortable to hold and is smooth and offers you great control and does not cause calluses or bruises to your hands. If you have intricate carvings on your wooden articles which you wish to protect the angled brush is a great tool, as its thinner tip is ideal for doing detailed work. These brushes will also ensure that your finish will not have any marks. Pro Grade is known for making durable and good quality brushes and can offer you the correct brushes to achieve a stunning polyurethane finish. Their brushes are well priced and are some of the best brushes available on the market.
- The brushes will not lose any bristles and are simple to clean
- Amazing value for money
- The synthetic filaments of the bristles hold more allowing you to save money and time
- Stains and paints can also be applied using this set
- You have better control thanks to thinner tips
- Durable brushes
- High-quality brushes
- Certain users have noted brush marks when finished painting
Our Top Tips for Using a Polyurethane Brush
When you apply polyurethane to your surfaces using a brush you need to take two stages into consideration, namely the preparation and application stage. In both stages, we will go into further detail.


Preparation Stage
You need to begin by preparing the wooden surface before you can apply the polyurethane finish. Using 220-grit sandpaper to smooth out the surface of the wood. When you have finished sanding down the surface using a vacuum cleaner to eliminate all the dust. Take a moistened cloth (such as cheesecloth) use denatured alcohol to dampen the cloth if you are working with water-based polyurethane, or mineral spirits if you are working with oil-based polyurethane to rub down the surface.
If you are working with woods like oak, walnut, or ash you should first apply a grain filler as these types of wood have an open grain and the filler will assist you in achieving a polished, smooth finish.
Application Stage
Once you open the can of polyurethane stir it slowly, be careful to not stir it too quickly. Before opening the container try not to shake it as it will result in bubbles forming in your finish. If you are working in an indoor space when applying polyurethane ensure you have adequate ventilation regardless of whether you are working with water or oil-based polyurethane as both give off strong fumes. You will also need to remove any dust from the area you are working in and not allow any debris, dust, or insects to settle on your painted surface before it has completely dried, which can take several hours.


Before you begin painting with polyurethane take your brush and dip the tip into mineral spirits if you will be working with oil-based polyurethane, or into the water if you will be working with water-based polyurethane. Once you have dipped the brush into water, take your hands and roll the brush so that any excess water is removed.
You can then move on to the polyurethane finish, take the brush and dip it a third of the way into the finish, and against the side of the container gently tap the brush. This will ensure you have the necessary amount of finish loaded on your bristles to provide you with the correct thickness.
Try to use horizontal or flat strokes when applying the polyurethane as this assists the finish to self-level and stops dripping from occurring. If you happen to be working on a vertical surface spray the finish on, apply a thinner coat, or use a cloth. When working with a vertical surface should you notice any drips use a razor blade and remove them immediately and then sand down the area afterward.
Allow the lights to rebound off the painted surface after each coat to note the effect of the polyurethane. This can be done by kneeling and at eye level to see if the light shows any defects on the surface. Certain defects can be bubbles or brush marks and they will be highlighted by the light and allow you the chance to fix them.
Applying Polyurethane with Poly Brushes
As there are two types of polyurethane each will have its way to apply it. What follows are details of how to apply both water-based and oil-based polyurethane.
Applying a Water-Based Polyurethane
To start with you need to ensure that the wood has no oil stains on it. If there are any you will have to remove them before you can begin applying the finish. This is due to the fact that water-based polyurethane will form beads and will not adhere to that surface area. any oil stains can be removed using a bit of steel wool


Once you are certain the surface is stain free you can begin applying the polyurethane, the water-based polyurethane can be applied with a thin layer as a thick coat will cause the grain of the wood to raise and you want to ensure this does not happen. Allow the first layer to dry completely which should take roughly 2 hours and then you can apply the second layer. When the coats have dried completely you will need to sand each layer down between the applications.
For areas you do not use often three coats is enough, while in high traffic areas you will need to apply a minimum of four coats to ensure it is effective.
Applying an Oil-Based Polyurethane
You will need to thin down your oil-based polyurethane using mineral spirits before you can use it. In doing so you will enable the finish to reach any difficult places with ease. To apply an oil-based polyurethane you should use a fine-bristled brush as this allows the finish to penetrate any hard-to-reach places. You will not achieve the same finish if you were to use a foam brush to apply the polyurethane as it will leave bubbles on the surface.
When applying the oil-based polyurethane finish do so using parallel brushstrokes in the same direction of the grain and use straight and long strokes. In doing so you will avoid any brush marks or bubbles by flattening the polyurethane. Ensure you are applying it in thin coats.


Allow the initial layer to dry and then take a 320-grit sandpaper and sand the surface gently. When sanding you want to be certain that the strokes go in the same direction as the wood grain. Sand with care as you want to ensure you do not remove any portion of your initial coat of finish.
Take a vacuum cleaner to remove any debris and dust and then wipe the surface over with a wet cloth. Two coats of oil-based polyurethane should provide sufficient protection to your wooden surface that said if you are applying the finish to a high traffic area such as floors you would need to apply at least 3 coats for the right results. Read more about the best polyurethane for floors.
When you are applying a protective polyurethane finish, the type of brush you choose to use makes all the difference. With our informative review, we hope that you will be able to pick the best brush for your job with ease! Read also about how to clean polyurethane brushes.
Frequently Asked Questions
I Want To Ensure There are no Bubbles, How do I do That?
You want to try and slow down the drying time which will allow the bubbles sufficient time to pop out themselves. To slow down the drying process you can add a solvent such as a thinner, retarder, or a flow additive. Mineral spirits can be added to water-based polyurethane to slow the drying time.
Are Water-Based and Oil-Based Polyurethane the Same?
No, they are not, it is easier to apply oil-based polyurethane and it is a thicker product thanks to it containing solids you will therefore require fewer coats. Unfortunately, oil-based polyurethane takes a lot longer to dry and is likely to leave brush marks behind. You will require more coats when working with water-based polyurethane. It can raise the wood’s grain and might leave watermarks behind, yet it dries a lot quicker and can be leveled with ease while also giving off less odor.
How Does one Avoid Brush Marks?
You can start by carefully and gently sanding down the wooden surface which will provide you with a smooth finish and then remove any dust. Nest applies the water-based polyurethane using a brush.
When Applying Oil-Based Polyurethane Why Should I Use a Natural Filament Bristles?
Oil-based polyurethane contains minerals, the finish is absorbed by the natural bristles and the brush retains its shape. When using a natural bristle when working with water-based polyurethane the water is absorbed by the bristle making them limp and hard to paint with.
Can I Use a Foam Brush When Applying Polyurethane?
We do not suggest using a foam brush when working with polyurethane as it does not provide a smooth finish and leaves parallel marks. You will also end up with bubbles in your final coat as the foam holds air pockets.