How to Glue HDPE – A Guide to Choosing and Using the Best HDPE Glue
This post may contain affiliate links. We may earn a small commission from purchases made through them, at no additional cost to you.
Every time you buy a bottle of shampoo or conditioner, take a swig from your milk jug or spray your cleaning detergents over your counters, you are working with bottles that are made from HDPE, or High-Density Polyethylene plastic. This plastic is quite sturdy and warp-resistant, but it can be quite difficult when it comes to gluing it, or it has been in the past. These days, there are types of epoxy glues that have been manufactured specifically for the purpose of gluing HDPE plastics. If you have been struggling to understand how to glue HDPE plastics, this tutorial will guide you through all of the information. This includes knowing what the best glue for HDPE is, as well as how to use HDPE glue or HDPE epoxy.
Table of Contents
Different Types of Plastic
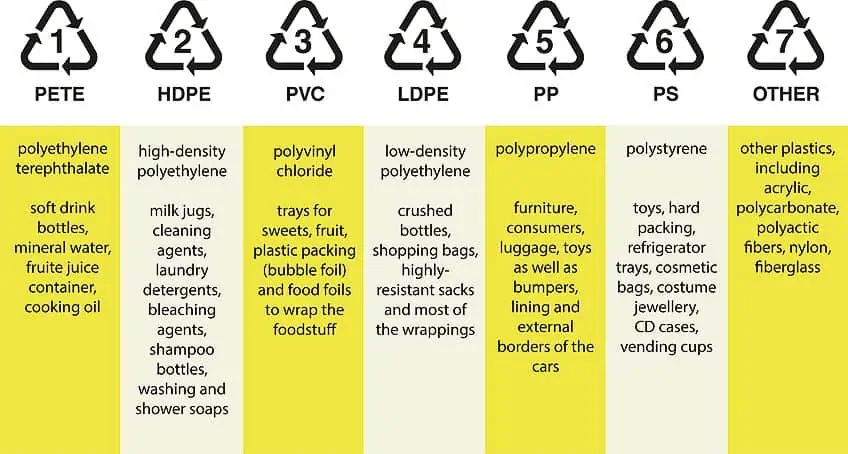
As much as most of us would hate to admit it, we can not live with the idea of plastic, but it seems as if we can not live without plastic either. Below we have listed the seven different types that we use daily – whether you realize it or not.
- PET or PETE – Polyethylene Terephthalate
- LDPE – Low-Density Polyethylene
- HDPE – High-Density Polyethylene
- PS – Polyethylene
- PVC – Polyvinyl Chloride
- PP – Polystyrene
- Others
In the past, there was no glue that was available, with the technology that had been developed at that stage, that would manage to glue HDPE plastic to any other kind of plastic surface, including to itself. HDPE adhesive has been developed since then, and it has been made readily available in most hardware stores. Why should you be HDPE gluing, you might ask?
Well, it has a tragic ability to avoid decomposing, which means finding alternative, up-cycling, ways to use the plastic when you are done with whatever came inside of it, would be your most eco-friendly choice.
A Little More About HDPE Plastic
The history of this plastic starts in 1898. It was not intentionally created, in fact, chemist Hans von Pechmann created it accidentally one day in his laboratory. In 1953, during the rush of plastics for commercial use, the plastic was redeveloped by two men, namely, Erhard Holzkamp and Karl Ziegler. Karl would later go on to win the Nobel prize for inventing the first HDPE pipe, in 1963.

Bleach bottles, shampoo bottles, milk jugs, you name it. HDPE is often used in so many of the plastic things we use on a daily basis. This is because of how strong the structure of the plastic is, once it is molded into shape. HDPE is a thermoplastic polymer, which means that it does not burn like some of the other plastics out there when it is exposed to severe heat. It will simply melt and stays within its structure.
HDPE is very strong, yet flexible. It is durable, yet light-weight, and resistant to damage because it does not corrode easily. This means that it will last longer, with whatever is inside, making it a first-class choice when it comes to containers.
There are two types of HDPE plastic. These are UHMW, which is Ultra-High Molecular Weight Polyethylene, LDPE, which is Low-Density Polyethylene, and HDPE, which is High-Density Polyethylene. Medical packaging is made with Low-Density Polyethylene and as we mentioned before, High-Density polyethylene is used to make milk jugs and bleach bottles.
Using HDPE Epoxy Glue
HDPE is extremely resistant to abrasions because of its hard or low surface density. This can make it very sticky when it comes to HDPE gluing, often needing adhesives that are specially designed to work for HDPE. Otherwise, normal glues are not suitable for this plastic, and harder methods like screws and nails would need to be used to get the HDPE surfaces to stay conjoined. This offers an industrial-styled loo, but, unfortunately, that is what you are limited to.


If you have the means to weld, then welding is also a great option to conjoin two, or more, HDPE surfaces together. This process requires you to melt the surface area you wish to adhere to, as well as the other side you wish to adhere to, and then stick them together. This works on a molecular level. If you are going to try out the welding method for HDPE, you must understand that you will not b able to weld HDPE onto any other type of plastic surface, other than another HDPE surface.
This is because the amount of heat that is needed and the treatments that are used on the plastic make it unsafe and impractical to try at home. Welding is more often used in an industrial setting, for big-scale projects.
Despite all that, HDPE gluing is not impossible. There is a possibility for you, with specifically curated HDPE adhesives that will enable you to join the two separate surfaces that are made of HDPE together. The best glue for HDPE is not your average superglue, this will simply bead on the top of the HDPE plastic as opposed to ideally sinking into it. We will discuss the different HDPE glues and HDPE epoxy adhesives that are available further on.
Our Recommendations for the Best Glue for HDPE
Seeing as the kind of glue you need to be able to adhere HDPE to another HDPE surface, or another type of plastic surface for that matter, you will need to do a bit of research before you buy just any glue. We have made things a little easier for you by listing a few of our favorite products on the market. Below you will find the best adhesives that will work for adhering HDPE surfaces together.

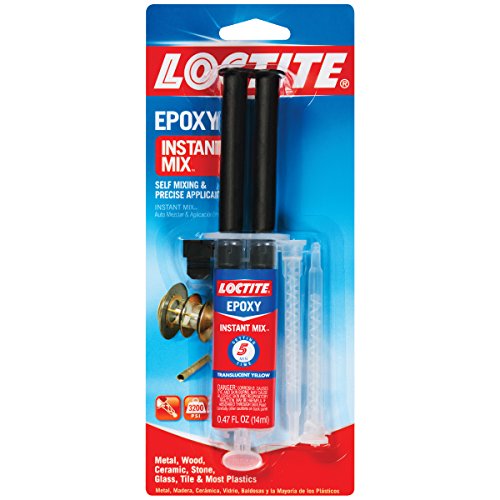
Top Choice for Fast Repairs: LOCTITE Epoxy Five-Minute Instant Mix
This is the first of our top three HDPE adhesives, mainly because it is easy-to-use and it works extremely well when it comes to bonding HDPE surfaces together. It is useful because it does not have to be for industrial use, it is also suitable for smaller projects at home.
It is made easy because of the nozzle that is built-in to the product. This can be used to consistently mix the resin and the hardener without a struggle. Usually, you would have to mix these two aspects of the adhesive by yourself, which was a lot more laborious. Below, we have made a list of the advantages and the disadvantages, for your convenience.

- Self-mixing applicator for use on a wide range of materials
- High-speed epoxy sets in just 5 minutes for quick and lasting repairs
- Resistant to humidity, water, most common solvents, and high impact
PROS
- Sanding and drilling friendly
- Easy application
- waterproof
- Dries fast
- Can be painted on
- Versatile with the different plastics it is suitable for
- Pigments can be added to change the color
CONS
- Smells bad
- Kept away from intense temperatures
- Oly useful for small-scale projects
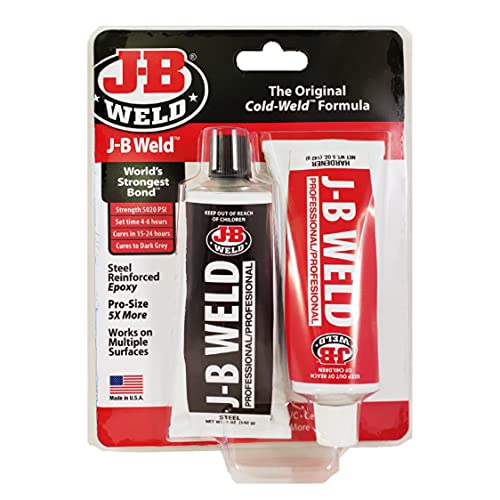
Top Choice for Big-scale Projects: J-B WELD Professional Steel-Reinforced Epoxy Twin Pack
J-B Weld’s product is one of the top epoxies available on Amazon, as well as the most popular. This is mostly because of how strong it is as an adhesive and because it works well on many types of plastics. If you are in need of a small amount, or a large amount, this product has all kinds of projects in mind from big to small, and from industrial to simple DIY.
More benefits this product offers include being able to be sawed, filled, and welded. As well as resisting the absorption of chemicals, causing them to warp. But, it has the downside of having a longer drying time (up to 6 hours), and the curing time will take about twenty-four hours in total, which can feel wasteful.

- A professional cold weld two-part epoxy system for easy application
- Creates a long-lasting bond for multiple surfaces including plastic
- Steel reinforced for a seriously high tensile strength and durability
PROS
- Great for exterior jobs
- Can withstand extreme hot and cold temperatures
- Very strong adhesive
- Drilling and sanding friendly
CONS
- Drying and curing take a long time.
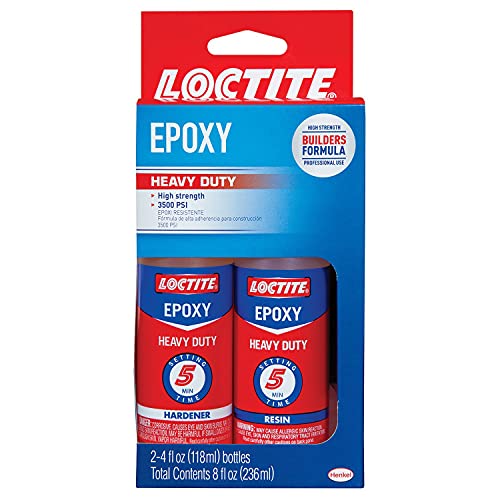
Top Choice for Heavy-duty Projects: LOCTITE Heavy-Duty Five-Minute Epoxy
If you are time-constrained with a heavy deadline that just suddenly boomed on you, Loctite has the perfect adhesive for you. It is extremely fast-acting, so there is minimal time to wait, but you must work fast so that it does not dry before you can stick it. This product is suitable for large, industrial use, but it can also work perfectly for home jobs where quick gluing is needed.
Types of surfaces this glue works with are varied which makes Loctite’s heavy-duty epoxy a good choice because you can use it for more than one project. Examples of the surfaces are ceramics, metals, wood, fiberglass, tiles, and more. If you would like to, you can read further to see all the advantages and disadvantages of working with this adhesive.

- Project-sized bottles for multi-piece jobs requiring superior strength
- Bonds metal, glass, ceramic, wood, many rigid plastics, and more
- High impact resistance means it will not crack when drilled
PROS
- Resists water
- Resists shrinking
- Resists cracking if drilling is needed
- Sanding friendly
- Heavy-duty adhesive
- Impact-resistant
- Five minute drying time
CONS
- Short shelf-life
- Very strong odor
- Only works for large-scale jobs
How to Glue HDPE – Instructions
This next section is all about how to glue HDPE plastic, but before you start, like most projects, you need to be sure you are prepared with all the tools and materials needed so that you do not experience any interruptions halfway through the job. Your next step would be to get the surface that you need to glue ready for the adhesive to be applied. This starts with cleaning any dirt from the surface. You can use an appropriate cleaning detergent that targets oily stains. Next, you need to sand down each surface that will be stuck together.

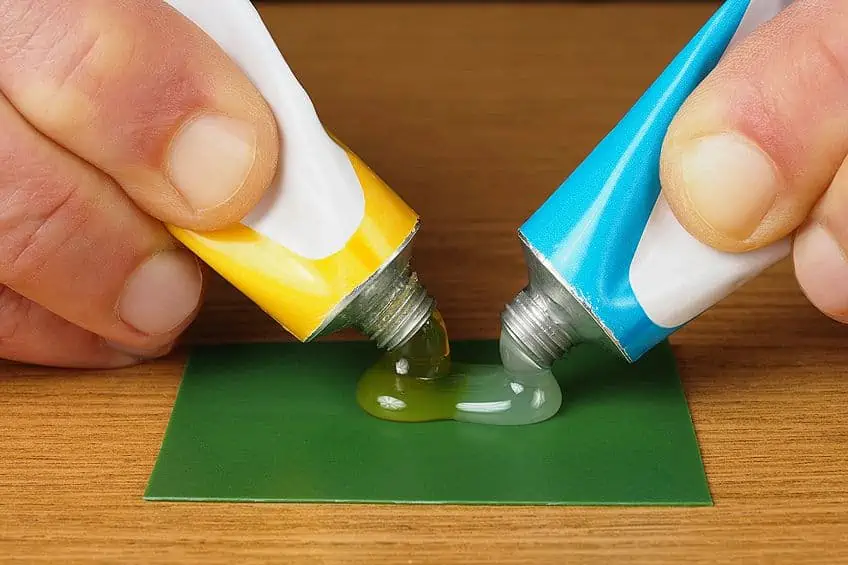
Once you have cleaned up all the particles from the sanding process (a vacuum cleaner is your best option here) you can begin with the gluing apart. Always start by reading the instructions on the adhesive’s label, it will describe the ratios of resin and hardener which you must mix together before they can be bonded. The label will also give other important information like the length of drying time. Once the mixing is complete you need to clamp the surfaces together until the glue has dried and cured.
More than often, a primer is suggested to be used before you use most glues, including most glues. This will ensure that the glue adheres to one surface so that both surfaces can be stuck together. The primer should be coated over the area you wish to bond, and it should be fully dry before any of the epoxy glue is added.
Tips and Tricks for HDPE Gluing
As with most glues, they have some nasty chemicals in their formula which can be quite harmful to our health. This means that some safety measures should be set in place before you can start. For your benefit, we have laid out some suggestions that will make your gluing experience without a hiccup. Keep reading to find out what should be instilled.
- Make sure that you have all the gear, tools, and materials needed for the job before you start. This will prevent any annoying interruptions to make a trip to the supply store.
- Make sure that you have a flat surface like a worktable or the flow to apply the glue.
- Keep windows open so that you have ample airflow. This is because the adhesive for HDPE, and other surfaces, are highly saturated with chemicals, which means the fumes will be debilitating and bad for your health.
- To prevent any visible spots of glue once the job is done and the glue has dried, always go for glue that is transparent instead of opaque.

- Ensure that you have safety gear that you can wear when working with the glue. This includes an eye mask, a respiratory mask, and gloves.
- Be careful not to get this glue in contact with your skin because it will dry and pose a risk of gluing your skin together. You can opt for full-coverage protective work clothing.
- Make sure you have sufficient light to work in.
- Make sure you apply the right amount of glue, as suggested by the label. This will prevent excess glue from spilling out from the edges of the surface you are bonding once they are clamped together.
HDPE is definitely one of the most widely and commonly used plastics in our modern age. Most of the bottles you pick up at the supermarket are made from HDPE. It is the kind of plastic that can biodegrade and it struggles to be recycled – this means that it should be upcycled. Hopefully, after reading this tutorial you feel equipped to start getting all types of projects that involve HDPE plastics.
Frequently Asked Questions
Can Two Surfaces of HDPE be Glued Together?
HDPE plastic is often thought to be impossible to be glued on. This is most often because people are using the wrong glue because they were lazy and did not read the label. The original idea for bonding two surfaces of HDPE would be only possible if you used a welding process, but this isn’t the case. With the right glue, you will be able to glue two surfaces of HDPE plastics together.
Can I Glue HDPE Surfaces with Superglue?
The short answer is yes. But the actual task is a long one because it involves using a primer as the base coat for the glue. The superglue will not absorb into the plastic surface, it will simply form beads on the top and run off the surface before the glue dries, making a mess. If you sand down both of the surfaces that you wish to bond first, then coat the area with some primer before you apply the glue, wait for it to dry, and then add your adhesive.
Can HDPE Panels be Glued Together?
Yes, you can glue two or more panels of HDPE plastic together, as long as you have ensured the appropriate preparation was done first. This means cleaning the surface, then sanding it down, and cleaning it again. The sanding process is to take away the smoothness of the plastic so that the glue will adhere to it. Some glues that are suitable for HDPE will come in two components that need to be mixed before they can be used. These are the hardener and the resin. Once you have mixed the glue, you can apply it to both panels and then clamp them together whilst they dry and cure.
How can HDPE be Bonded?
In the question of how to glue HDPE, there are more ways to bond HDPE than just adhesives. You have other choices like welding the plastic together by melting the surface area you wish to bond using very high temperatures. There is also the option of using nails and screws to keep them connected.
Do All Glues Work on HDPE?
No, there are some glues that will not work for this type of plastic, all you need to do is read the label which will be explicit about what glue it works for. You should not rely on the fact that it says it will work for “all” plastics unless it specifically states that it works for HDPE. Other glues that work for HDPE bonding are produced by the brands J-B Weld as well as Loctite.