Best Grout Sealer – Our Guide to Tile Grout Sealing
This post may contain affiliate links. We may earn a small commission from purchases made through them, at no additional cost to you.
It is imperative after tiling that you use a tile grout sealer. It is quite a simple process to do. However, with the overwhelming number of products available on the market, you might be confused about which tile grout sealer you should purchase. The best grout sealer all depends on the location of the grout, your budget, and your required needs. We will explore which tile grout sealer is best for you in this article and will offer you an overview of how to apply grout sealer.
Table of Contents
- 1 What is Grout Sealer and Why Do we Need to Use it?
- 2 How to Clean Old Grout
- 3 Our Recommended Options for the Best Grout Sealants
- 3.1 Best Deep-Penetrating Grout Sealer: MIRACLE SEALANTS Impregnator Sealer
- 3.2 Best Eco-Friendly Grout Sealer: AFM SAFECOAT Grout Sealer
- 3.3 Best Premium Grout Sealer: AQUA MIX Sealer’s Choice Gold
- 3.4 Best Grout Sealer for Big Projects: TUFF DUCK Natural Grout & Stone Sealer
- 3.5 Best Spray-On Grout Sealer: MIRACLE SEALANTS Spray-On Grout Sealer
- 4 How to Apply Grout Sealer
- 5 Professional Tips for Cleaning and Applying Grout Sealant
- 6 Frequently Asked Questions
- 6.1 How Many Coats of Grout Sealer Should be Applied?
- 6.2 Does Grout Need to be Sealed if it is New?
- 6.3 How Regularly does one Need to Apply Grout Sealer?
- 6.4 How Soon can I Seal New Grout?
- 6.5 Is it Necessary to Seal Tiles?
- 6.6 How Much Time does Grout Sealer Need to Dry?
- 6.7 Do I Need to Seal All Types of Grout?
What is Grout Sealer and Why Do we Need to Use it?
Let us begin with grout. Tile grout contains limestone and cement and is in powder form. Occasionally it may also contain sand or pigment. You combine the substance with water to form a paste that is then used to fill the spaces between tiles that have been newly installed. When the paste has dried, grout will stop dust and dirt from collecting in between the tiles, which will also be stopping excess moisture from reaching underneath the tiles. However, grout can be porous which will then absorb water and result in mildew and mold growth. In extreme situations, it can even result in structural failure. So, does grout need to be sealed, in most cases the answer is yes.


Selecting a quality grout sealer to apply can stop the grout from absorbing moisture and thereby increasing the longevity of your tiles will ensure that they are free of stains and mold growth. If mold has grown on your tile grout, it can be dangerous to your health, particularly if it is neglected and allowed to thrive.
It is recommended that you remove any mold before it becomes a problem. When sealing old grout, cleaning is imperative. This article will assist you with knowledge on how to clean your grout effectively and how to seal grout.
Remember that epoxy-based unsanded grout will not need a sealant as it is by nature non-porous and therefore waterproof and simpler to clean than grout that has been sanded. Epoxy-based grout is very durable, and while it is expensive, it has some advantages. Unfortunately, many people feel that it does look quite artificial.
Types of Grout Sealer
There are so many manufactures that make grout sealers, it can all seem very overwhelming. As you can imagine with all the different suppliers of grout sealer there are many different formulations to choose from. There are solvent-based varieties as well as water-based options, but there are two types of grout sealer which are seen as the main options. These are membrane-forming grout sealers and penetrating grout sealers.
Membrane-Forming Grout Sealer
This type of grout sealer is sometimes referred to as surface coating grout sealer and is perfect for spaces that need moderate protection such as floor tiles or kitchen sink splash backs. However, this type of grout sealer is not great for spaces that are exposed to excessive steam and moisture such as bathrooms. It would therefore not be the best grout sealer for showers. Rather use penetrating sealer in these areas.


Over time membrane-forming grout sealer can, unfortunately, become cloudy in color and will have to be reapplied more often than penetrating sealer.
Penetrating Grout Sealer
Penetrating grout sealer, also referred to as impregnating grout sealer, is perfect for maximum protection against extreme moisture. Much like its name states, a penetrating grout sealer penetrates the surface of the grout, while a surface coating sealer only impacts the surface. This form of sealer is more effective and lasts longer as you will only have to reapply every three to four years.
There are types of penetrating grout sealers available that include a color that will tint your grout. This is a stunning option to both protect your tiles while adding to the aesthetic appeal, and covering up existing stains.
Solvent- and Water-Based Grout Sealer
When we discuss water-based and solvent-based we are referring to the carrier of the grout sealer. The carrier, being either solvent or water, as the grout sealer dries, will evaporate and therefore will seal the grout. Standard solvent-based grout sealers penetrate a lot deeper into the surface than water-based versions. However, thanks to the scientific progress of some water-based formulations, these sealers can penetrate deep enough as grout tends to be quite porous.


Water-based grout sealers tend to have very low volatile organic compounds (VOCs). There are significantly more VOCs in solvent-based grout sealers. VOCs pose a dangerous risk to both the environment and humans. Due to this, we recommend you rather use a water-based grout sealer, and should you have to use a solvent-based grout sealer you will need to wear a respirator and protective gear. You should also ensure you are working in a room with good ventilation, open windows, and doors to increase airflow.
How to Clean Old Grout
While you are aware it is necessary to seal the grout, if you have neglected to do it for some time you will have to address the stained, dirty, bacteria-infested, or molded tile grout. If you simply apply grout sealer on top of the old grubby grout you could potentially lock in the dirt or stop the correct adhesion of the sealer. Naturally, you will have to clean the old grout before you can begin applying any grout sealer. We have put together details on some of the different methods available to you to clean your old grout.


Scrub With Hot Water
We suggest you begin with some hot water. You will be able to loosen some of the surface’s grime using just hot water, and thereby making it easier to remove. Spray the grout lines with hot water and then use a toothbrush or a scourer to scrub the grout before rinsing the area. If the grout is still not clean you will then have to move onto the next method. You can also use a steam cleaner which is a very effective method to clean grout.
Bicarbonate of Soda and Vinegar
Create a paste by combining water and bicarbonate of soda. Apply the mixture to the grout, using a toothbrush scrub at the grout, finally allow the mixture to sit for several minutes. Next, spray some distilled white vinegar, using a spray bottle, directly onto the bicarbonate of soda. The mixture will begin to bubble and fizz as a chemical reaction occurs. Carry on scrubbing the grout using either a scourer or toothbrush to remove the grime and dirt.


It is important to thoroughly rinse off the white vinegar from the tile grout as over time it can be corrosive.
Oxygen Bleach
If you find yourself with a difficult stain on your grout, you can attempt to clean it with oxygen bleach (also known as sodium percarbonate). This product should be used with care, while it is not as toxic as household chlorine bleach, it is still dangerous. Before applying oxygen bleach, we recommend you refer to the manufacturer’s instructions. Ensure the area you are working in has adequate ventilation. Once you have applied the formula you will need to leave it on for roughly 15 minutes before you use clean water to rinse it off.


Bicarbonate of Soda and Hydrogen Peroxide
You can also use a mixture of bicarbonate of Soda and hydrogen peroxide to effectively remove any dirt from your grout. Combine the two substances in a ratio of two parts bicarbonate of soda to one-part hydrogen peroxide to form a paste. Add a little bit of dishwashing soap to assist in fighting the grease and oils. Apply the paste directly to the grout line and allow it to sit for roughly 15 minutes before scrubbing with a scourer or toothbrush and finally using water to rinse it off thoroughly.
Best Overall Grout Cleaner: BLACK DIAMOND Ultimate Grout Cleaner
This is your go-to product if you require an all-rounder option. The formula is highly penetrating and is effective in soaking deep into the grout and lifting any grime, dirt, and grease. The product is easy to apply thanks to the built-in spray nozzle. The product is affordable, while also being effective on soap scum, dirt, and food stains. The product is acid-free and will clean your colored grout while not bleaching the color and can be used on an assortment of surfaces. Sadly, this product will not work on calcium buildup, mold, or water spots, but is perfect for regular and basic grout cleaning.

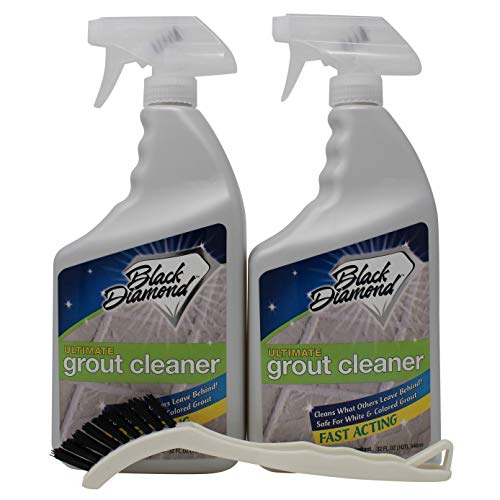
- Acid-free formula will not discolor white and colored grout
- Deep-cleans hardened grease, food, and soap
- Not recommended for calcium or water stains
- Works well on tough dirt
- Non-acidic
- Can be used safely on marble and ceramic tiles
- Simple to use
- Works quickly
- Old yellowing grout will not be whitened by this product
- Not a good option for removing mold
Thanks to the above methods your grout lines should be free from any grease or dirt, and be sparkling clean. Next up you will need to select your grout sealer. Before you start applying any grout sealer your grout needs to be completely dry. If grout sealer is applied to wet grout, the sealer will not adhere correctly to the grout which will result in the sealer failing, and with time, you may experience moisture seeping into the grout and stains forming.
Our Recommended Options for the Best Grout Sealants
There are many grout sealers available so it can be a daunting task to select the correct one for you. Depending on what surface you are working with and your personal preference will impact which grout sealer you select. These particular products listed below are highly rated and recommended.
Best Deep-Penetrating Grout Sealer: MIRACLE SEALANTS Impregnator Sealer
This is a solvent-based grout sealer, which means it can penetrate a lot deeper than the majority of water-based sealers. This provides you with long-lasting protection from moisture. This particular sealant not only works well on grout, but can also be effectively used on quartz, natural stone, and slate. The formulation of this sealer is both water- and oil-resistant which provides an invisible protective barrier that lasts as long as 20 years. This grout sealer provides amazing coverage and performs well at protecting your grout from the elements. It is simple to use and will in no way change the surface’s appearance.

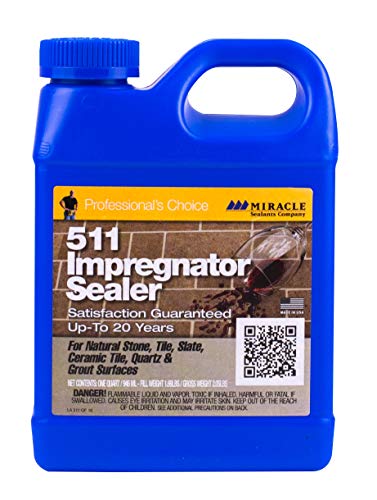
- Indoor and outdoor use with UV transparency and weather resistance
- Oil and water resistant, and safe to use on food prep surfaces
- Excellent coverage at 1,000 square feet per quart
- Amazing coverage
- Grout is penetrated deeply
- Lasts long
- Can be used on an assortment of surface
- Provides a high level of protection
- Gives off a foul odor
- Solvent-based
Best Eco-Friendly Grout Sealer: AFM SAFECOAT Grout Sealer
This simple-to-use sealer, which emits low levels of odor, is also considered one of the safest grout sealer products available. This sealer is perfect for use in bathrooms and kitchens and it provides amazing water resistance and can last for as long as five years. There is no formaldehyde or VOCs in this sealer. A layer of this grout sealer will take four hours to dry and then you can apply an additional layer. The product takes a day to cure completely. With just one quart of this product, you will be able to seal an area of 100 square feet in size. The sealer will dry clear and will in no way discolor the grout.

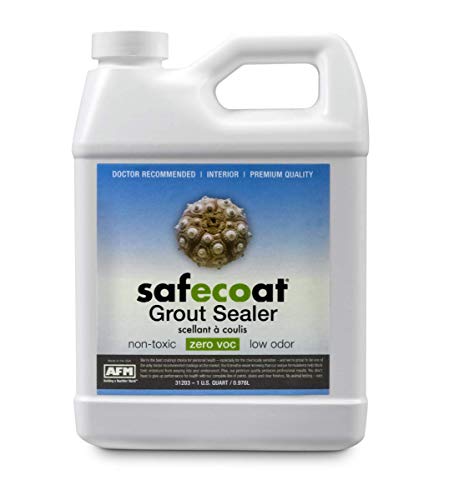
- Safe to use indoors and outdoors with no toxins
- Water resistant for use in kitchens and bathrooms
- Good coverage at 100 square feet per quart
- It does not affect the color of the grout
- Environmentally-friendly
- If applied correctly, it is a long-lasting product
- Amazing coverage
- Low odor
- Pricey
- Moderate penetration
Best Premium Grout Sealer: AQUA MIX Sealer’s Choice Gold
This product can be used on a multitude of surfaces, including marble, porous tiles, granite, limestone, slate, and of course grout, making it extremely versatile. You can apply it with ease using a sponge and it will be mildew and mold resistant once cured. This sealer offers a no-sheen, natural look. The product penetrates deep into the grout which protects from both stains and moisture. It is safe enough that it can be used in areas where you will be preparing food. The manufacturers claim that it will protect for up to 15 years.

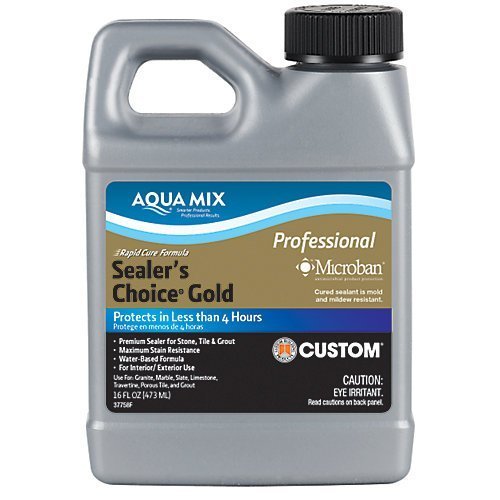
- Stain resistant penetrating sealer for porous surfaces
- Ideal as a pre-grouting sealer and for use on food prep surfaces
- For use on natural stone, porcelain, cement, and masonry
- Simple to apply
- No-slip
- Versatile
- Provides a natural look
- Can be used on surfaces where food is prepared
- Very expensive
Best Grout Sealer for Big Projects: TUFF DUCK Natural Grout & Stone Sealer
This product offers amazing protection for travertine, slate, marble, and even concrete. The formula is non-toxic and the product can be purchased in a one-gallon bottle. The bottle can cover an area of 800 square feet. The sealer is penetrating and yet will not change the appearance of your grout lines or other surfaces. This sealer works well in resisting water and oil. This product provides five years of protection on interior surfaces, and three years of protection on interior surfaces. This is the best grout sealer for showers.


- Protects stone and concrete for up to 5 years on interior surfaces
- Penetrating sealer for a natural appearance
- One coat application
- Simple application
- Can be used on several different surfaces
- Long-lasting
- Effective sealant
- Perfect for large surface areas
- Gives off a strong odor
Best Spray-On Grout Sealer: MIRACLE SEALANTS Spray-On Grout Sealer
It can be a tedious task applying grout sealer, so using a spray-on sealer is a great time saver. The question is, is a spray-on sealer effective? This sealer as the name implies is a spray-on sealer that comes in an aerosol and is simple to use. You will not have to use any applicators; you simply seal the grout straight from the can. The pressurized aerosol can offer sufficient and even coverage. The best part about this product is that it will protect your grout from any stains and moisture, while also being quick drying.

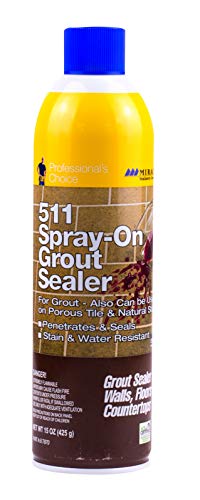
- Can be applied on old grout or new grout within 2 hours
- Coverage of up to 250 linear square feet per can
- Easy to use spray application
- Non-yellowing
- Simple to use
- Effective grout sealer
- Dries very quickly
- Can potentially stain other surfaces
- Does not work well on surfaces other than grout
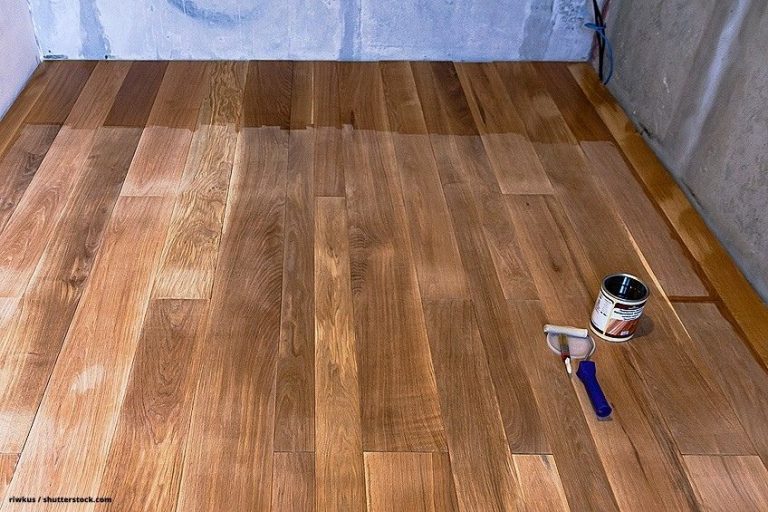
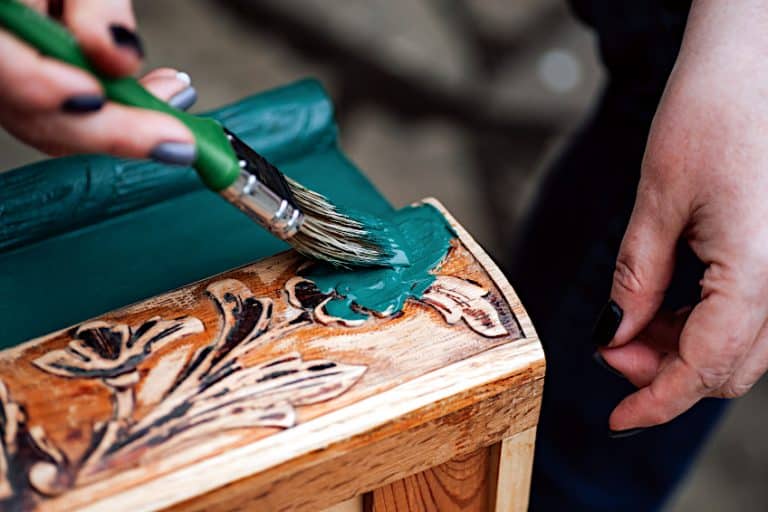
How to Apply Grout Sealer
Applying grout sealer is an easy DIY task that even a beginner can handle. It is however a tedious exercise, particularly if you have to tackle a large surface area. To ensure stunning results, we suggest you work methodically, take your time, and be patient. We have put together an overview of how to apply grout sealer.
We recommend that you always consult the instructions that you receive with your selected grout sealer before you begin..
What You Will Need
To ensure that your grout sealer is applied safely and cleanly you will require the following supplies:
- Grout sealer
- Grout cleaning solution (this is not necessary if you are sealing new grout)
- Applicator (applicator bottle, brush, foam roller, etc.)
- Soft lint-free cloth
- Nitrile gloves


Cleaning and Repairing Grout
Your first step before applying grout sealer is to clean your grout thoroughly. As mentioned earlier, should you attempt to apply grout sealer to dirty grout, you will seal in the grime and dirt. Grime and grease which has not been cleaned off the grout can also impact the adhesion of the sealer. The methods we have previously mentioned are the most effective options to clean the grout. This is an imperative step in the process and you should only skip it if you are working with new grout.
If your grout is cracked or chipped, we recommend you repair these issues before applying the grout sealer. These can be fixed by removing the damaged product and applying new grout. If you are working with tiles that have been recently installed, we suggest you wait at least three days to allow the grout to dry completely.
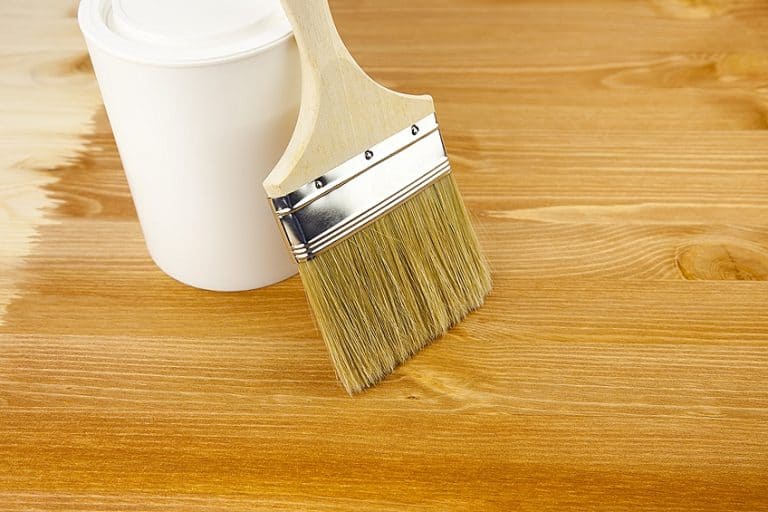
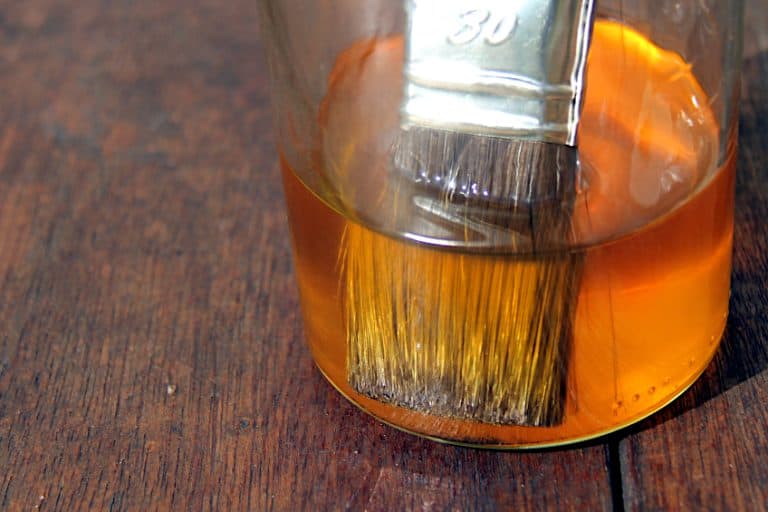
Choose Your Sealer and Applicator
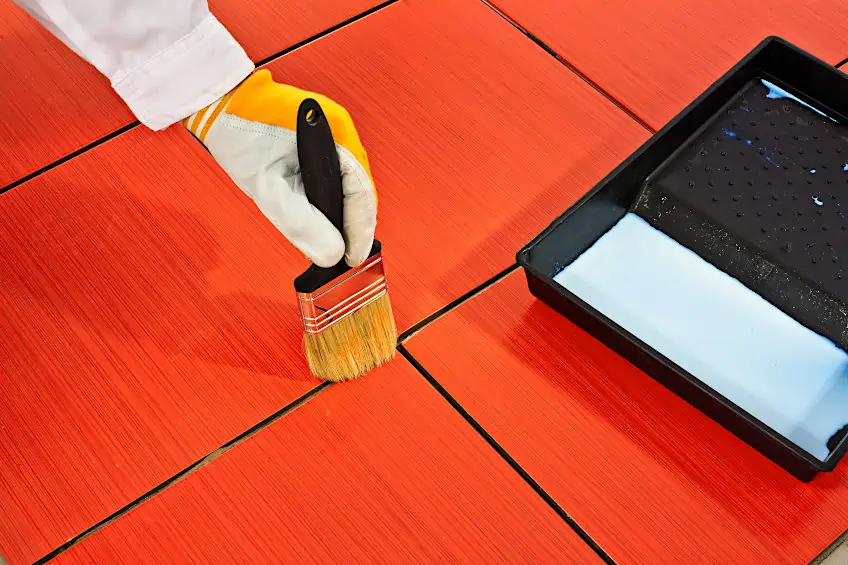
Selecting the correct grout all depends on the area of your home that you will be applying it to. You will also need to take the type of tiles (such as ceramic, marble, or stone tiles) into consideration. If you are working with unsealed tiles that have thin grout lines, you might be able to use a sponge to apply the sealer over the whole area. But, in most cases, you will achieve better results using a brush or sponge applicator. Certain products have an applicator wheel built into the bottle, making it simple to apply.
Consult the label of the grout sealer for any information, such as if it can be used on glazed or unglazed tiles, and which area in your house the formulation is for. Always consult the instructions and parameters on a product before purchasing it to confirm it is what you require.


Applying the Grout Sealer
Once you have put on your nitrile gloves, you can douse your selected applicator with your sealer and begin applying the grout sealer methodically and slowly to the grout lines. You may have selected a spray bottle or a rolling applicator bottle, either will make the process easier. remember to soak the grout liberally to ensure sufficient coverage, and clean away any excess sealer using a lint-free cloth. We recommend you begin with the vertical grout lines and then work on the horizontal lines as this way you will be certain you have not missed any areas.
You will need to cover all the grout. If you get any grout sealer on the tiles, use a cloth to clean it off, before it dries. This, however, is not necessary if you are using a grout sealer that has been designed for use on both tiles and grout.
You will need to cover all the grout. If you get any grout sealer on the tiles, use a cloth to clean it off, before it dries. This, however, is not necessary if you are using a grout sealer that has been designed for use on both tiles and grout.
How long it will take for your grout sealer to dry differs from manufacturer to manufacturer but is generally between 15 and 60 minutes. You will probably have to apply an additional coat of grout sealer and potentially a third coat may be required. Certain grout sealers take a full day to cure while others can take up to two days.
Professional Tips for Cleaning and Applying Grout Sealant
It is not necessary to call in the services of a professional to clean and reapply your grout. It is a simple enough process for you to do yourself, and we have put together a list of tips to make the process even easier.
- To ensure you do not end up buying the wrong quantity of grout sealer, assess your surface area and refer to the manufacturer’s instructions for your selected product. The instructions should provide information on how many square feet the container of grout sealer will cover.
- To make it easier to clean your tile grout, you can use some whitening toothpaste and an electric toothbrush. This method is quick and effective and much less taxing on one’s elbows.
- If you are applying grout sealer to grout between floor tiles, we recommend you begin the application at the end furthest from the door and work from one side to the other, working systematically to apply the grout sealer, until you reach the exit.
- You can use a stiff-bristled grout brush to tackle any stubborn grime on your tile grout. This type of brush has been specifically designed to get tough dirt out of grout lines. This is the perfect tool, but sadly will still require a significant amount of elbow grease!
- To determine if you have sealed the grout sufficiently is to drizzle a few drops of water onto the grout. You ideally want the water to not be absorbed and rather sit on top of the grout. The grout has not been sealed correctly if the water is absorbed. Only try this trick when you are certain that the grout is dry.
- To avoid excessive amounts of grout sealer from drying on the tiles, have a cloth at hand when sealing grout. This is not necessary if you are sealing unglazed tiles. You will have to use
- You can use painter’s tape to cover any area you do not wish to get grout sealer on.
While sealing grout is a time-consuming, tedious job, it is very simple to do and will ensure your tiles look fresh for many years to come, given the sealant is applied correctly. Always ensure that old grout has been thoroughly cleaned before applying any grout sealer. If you are working with a new grout, before you can begin sealing it you will need to ensure that the grout has cured completely. Hopefully, this article has provided you with the details of how to seal grout and in particular how to seal floor tile grout, safe in the knowledge that you have selected the correct product for the task at hand.
Frequently Asked Questions
How Many Coats of Grout Sealer Should be Applied?
Sadly, just one coat of grout sealer will not be sufficient, particularly if you are working with a porous grout. We recommend you apply at least two coats of grout sealer, if not more. Do not apply the next layer until the previous layer has dried completely. To confirm the drying time, consult the manufacturer’s instructions.
Does Grout Need to be Sealed if it is New?
Most of the time contractors will finish the tile installation and then leave it as they will require time to cure completely. This means that often new grout still requires grout sealer to be applied. You will therefore have to apply the grout sealer yourself unless you have requested that your contract apply grout sealer as part of their services.
How Regularly does one Need to Apply Grout Sealer?
Most manufacturers of grout sealers have flashy claims that their product will last for a significant amount of time, you need to factor in the regular cleaning and high traffic that the area will receive. This will cause the grout sealer to wear down with time. We recommend sealing your grout once or twice a year for areas that experience high traffic. You may be lucky to get away with only sealing your grout every second year.
How Soon can I Seal New Grout?
You must seal new grout to protect it from moisture and stains, but we recommend you wait at least two days before applying any grout sealer to your freshly installed grout. You can play it extra safe and wait three days before applying any sealer. A rule of thumb is that grout needs to be completely dry and clean before you can apply any grout sealer.
Is it Necessary to Seal Tiles?
You will not have to seal your tiles if they are glazed ceramic or porcelain. However, if you have unglazed tiles such as terracotta or natural stone you will have to seal them. You might have to use a different type of sealer to seal unglazed tiles but there are many multi-purpose stone and grout sealers available on the market. Keep in mind that you could potentially stain your unglazed tiles with grout sealer, and it is very difficult to remove after the fact.
How Much Time does Grout Sealer Need to Dry?
Depending on which product you are using, the drying time of the grout sealer varies from brand to brand. On average it will take between two and three hours for the grout sealer to dry but can take up to two days for the product to cure completely. Only resume normal use when you are certain the product has dried and cured completely.
Do I Need to Seal All Types of Grout?
While it is necessary to seal cement-based grout, to offer protection from mold, moisture, and stains, you do not need to seal synthetic grout. Synthetic grout includes epoxy and urethane grouts. These types of grout do not require sealing as they are not porous, so they are easy to clean and naturally repel moisture.