
Best Silicone Molds for Resin – Full Buying Guide
This post may contain affiliate links. We may earn a small commission from purchases made through them, at no additional cost to you.
Every year with Christmas and birthdays, you are always left with the problem of what to purchase as gifts for friends and family. What if instead of buying something, you can make something yourself? This will mean you have created a personal, unique, item that will be truly valued by those who receive it. You can make an assortment of items cast in epoxy resin using silicone resin molds. In this article, we will assist you in selecting the best silicone molds for resin.
Table of Contents
- 1 What Do You Use Resin Molds For?
- 2 Making a DIY Silicone Mold for Epoxy Resin Casting
- 3 Best Silicone for Resin Shapes and Forms
- 3.1 Best Jewelry-Making Silicone Resin Mold: NANAPLUMS DIY Jewelry Casting Molds
- 3.2 Best Silicone Molds for Resin for Ashtrays and Coasters: LOTFANCY Epoxy Resin Silicone Ashtray Coaster Molds
- 3.3 Best Silicone Epoxy Molds for Spheres, Cubes, and Pyramids: REPINSTA Sphere, Cube, and Pyramid Silicone Mold Set
- 4 How to Use Epoxy Resin With Your Silicone Mold
- 5 Tips for Making Silicone Resin Casting Molds
- 6 Frequently Asked Questions
What Do You Use Resin Molds For?
You may wonder, why use a resin mold? To equip you with a better understanding, we will explain resin molds in more detail and why they are great to use. We are familiar with different types of coasters, jewelry, cell phone covers, toys, key holders, and so much more made from resin. You create the resin items by pouring resin into a mold of a given size and shape, using small to large resin molds.

You will use a two-part liquid polymer casting resin, which needs to be thoroughly mixed to combine the two components and then poured into your desired mold that is the size and shape of the item you are looking to create. Once the resin has cured you can then sand down the item, paint it and seal it. you can purchase molds in a variety of colors and materials. Each mold has its relevant application, and you will be amazed at the variety of molds on offer at your local craft store.

Types of Molds for Resin
When buying your silicone resin mold, there are several factors you will need to take into consideration. When buying the best resin mold for your needs you will need to choose carefully, as each mold has a different application. Many molds are also made from an assortment of different types of materials.

We will now consider the different types of materials that molds can be made from and determine the correct one for your project. There are three different types of materials that molds are created from:
- Pre-made plastic molds
- Silicone rubber epoxy molds
- Latex rubber molds

Pre-Made Plastic Molds
these molds can be purchased from any craft store, and are readily available online. These types of molds are available in thousands of different sizes and shapes from toys, to letters of the alphabet, to cellphone covers, jewelry pieces, and so much more. These types of molds are mass-produced, making them very affordable, and you can purchase a variety of them and build up a fair-sized collection for use whenever you need them. Unfortunately, the molds are made from plastic are not environmentally friendly as they are not biodegradable.
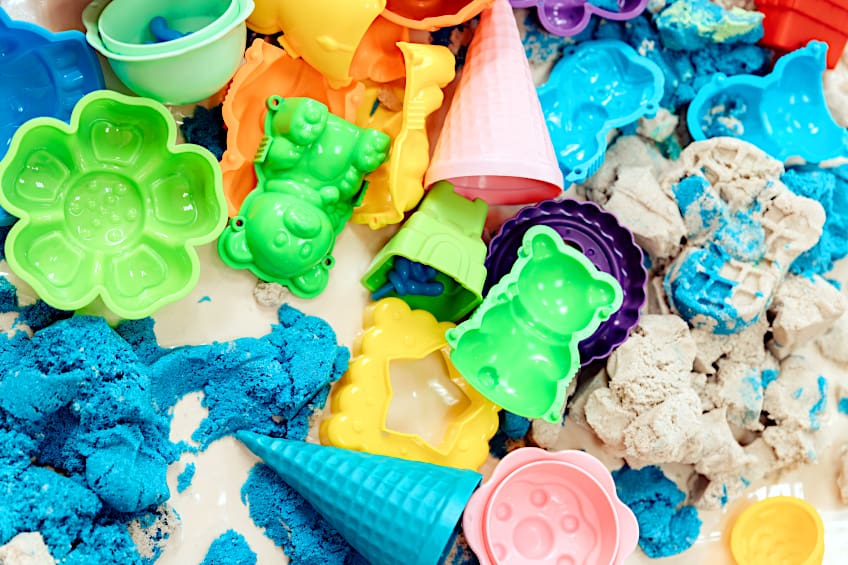

Plastic resin molds are made from plastic, which makes them stronger, rigid, smooth, and durable. With the majority of these molds, you will not have to coat the molds with anti-adhesive coating before you begin pouring your resin, as it is quite easy to remove the item from the mold once it is set. We do however recommend applying a mold release agent to make sure the item comes out of the mold with ease.
Plastic molds are simple to work with, but sadly, being plastic, they can scratch easily, and the scratch marks will show on your finished piece. If you are just starting with resin art molds, we recommend you begin first with a plastic mold, and once you have gained further experience you can move over to silicone molds. If you are planning to use large resin molds then a plastic mold is ideal as it remains rigid, unlike a flexible silicone mold.
Silicone Resin Molds
Silicone resin molds cost a lot more than plastic molds, but if you plan to take resin crafting seriously then we recommend investing in silicone molds as they will last much longer, as long as you take care of them. Silicone molds will also ensure that your resin piece has a shinier and brighter finish, as the surface of the molds is very smooth. However, you can always touch up your item with some resin gloss sealer spray if it is not as shiny or bright as you want.

Silicone molds are perfect for use when casting resin. Silicone resin molds are easy to clean and simple to use, and they can be used over and over again! Once your cast resin has completely cured, you can just pop the item out of the mold with ease. You will need to ensure that your silicone molds are kept out of direct sunlight as the UV rays will break down the silicone. Keep in mind that once you have used a silicone mold to cast resin, the mold is no longer safe to use for food anymore.

Another option is to make your silicone resin molds, and you can create a mold of whatever shape or form you require. There are a variety of silicone mold kits available on the market for this. Unlike pre-made plastic molds, you can make resin art molds for almost anything from toys, to jewelry, coasters, and river tables. You will simply have to generate a negative form of any type of item you are hoping to create, such as earrings, a pendant, or any other shape you are looking to make.
Latex Rubber Molds
Latex rubber molds used to be quite common, and while you are still able to purchase them, it can be harder to locate a variety of different molds. You can make our latex rubber mold. However, this process is quite time-consuming and is a lot more difficult to do than when making a silicone mold. To create your latex rubber molds, you will need to take the item you are looking to replicate and begin by painting it with the liquid latex. Continue to apply several layers until all the details of your positive items are covered. Ensure that each layer is dried before you add the next coat.
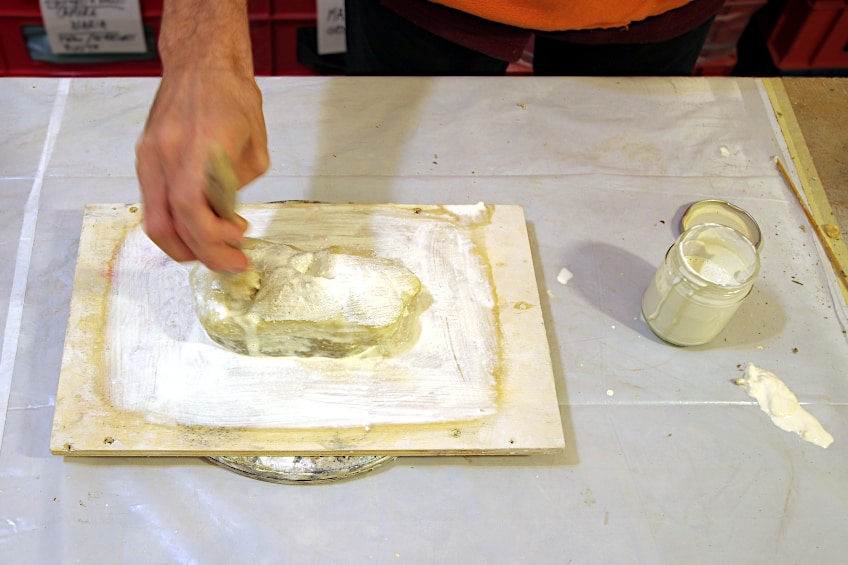

When you have finished the process, and all the layers of latex have cured, you can spray the latex mold material with some non-stick spray such as cooking oil, ensuring that the entire surface is covered. You will then take some plaster of Paris and add it to the mold. Allow time for it to dry completely, consult the manufacturer’s instructions to determine the necessary drying time.

Once dried you can remove the plaster of Paris from the mold, but the item you are replicating should be left in the mold. You can now remove the positive item from the latex mold, you are now ready to begin replicating as many items as you require. Certain latex rubber is particularly tough, it can stand up to the majority of materials, even concrete. As long as you look after the mold you will be able to use it for several years.
Plastic Molds vs. Silicone Molds When Casting Epoxy Resin
You will require an understanding of the two types of molds if you want to achieve the best results with your resin castings. You can use many types of resin in either of these molds, but each has its own positive and negative attributes, which you need to know about if you hope to create a successful project. we have put a table together to assist you.
| Characteristic | Plastic Mold | Silicone Mold |
| Food Safety | ✘ | ✔ |
| Durability | ✘ | ✔ |
| Recyclable | ✔ | Limited |
| Biodegradable | ✘ | ✔ |
| Dishwasher and Oven Safe | ✘ | ✔ |
| Environmentally Safe | ✘ | ✔ |
| Easy to Use | ✔ | ✔ |
| Cost | Cheap | Expensive |
| Easy to Demold | ✔ | ✔ |
| Casting Appearance | Dull | Bright and shiny |
| Custom-Made Molds | Pre-made by factory | Can make your very own mold |
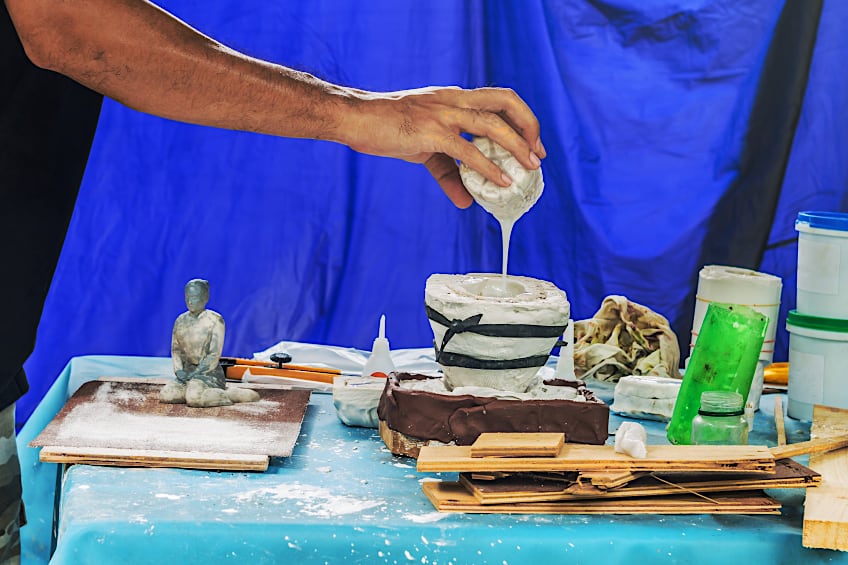
Making a DIY Silicone Mold for Epoxy Resin Casting
Heading to your local craft store and buying a silicone mold is the easiest way to begin doing resin art. You can create your own unique mold of any size or form you require and reuse it as often as you like. You will need two materials to form your resin mold, namely silicone putty, and silicone liquid. Both methods will need a negative form of any item, that you can then fill with epoxy resin.


Liquid Silicone for Epoxy Molds
Using silicone liquid, you can make silicone molds with one of two processes. The first option is to use a specialized kit that has been designed for this purpose. The second option is to use a tube of silicone caulk. When working with a silicone liquid mold-making kit, you will receive two components that will need to be combined at a ratio of 1:1.

Silicone Liquid Mold-Making Kit
You can begin by combining parts A and B in a ratio of 1:1. You will require equal parts of each component; place them in a separate cup and stir them together for roughly five minutes until they are mixed together thoroughly. Next, you will take the item you are planning on coping into a non-silicone plastic container. There needs to be adequate space in the container for the mixture to completely cover the item.

It will take roughly six hours for the mixture to cure at standard room temperature. It is normal if there is slight shrinkage, so do not let this concern you. Once cured you can remove the mold from the container, and you are ready to begin your resin casting project.
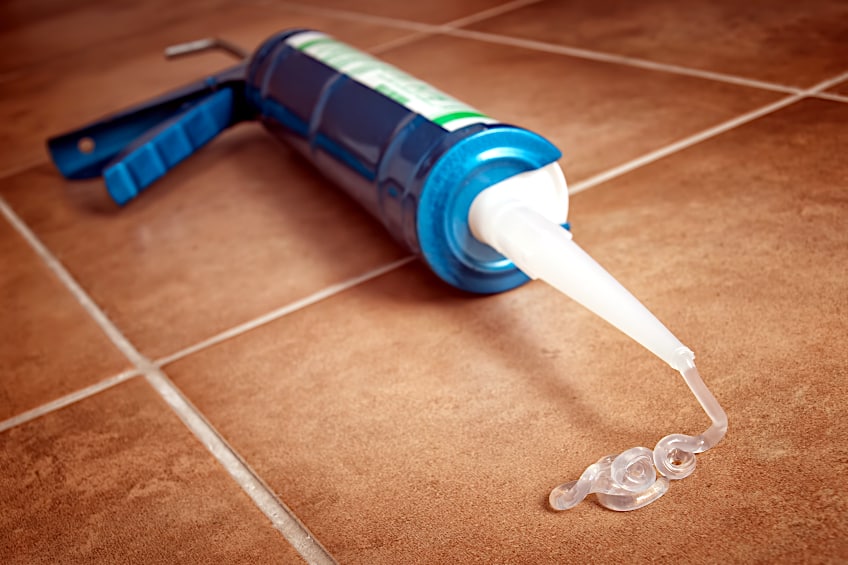
Silicone Caulk
To do this method you will need a bowl containing a water mixture made up of some liquid soap to a ratio of one part soap to 10 parts water. We recommend using a colored soap as this will help you see the silicone caulk in the water. You can then squeeze the silicone caulk into the water, from the tube. Ensure that you have enough that you will be able to cover the chosen positive item you will be molding.

You can start to knead the mixture, ensure that you are wearing plastic gloves for your safety, you want to knead the mixture into a ball. The mixture can be kneaded as if it was a ball of dough. You want to achieve a consistency that the mixture no longer sticks to your gloves, this should take roughly five minutes. Once the silicone starts to slightly harden, you can remove it from the container and begin molding it over the positive item you want to create. You need to press the silicone tightly around the item as you want to form a watertight seal.
The silicone will need time to cure properly, this will take between one and two hours. Then, as careful as possible you can remove the positive item from the mold, and you are left with a mold ready to use to create your epoxy resin casting. Keep in mind that liquid silicone is not food safe and cannot be placed in an oven.
Silicone Putty for Making Epoxy Molds
Silicone mold putty comes in a kit as two parts that contain two different types of putty, that have to be combined in a ratio of 1:1 to create your mold. As opposed to liquid silicone, you can heat silicone mold putty in the oven up to 400 degrees Fahrenheit (204 degrees Celsius), depending on which brand you have chosen to use. The majority of silicone putty is also food safe, to be certain consult the manufacturer’s instructions.

Mix equal parts of both the different color-coded putties. The putties are very safe to handle so you can mix it using your hands. It should take you roughly one minute to blend the two parts properly. You do not need to mix exactly equal parts of the putty, as a close enough proportion will be sufficient.
Take the putty and mold it around the positive item you are looking to copy, you want to ensure that all air pockets are removed. This will take you roughly three minutes. Allow the putty to stand for between 45 minutes and one hour so that it can harden. If some putty has folded over onto the backside of your item, you can take a sharp knife or razor blade to remove these pieces as they will cause problems when you try to remove the item from the mold.


Slowly and carefully, you can begin removing your positive items from the putty. You can then leave the putty for 24 hours to completely cure. Alternatively, you can place the putty in an oven at 350 degrees Fahrenheit (176 degrees Celsius) for roughly 30 minutes. You now have a silicone mold that you can use with your epoxy silicone resin casting.
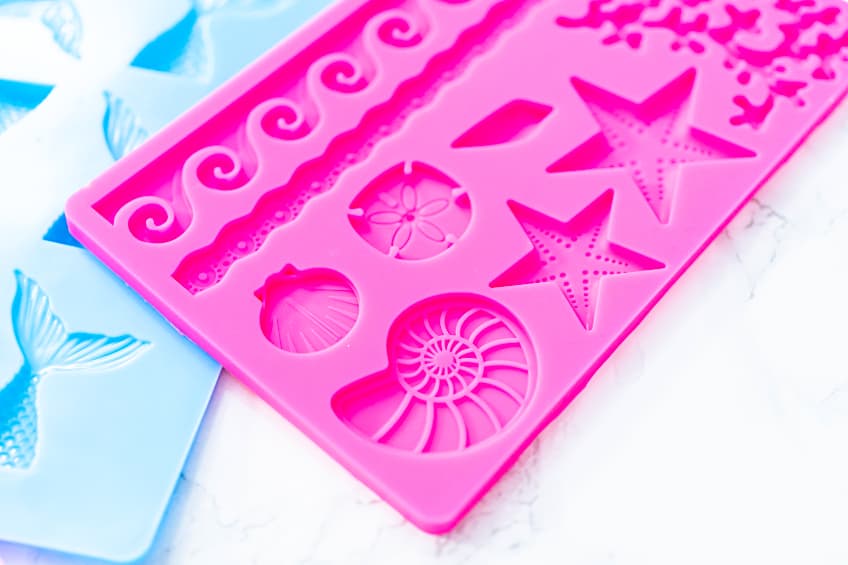
Best Silicone for Resin Shapes and Forms
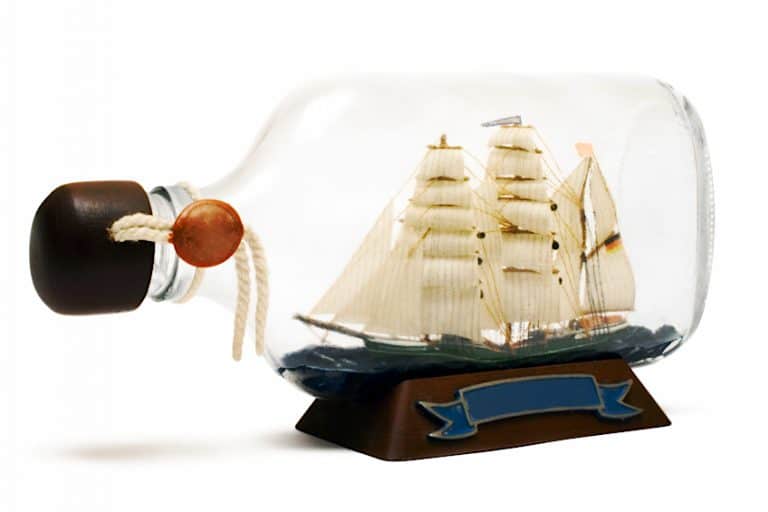
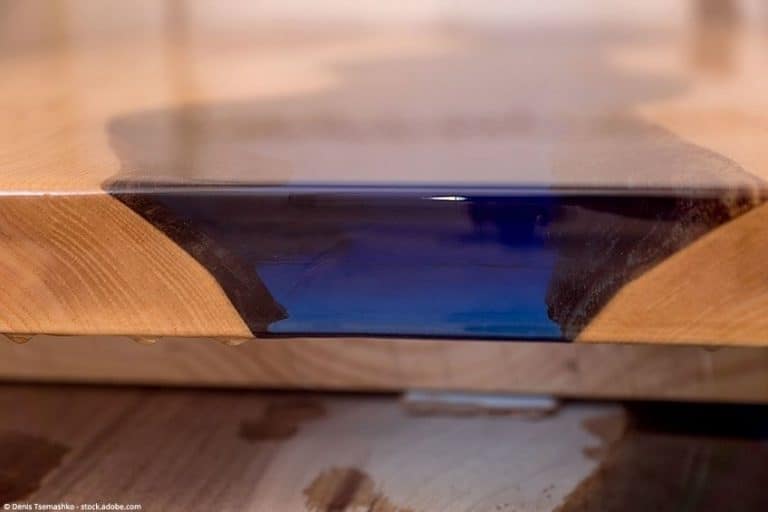
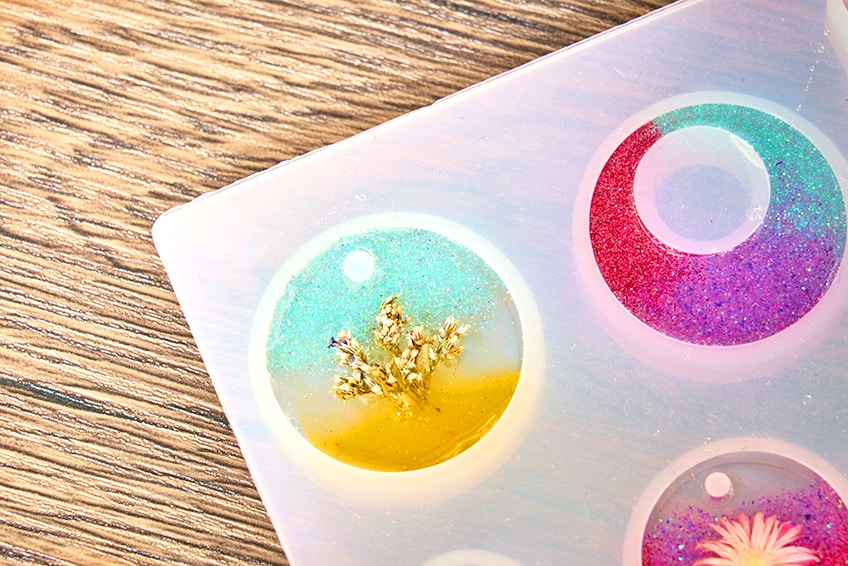
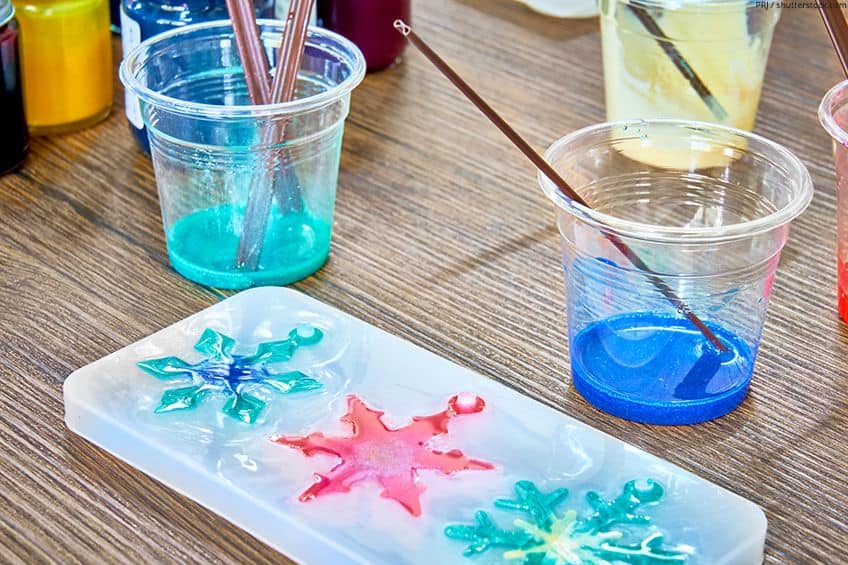
There are endless options when it comes to items that you can cast from silicone resin and range from jewelry items to hair clips, paperweights, coasters, and even river tables. Once cured, epoxy resin forms a durable and hard surface. It is a very versatile product. There are no limitations to what you can create as you can add to your castings and include items like different colored dyes, glitter, or even dried flowers.
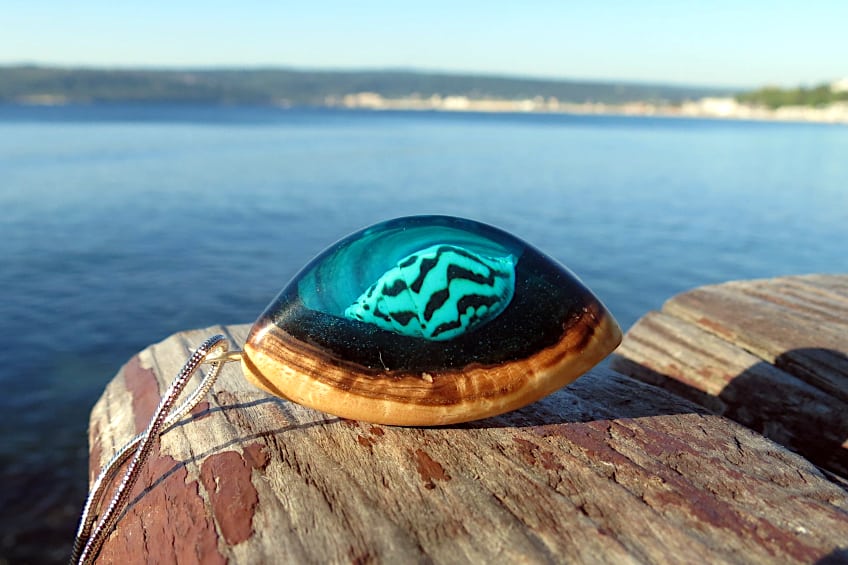

Once your resin has cured and hardened, you will be able to pop your item out with ease, tidy up, and the job is done. When using a silicone mold, your completed item will have a brilliant and shiny finish.
Best Jewelry-Making Silicone Resin Mold: NANAPLUMS DIY Jewelry Casting Molds
If you are looking to create your jewelry as a gift for friends and family, or just for yourself then this is the perfect DIY jewelry casting mold for you. The set is made from high-quality silicone, meaning your finished casting will have a shiny and smooth finish that is transparent.
The kit comes with over 100 silicone molds which are durable and flexible, simple to use, and clean. The molds can be used to make rings, bracelets, earrings, pendants, and so much more. It also comes with 12 different types of glitter, measuring pipettes, eye pins, stirrers, as well as stainless steel drill bits so you can use them to make holes where you need them, and so much more. We have put together a short guide on how to use the set to create your resin jewelry.
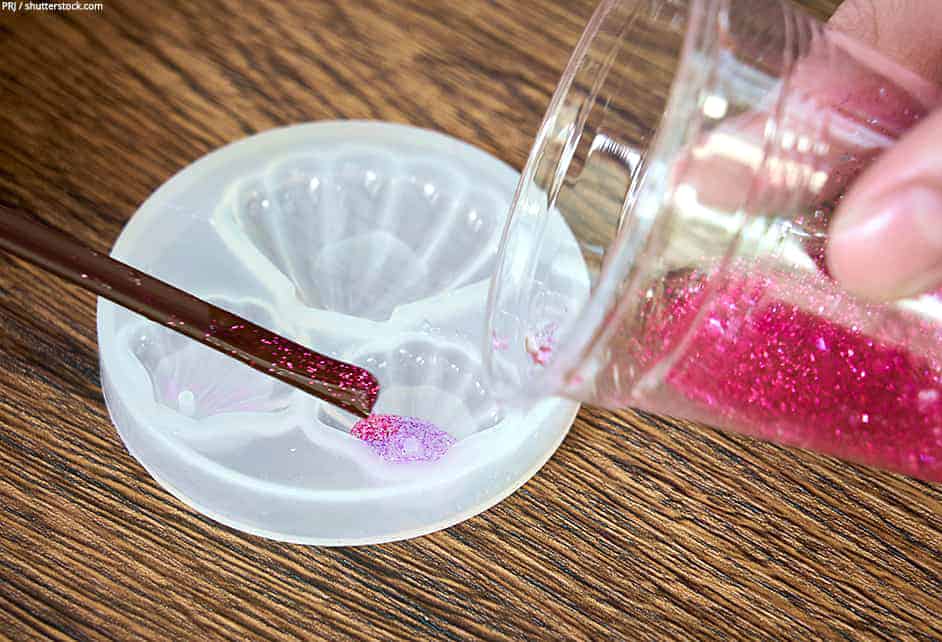
- Carefully and slowly pour the resin into your selected mold, this will decrease the chance of air bubbles forming.
- Should any air bubbles form, you can use a toothpick to puncture them, or a hairdryer to remove them.
- Let your casting sit for 15 minutes, this will give the resin some time to harden slightly.
- Take a pair of tweezers, use them to carefully place the object you wish to embed into the resin on the top of the bottom layer of the resin.
- Keep in mind that the bottom of your mold will be the front of your finished item, so it is necessary to place the embedded item upside-down.
- Pour the last layer of resin into the mold, take a toothpick and use it to keep the embedded item to stay where you want it to be.
- At this stage, you can add some sequins or glitter as a background for your cast item.
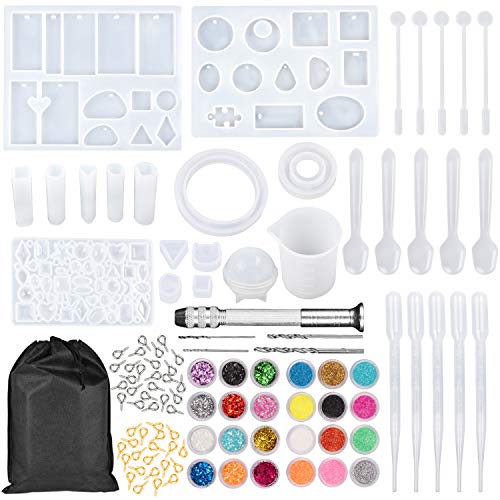

- Includes 15 flexible, durable, smooth, and easy to clean molds
- Includes 120 accessories and tools with 24 decoration supplies
- For making necklaces, pendant, bracelets, key chains, and more
- Reasonably priced
- Comes with over 100 silicone molds
- Easy to demold
- Molds made of high-quality silicone
- Some reviews feel the size of the molds are too small
- The drill bits do not fit into all drills
- Some purchasers complain of glitter spills all over the kit
Best Silicone Molds for Resin for Ashtrays and Coasters: LOTFANCY Epoxy Resin Silicone Ashtray Coaster Molds
Coasters are useful in any home, so this is a popular choice for silicone molds and resin castings. This is the perfect product to buy if you are a beginner or an experienced user. You no longer have to buy any ashtrays or coasters for your home, as you can now make your own. You can personalize them by making them any color you want and adding or embedding anything into them.
Thanks to silicone resin molds being made from high-quality silicone, that is durable, smooth, reusable, and flexible. In terms of temperature, the molds can withstand 428 degrees Fahrenheit (220 degrees Celsius).
The molds are so easy to use, and once you have finished molding, they can be cleaned with ease. you will be able to demold the molded item easily, once cured you can just pop it out. If you apply a mold release spray before you begin casting, it will be even easier to remove and the mold will be preserved for longer. You can add to your items by adding sequins, glitter, colored mica powder, and even some glow-in-the-dark powder.
This resin molding kit can be used to create an assortment of items, from soap holders, coasters, wax candle holders, ashtrays, flower pots, pen holders, and any other home décor.

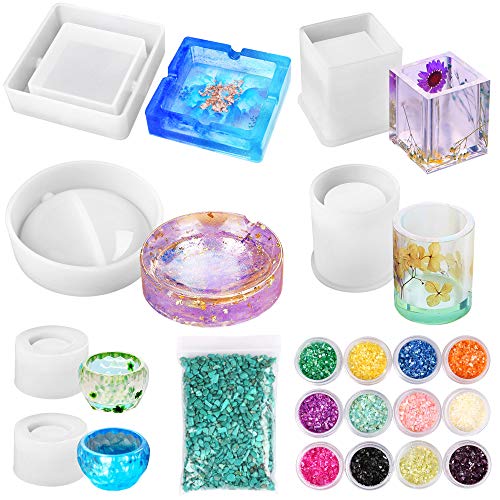
- High quality, soft, flexible, durable, smooth and reusable silicone molds
- Easy to use and clean and compatible with most resins and casting materials
- Makes ashtrays, pen holders, soap holders, candle holders, and plant pots
- Great quality silicone molds
- Priced well
- Simple to use and easy to clean
- The glitter has been described as cheap-looking
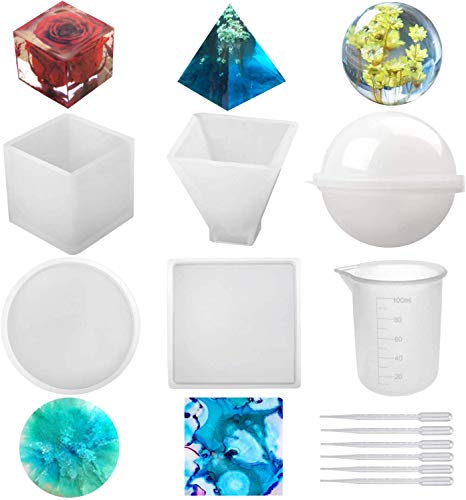
Best Silicone Epoxy Molds for Spheres, Cubes, and Pyramids: REPINSTA Sphere, Cube, and Pyramid Silicone Mold Set
If you are looking to make a paperweight, embed with a variety of objects, then this is the perfect mold for you. These silicone molds are made from durable silicone using advanced techniques and are reusable, flexible, and smooth. They are simple to use, easy to demold, and can be cleaned with ease. The silicone molds are compatible with almost all casting resins or materials such as bath bombs, candle wax, soap, and epoxy resin.
You need to ensure your molds are completely clean before using them. The demolding process is so much easier if you are working with a clean surface. Your casting needs to be completely cured before you can attempt to mold the item. You have to wash the mold as soon as you have finished using it. You can clean the mold using some warm soapy water. The mold should be stored in a space that is not exposed to direct sunlight, as UV rays can damage the molds.
This mold set consists of a square, a sphere, a pyramid, a cube, one silicone measuring cup, and six plastic pipettes. The kit provides you with all that you need, so it is super convenient and easy to use.

- Easy to clean and compatible with most resins and casting materials
- Durable, flexible, and smooth silicone molds for easy demolding
- Includes molds for sphere, cube, pyramid, square, and round castings
- Easy to use and simple to clean
- Great quality molds
- Sturdy and flexible molds
- Molds do not withstand high heat well
- Demolding can be challenging
- Molds are relatively small
How to Use Epoxy Resin With Your Silicone Mold
We have put this tutorial together to assist you in using epoxy resin as it has low toxicity, sets fast, and is simple to use, making it the best resin. The resin comes with two components, namely a resin and a hardener, that need to be combined (in equal quantities, with a ratio of 1:1) to stop the resin from solidifying too fast. Epoxy resin provides you with a clear, glass-like finish, and is self-leveling. While epoxy resin may cost more than polyester resin, it is the ideal material for beginners and is perfect for all those craft projects.

Basic Supplies Needed to Get You Started
We recommend you gather all your supplies together before you begin your resin casting project. So, you don’t find yourself running around looking for things while working with the resin.
- Any items that can be embedded in the resin
- The mold you require to make the casting of your item
- Gloves
- Epoxy resin, in a two-part form
- Disposable plastic cups
- A syringe or something similar to measure with
- Popsicle sticks
Preparing Your Mold
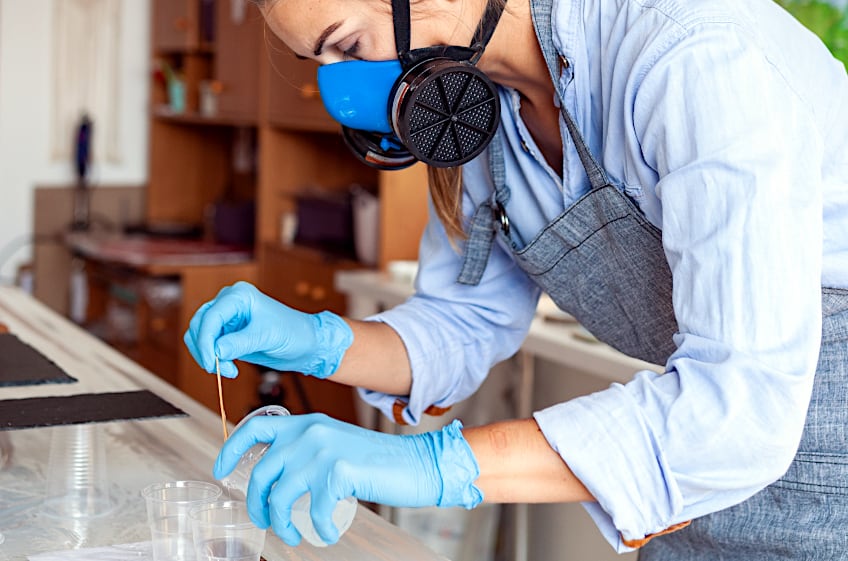
Silicone sadly gathers dust and other foreign particles, you will therefore have to clean your mold using warm soapy water before you use the mold, and allow it time to dry. You can use mold-releasing spray on the mold, before you cast, to ensure the casting will pop out the mold with ease. You want to ensure you are working in a well-ventilated space and wearing the appropriate safety gear. It is also advisable to lay down some newspaper to protect your work surface.

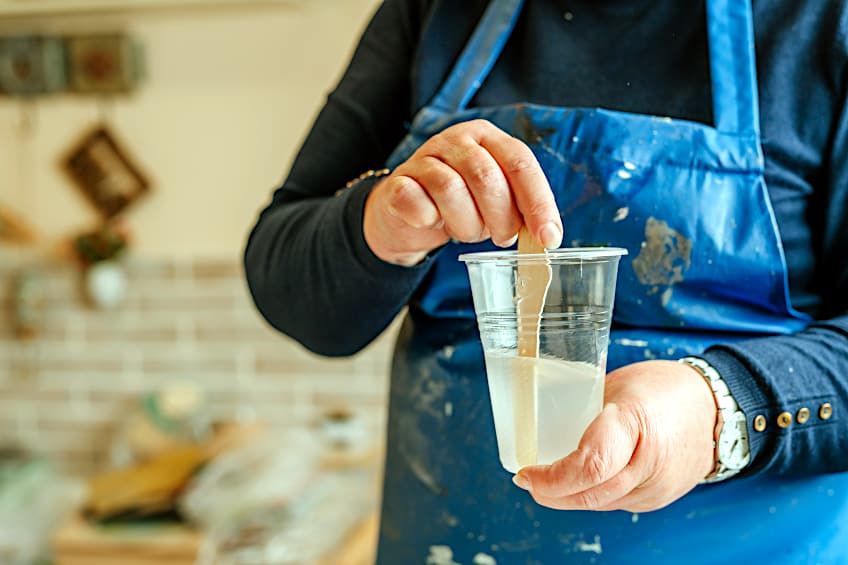
Mixing the Resin
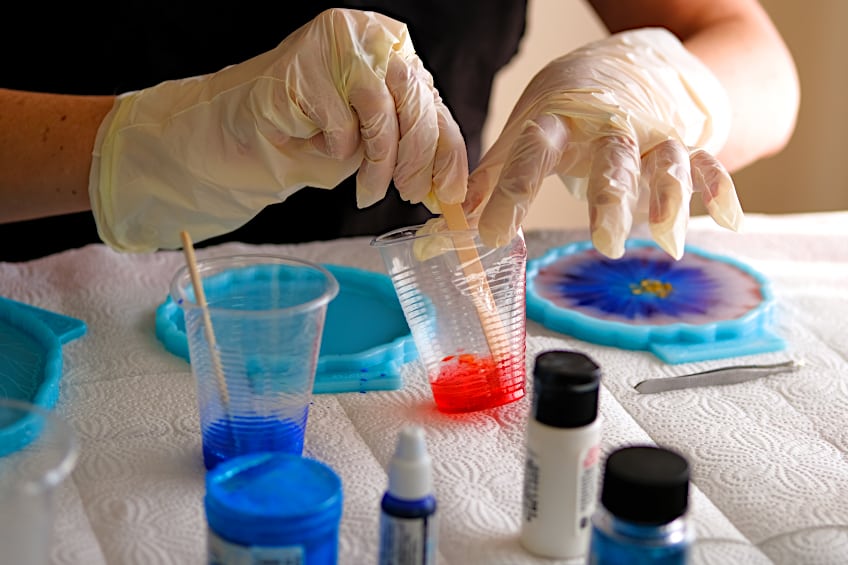
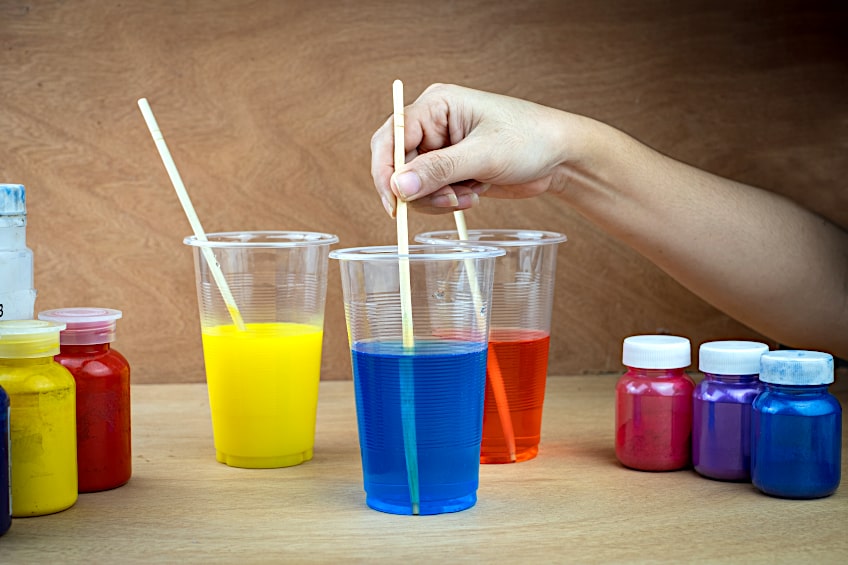
The resin comes in a two-part form, and you will need to combine the two components. You can use the syringe to carefully measure out the right amounts of each component, remember you are working with a 1:1 ratio. You should always consult the manufacturer’s instructions before mixing the two parts. This is important as different brands of resin have different mixing instructions. If you do not mix the products correctly your mixture may not cure properly and could be watery.


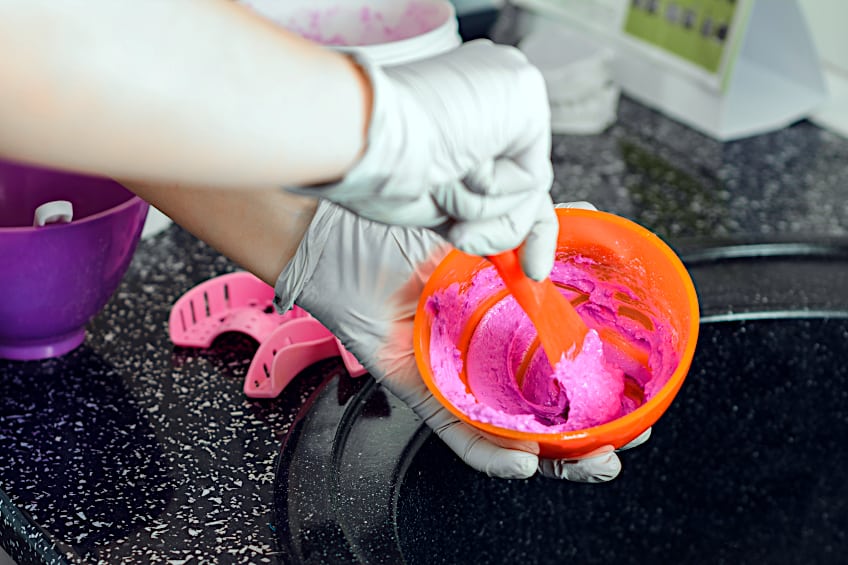
You can mix the resin in the cup using the popsicle stick, remember that resin is time-sensitive, so you will have to work quite quickly. If you are planning on adding anything to your resin, this would be the time to do so. You could add anything from glitter to dye to change the resin’s color. When adding color to the resin you cannot use food coloring as it will not work, you would need to either poster paint, such as acrylic paint, or Indian ink. You need to mix the resin thoroughly until you achieve a consistency you are satisfied with.

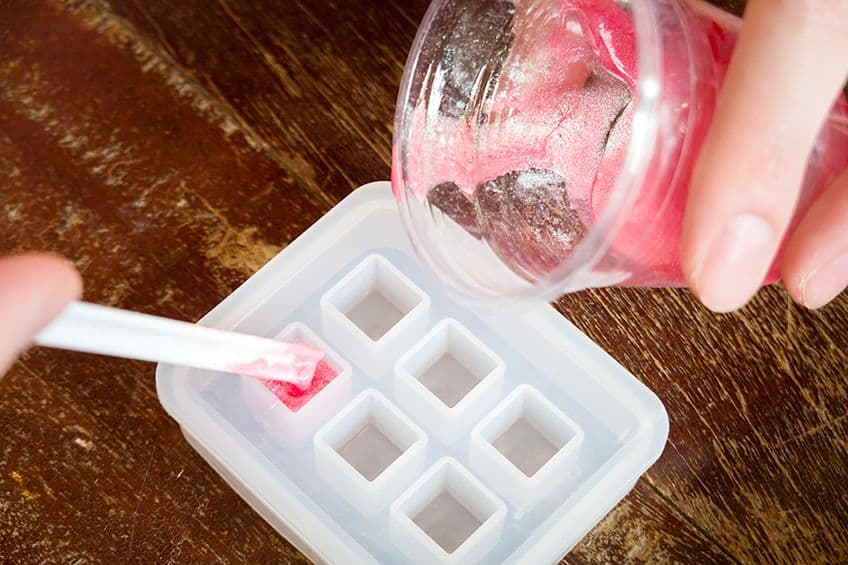
Pouring the Resin into the Mold
Once mixed thoroughly the resin can be decanted into the mold. You can scrap all the resin out of the cup, into the mold using the popsicle stick. At this time, you have to be aware of the meniscus level, this means that the resin will either have concave or convex levels. If you want the resin to be completely flat you will have to fill the mold until it runs over. However, should you do this, you will have to tape around the outside of your mold, which you will then remove when you are finished.

When you are happy with the mold and how it has been filled, and you are certain there are no air bubbles, you can add any objects that you would like to your mold, such as a charm, but keep in mind to take into consideration the placement of the item in your resin. You can now leave the mold to stand so that the resin has time to cure. Consult the manufacturer’s instructions to determine the required curing time.
Removing Your Casting From the Mold
This step is the most important one for the success of your project, it is time to remove the casting from the mold. You need to be certain that the casting resin has completely cured and then you can begin demolding your item from the mold. Gently pry the casting free from the mold, you want to be careful that you do not damage it, if you have followed the above instructions correctly, the item should pop out with ease.

if you used some mold-release on your mold before you poured the resin in you will find the item is even easier to demold. Once you have demolded the item, you will need to clean it up. You can throw away the cup, popsicle sticks, and gloves, allow the syringe to soak overnight in some hot soapy water, and clean it the following day.
Tips for Making Silicone Resin Casting Molds
Before you start to cast your resin, there are certain aspects you will need to take into consideration when making your mold, or you might not achieve the results you expected. You need to know exactly what your item or mold will look like and what you expect it to come out as.
- Ensure your mold box is the correct size. You will need a box that is large enough to hold your item, but not massive so that you end up with extra space. You want roughly half an inch gap around the sides of your item so that you do not end up wasting silicone.
- Your finished item will replicate the template you have selected to use. So, if you are working with a rough template, then your finished piece will also be rough. If you want your item to have a shiny, smooth finish, then you need to select a template that is polished and smooth.
- Always use an anti-adhesive spray or mold releasing agent. The releasing spray will assist you in demolding the item. While smooth surface items will not have a problem demolding, we recommend still using releasing agent spray to make it even easier to demold.
- When pouring the resin or handling the mold, you must wear gloves. This will stop you from leaving any fingerprints on the resin mold, while also protecting your hands.
- Before you cast your resin, ensure that your mold is clean and dry. Any particles or dust will end up embedded in your casting.
- Ensure your work surface is flat. If the surface is uneven it can result in your item curing unevenly, despite using the perfect mold and the best resin.
- Avoid overfilling your mold, if you do you will end up with additional work afterward as you will need to sand the item down.
- To aid you when demolding, you can press the mold until it is slightly loose, and then add some soapy water into the mold. This will assist with your resin item demolding with ease.
Silicone resin molds are easy to use and it is simple to create your silicone resin piece. Your resin creations will make stunning gifts for family and friends, or something beautiful you can keep for yourself. We hope this article has equipped you with the knowledge you need to select the best silicone mold for the resin to use on your next resin art project.
Frequently Asked Questions
Can Epoxy Molds Go in the Oven?
We do not recommend placing a plastic mold in the oven, but you can do so with a silicone mold. This will speed up the curing time. Turn your oven to 150 degrees Fahrenheit (65 degrees Celsius), and then place the mold in the oven for roughly five minutes. You can then switch off the oven and leave the item in the oven as it cools down. If you are going to apply more layers of resin you can repeat this process. Keep in mind you will need to use an oven that will not be used for food afterward as the fumes can be toxic.
Is It Necessary to Use Mold Releasing Agent With Silicone Molds?
It is not something you have to do, but we strongly recommend using an anti-adhesive spray or a releasing agent as it will stop the cured resin from sticking to the mold, which could potentially result in damage to your casting.
Can Baking Molds Be Used for Silicone Resin Casting?
Yes, you can use a baking mold, but once you have used it for resin you will not be able to use it for food afterward. You might not be happy with the results of your final finished casting as the baking mold can cause the resin to look frosted or cloudy. You will need to do some additional work to achieve a glossy finish.
How Long Does Resin Take to Cure?
The length of time required for the resin to cure varies from brand to brand or the type of surface you have applied the resin to. On average, resin should dry and cure completely within 12 to 72 hours.